Iz is a major dungeon in Pathfinder: Wrath of the Righteous. You visit it in Act 5 and the many instances herein will determine the fates of supporting characters. Be forewarned that some of these outcomes are irreversible. Here’s our Pathfinder: Wrath of the Righteous Iz guide to help you with this dungeon, as well as the survival of Queen Galfrey and the secret ending. We also discuss other tidbits, such as Irabeth, the Sword of Valor, and important items.
Note: For more information, check out our Pathfinder: Wrath of the Righteous guides and features hub. Likewise, please be reminded that this guide contains spoilers.
Pathfinder: Wrath of the Righteous Iz guide – Queen Galfrey, Irabeth, and the Sword of Valor
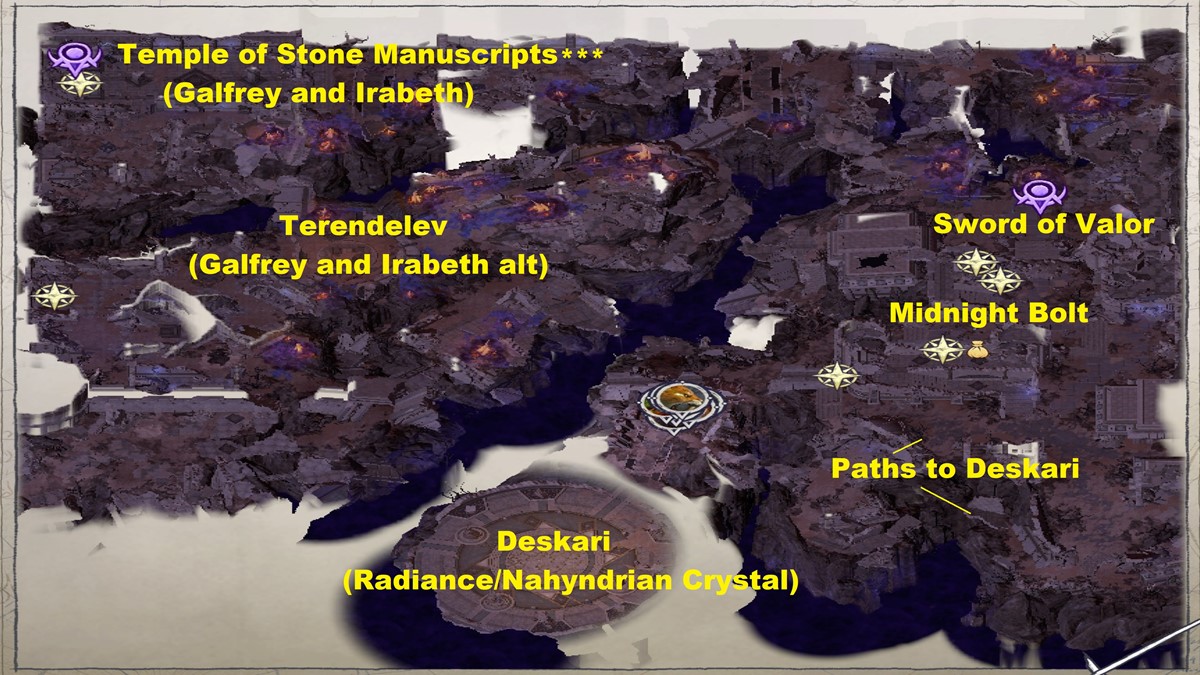
To be clear, our Pathfinder: Wrath of the Righteous Iz guide won’t act as a complete walkthrough. Rather than discuss every enemy, trap, and item, we’ll simply focus on the important incidents and decisions in this dungeon. For now, you can refer to the map below:
Make Your Choice: Temple, Sword of Valor, or Terendelev
There are two default areas that you’ll want to go to, as well as a third depending on a choice you made earlier in the game. The choice you make here is crucial. Upon leaving the first area that you clear, Deskari’s locust horde will show up, killing NPCs or destroying buildings, preventing you from completing certain tasks or acquiring integral items. For instance, if you rescue the Crusaders in the Sword of Valor area, Deskari’s minions will turn the Temple into rubble and Galfrey might end up dead.
Temple of Stone Manuscripts – By far the most important of the three:
- Choosing this over the Sword of Valor will cause the deaths of some Crusader NPCs (i.e., Ciar).
- If you gave Queen Galfrey the Lexicon of Paradox in the Midnight Fane dungeon in Act 3, she’ll return it to you, but only if you follow one of the “good/neutral” Mythic Paths (i.e., Angel, Aeon, Azata, Legend, and Gold Dragon).
- Irabeth will also be with her, assuming Galfrey stripped you of your rank in Act 3, and if you bolstered her confidence throughout the game (i.e., positive responses in dialogues). If you retained your rank, then she might just be in Drezen.
- The Temple basement has the Glass Key behind a fake wall, as well as the Key Crystal on an altar past the circular chamber. Both items are needed for Areelu’s Laboratory and are prerequisites for the Ascension secret ending.
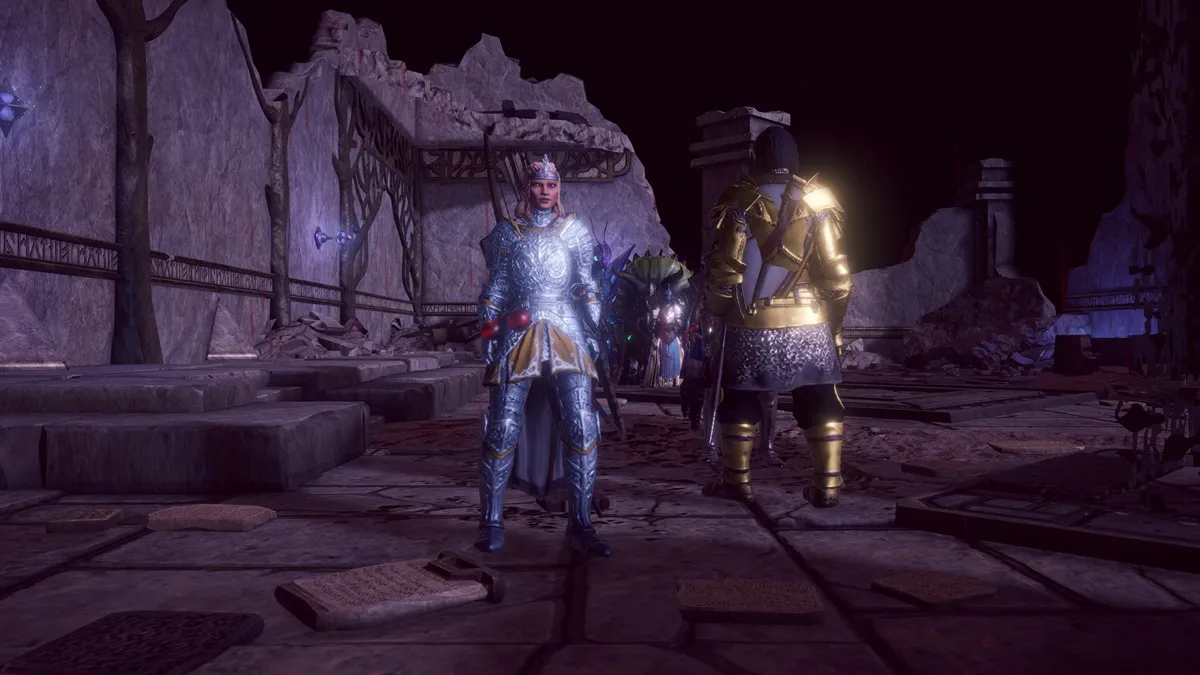
- If you enter the circular area, it will trigger the Anemora encounter, whereupon you can save Queen Galfrey in Iz in Pathfinder: Wrath of the Righteous.
- It’s possible to use Dimension Door to grab the Key Crystal without triggering the encounter. This lets you save the Crusaders. However, when you return, Galfrey will die (unless you chose the Aeon path).
- During your discussions with Galfrey, it’s possible to kill and revive her as an undead (Lich path) or recruit her (Angel path, successful romance, and with Irabeth alive).
Sword of Valor – For the most part, you’ll battle several demons to protect your banner (which just gives you a regeneration buff). You don’t really need to prioritize this since you’ll recover it in time for the Threshold finale.
- Choosing this over the Temple of Stone Manuscripts causes the following:
- Death of Irabeth if she’s with Galfrey. This prevents you from completing the Galfrey romance/recruitment.
- Death of Galfrey if Irabeth isn’t with her or if you used Dimension Door just to grab stuff in the Temple’s basement.
- Destruction of the Temple, preventing you from getting the Glass Key and Key Crystal, assuming you didn’t head down and use Dimension Door.
- There’s another option that lets you beeline for the Temple to save Galfrey, while also preventing the banner from being ruined. This is related to the Feud of the Faithful quest from Act 1. If you sided with Hulrun, he’ll show up and sacrifice himself here.
Terendelev – If you did not give Galfrey the Lexicon of Paradox in Act 3, she and (possibly) Irabeth will be here.
- This location should not be prioritized at all as it will lead to the destruction of the Temple and the capture of your banner.
- Alternatively, you can head to the Temple, grab the Glass Key, and Dimension Door to get the Key Crystal without triggering the Anemora fight. This allows you to pick up the two important items before heading to Terendelev’s arena.
Other Important Stuff: Midnight Bolt and Radiance Upgrade
- Midnight Bolt – Near the Crusader’s camp, you’ll find a door that leads to a ruined manor. Explore the area while battling mobs. You’ll eventually reach the second floor where you can pick up a Midnight Bolt. There are other Midnight Bolt locations in the game, too.
- Radiance – If you were able to acquire the previous Radiance upgrades in the campaign, and it’s still in your inventory, it will shine brightly as you approach Deskari’s arena. It’ll then transform into the +6 variant, unlocking its full potential.
Deskari
Leave Deskari for last, since defeating him will alter some of the pathways in this dungeon. The most important things in this encounter are:
- Nahyndrian Crystal – Shoot the Demon Lord with a Midnight Bolt. At the end of the fight, there’s a dialogue option to obtain one more Nahyndrian Crystal.
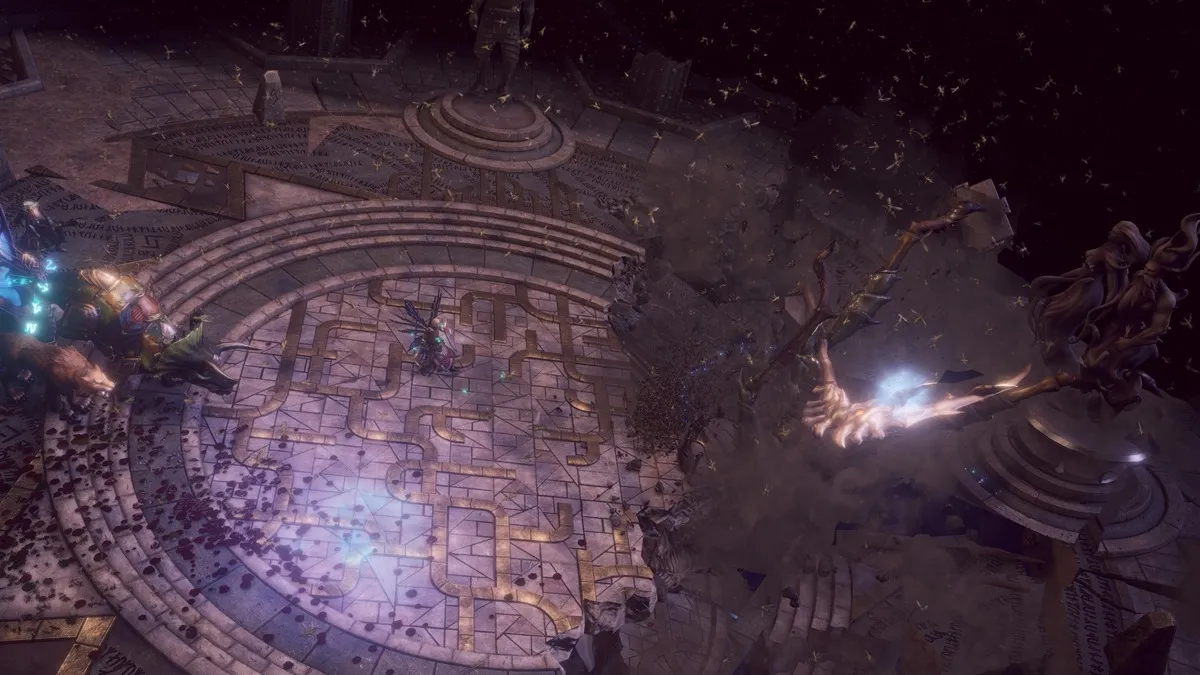
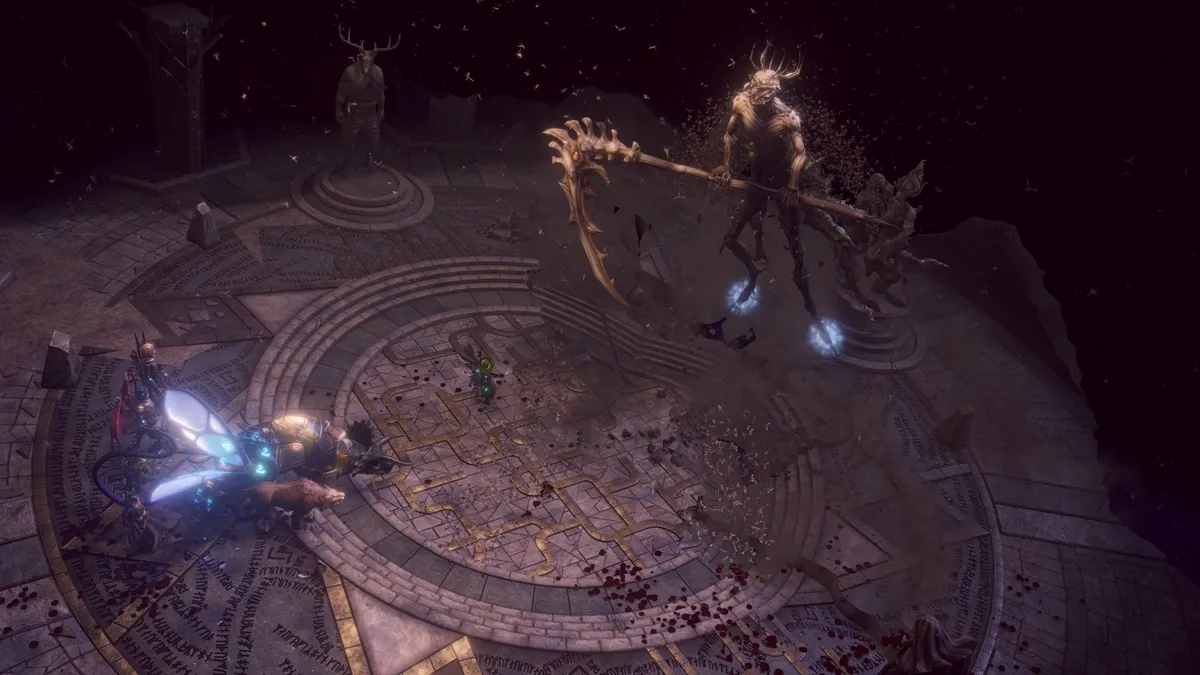
- Deskari’s Defeat – Make sure you can actually defeat Deskari quickly. You’ll know you did it right if you see your character blast him with energy, and he’ll fall down the chasm (left image). If you took too long, Deskari will just open up the chasm and fly down (right image). As far as we can tell, Deskari’s defeat here is crucial if you want the Ascension secret ending in Pathfinder: Wrath of the Righteous.
In any case, depending on your decisions in the Iz dungeon of Pathfinder: Wrath of the Righteous, you’ve probably saved Queen Galfrey and Irabeth, all while taking out Deskari. You’re not done yet, because the Threshold finale awaits.
- Screenshots by PC Invasion
Pathfinder: Wrath of the Righteous is available via Steam.






Published: Jan 4, 2023 6:45 AM UTC