Curing Netherrack is one of the more valuable upgrades in Minecraft Legends. It means you can push closer into enemy territory and blast them with Redstone Launchers or build your spawners closer to reduce time going back and forth from objectives. Even if you unlock the upgrade, though, it may not be immediate obvious how to cure Netherrack. Here’s how to cure Netherrack in Minecraft Legends.
Purification and pushing back
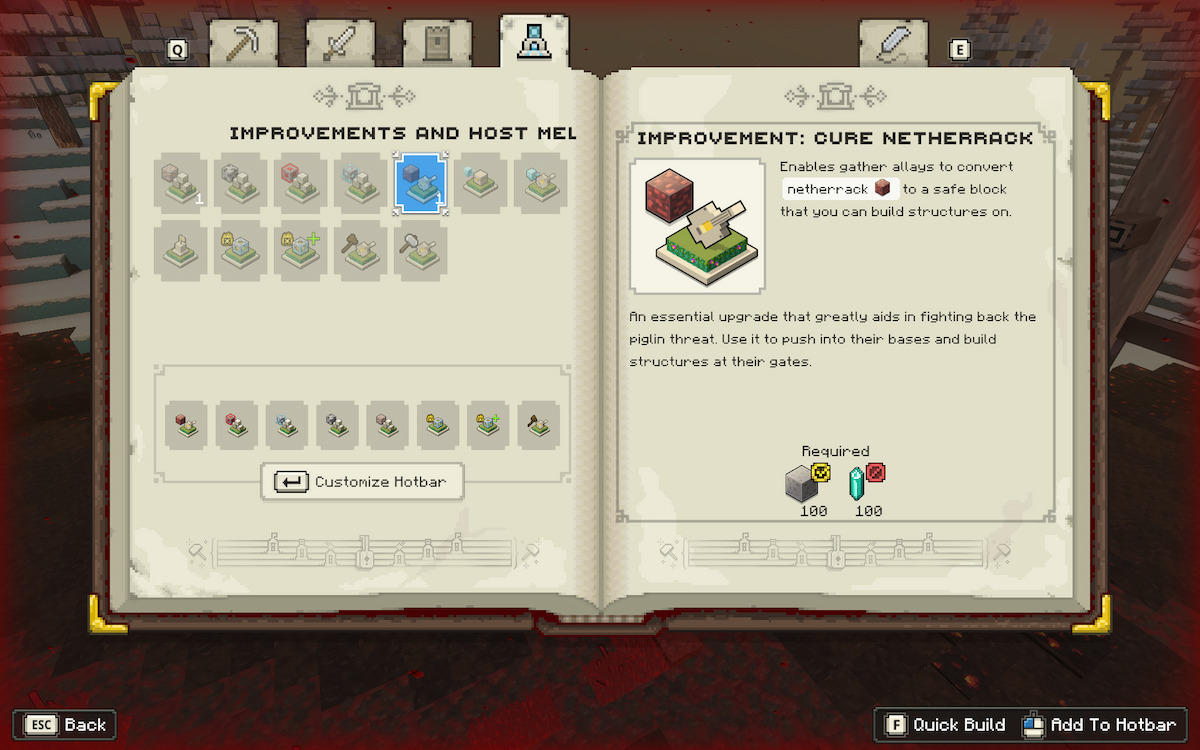
First of all, you need to build the Cure Netherrack improvement at the Well of Fate. It’s a very easy one, only needing 100 Prismarine and 100 stone, available from the beginning of the game.

Once the improvement is built, you don’t have to build it again. The option to cure Netherrack is actually in your Z toolbar with a Netherrack block icon. Select it and hold down the right mouse button to go into placement mode, then place the box down near the Netherrack you want to cure.

The Allays go to work and start purifying the Netherrack in the radius of the box. This includes spore trees, but won’t include proper structures. As with every gathering allay, you can place as many down as you have capacity for as long as there is Netherrack to cure.

Given there’s a lot of Netherrack to cure in a given area, placing down several blocks to cure it in different areas helps eat away at the Nether quickly. Be wary that mobs can still destroy the box in one hit, so it’s best to cure away from Piglins.
Cured Nether areas are easily identifiable, as they have their own color scheme that doesn’t match the rest of the biome. There are some leftover parts from the Nether corruption that don’t go away with curing it, and submerged blocks don’t purify. Sometimes the gathering box misses a spot or two, so it’s good to go back over once each is done. Nonetheless, this is how you cure Nether in Minecraft Legends. And now the Redstone Launcher has a space to fire.


Published: Apr 19, 2023 1:13 AM UTC