If you’re looking to get more performance out of your PC, you’ll want to consider overclocking some of your existing components such as your CPU and GPU. Overclocking typically involves increasing the speed at which your components run in order to get more performance without needing to purchase new hardware. While overclocking can provide noticeable bumps in performance at no extra cost aside from some additional power consumption, there are still a few things to keep in mind in order to safely overclock your PC.
By overclocking a component, you may void the warranty provided by its manufacturer by running it outside of the recommended specifications. Overclocking your PC also tends to generate more heat depending on how far you push your components. If your build doesn’t have proper cooling, this could reduce the lifespan of your components, or even damage them. The stock cooler that may have come with your CPU usually won’t be sufficient to safely overclock, so you may also want to consider investing in a decent aftermarket air cooler or liquid cooling for your PC build.
How to overclock your CPU safely
It is important to note that not all processors can be overclocked, and you’ll want to make sure your motherboard is up to the task as well. For Intel CPUs, you’ll need an unlocked “K” series or “X” series processor in order to change the clock settings of the CPU. As for AMD CPUs, all Ryzen processors are unlocked and can be easily overclocked. To overclock your CPU, you’ll first need to restart your PC and enter the BIOS menu (usually by pressing “Delete” or “F2” while booting).
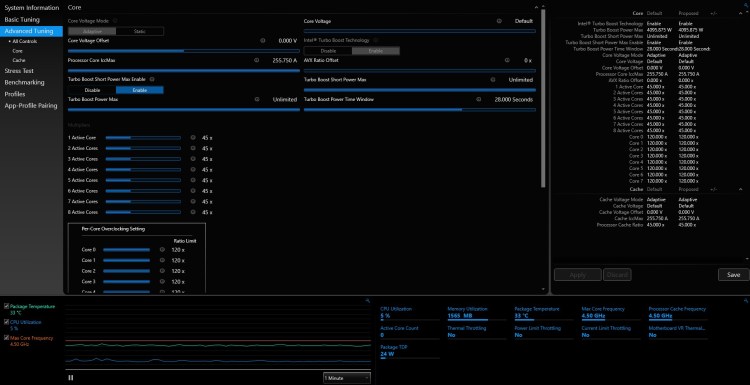
Alternatively, you can use overclocking software such as Intel’s Extreme Tuning Utility or AMD’s Ryzen Master Utility. Those looking for a simple but powerful tool can also use CPU Tweaker to overclock their CPUs. From there, users can find certain parameters to tweak to help boost performance while testing stability.
Increase your CPU multiplier (Core Ratio)
Your CPU multiplier determines the speed of the CPU by multiplying the base clock (BCLK) by a certain value. Since the BCLK is typically set to 100MHz, you will be able to increase your CPU’s clock speeds in increments of 100MHz. For example, increasing the multiplier from 30 to 31 will increase the final clock speed from 3.0GHz to 3.1GHz. You can set different multipliers for individual cores to squeeze out a little extra performance, however, applying the same settings across all cores is the simplest option.
After increasing the multiplier, perform some stress tests to check if your system is still stable with overclocking. If your system doesn’t crash and your temperatures remain relatively low, you can try increasing the CPU multiplier further. Just consider doing this in small increments. Once your PC eventually does crash, don’t worry. Turn the multiplier back down to the last value where your system ran smoothly. While increasing the multiplier gradually may be tedious, it is still the safest method when it comes to overclocking.
Increase the CPU Core Voltage
Another parameter to play around with when overclocking is the Core Voltage, which represents the voltage that is supplied from the motherboard to your CPU. While increasing the core voltage doesn’t directly improve performance, it gives you more overclocking headroom to run at higher speeds. To alter the custom Core Voltage, you’ll need to change the mode from Auto to Manual in the BIOS or overclocking software. Usually, you’ll start at around 1.2V by default and it is advisable not to exceed 1.4V unless you’re experienced with overclocking. It should be noted that increasing the voltage will result in higher temperatures and could reduce the CPU’s lifespan. Also, selecting a very high voltage may send too much power to your CPU and permanently damage the chip. So, when messing around with the core voltage, it is best to increase it gradually and in small increments.
How to overclock your GPU safely
With graphics cards still being very difficult to come by, you’ll likely want to get the most out of older cards in order to play at higher resolutions and boost your FPS. Much like with CPUs, performance can be improved by changing the clock speeds.
Install overclocking and benchmarking tools
To overclock your GPU, you’ll first need to download and install an overclocking utility. There are many great options to choose from, but MSI Afterburner is regarded as one of the best and it’s available for free. You’ll also need a benchmarking tool to stress test your card and measure its performance. Unigine Heaven is a reliable and free tool that should be adequate in most cases, but those looking for a more complete and detailed benchmark test can go for 3DMark. Newer AAA games tend to have built-in benchmarking tools which are also worth checking out. Using a couple of different tools will also help to give you a better idea of how your PC performs under different stress tests. For example, an overclock in one game might be stable, but not in another.
Run a benchmark at default settings
In order to understand how much the overclock improves your card’s performance, it’s advisable to run a benchmark test at default settings as a point of reference. This will give you a good idea of your build’s performance and temperatures at base settings. Also, make sure to keep a record or screenshot of the results to compare with the new results after overclocking.
Increase your Core Clock
Just like with CPU overclocking, start by gradually increasing the core clock speed in small increments, but this time using MSI Afterburner. Then, run benchmark tests using some of the tools to measure the improved performance while also keeping an eye on your temperatures. Once the benchmark successfully completes, take note of the results and try increasing the clock speed further. Eventually, the benchmark will crash or encounter issues such as visual artifacts, which means you should go back to the core speed selected in the last successful benchmark test. As always, taking things slowly is the best way to ensure that you’re overclocking safely.
Increase your Memory Clock
After raising your core clock, you may still be able to push your graphics card further if your temperatures are still reasonably low. This can be achieved by changing your Memory Clock in the same way. Just keep increasing it and running benchmark tests until your FPS starts to drop or you begin encountering artifacts or visual glitches. While overclocking the GPU memory won’t provide that big of a bump in performance compared to the core clock, it still may be worth a try.
If you’ve overclocked your PC properly, then you should be able to get the most performance out of the hardware available to you without compromising too much on temperatures. With GPUs still being hard to come by, overclocking is a great temporary solution for PC gamers stuck with older hardware, as long as it is done safely.


Published: Jan 31, 2022 06:30 pm