While playing the vanilla version of Hogwarts Legacy is a blast, adding mods to your game can sometimes make your playthrough more interesting. From graphical reshades, to cool outfits, and even bug fixes, mods can improve your time with Hogwarts Legacy immensely. But figuring out how to get mods into the game can be tricky. Here is a step-by-step guide on how to install Hogwarts Legacy mods.
Note: For more information, check out our Hogwarts Legacy guides and features hub.
How to install mods in Hogwarts Legacy
The main hub for mod postings and downloads is Nexus Mods. This website hosts numerous mods for all sorts of video games, one in particular being Hogwarts Legacy. Search for the game, and you will be able to spot pages upon pages of mods to choose from. Installing mods is quite simple, so follow the instructions below.
- Select a mod that you would like to download.
- Read the instructions in the mod’s ‘Description’ tab (most mods download the same but keep the instructions in mind).
- Select the ‘Files’ tab and select ‘Manual download’ on the file you want.
- Unzip the file downloaded.
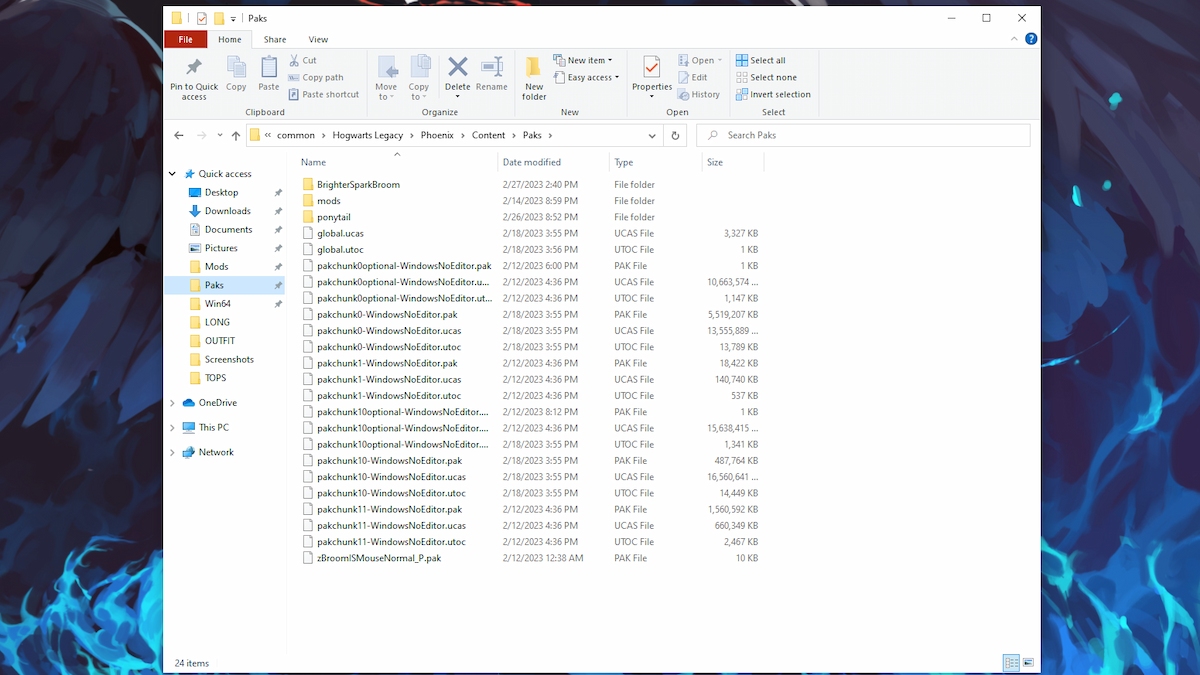
- In ‘File Explorer’ search for the ‘Paks’ folder here: ‘C:\Program Files (x86)\Steam\steamapps\common\Hogwarts Legacy\Phoenix\Content\Paks’
- Drag the unzipped mod folder or the mods themselves into the ‘Paks’ folder.
The mod should now be playable once you boot up the game. One thing to note for visual mods: those usually require you to download ‘ReShade’ and allow it to have access to Hogwarts Legacy. ‘ReShade’ is a program that is used to improve the visual quality of your game. Otherwise, using this method to install Hogwarts Legacy mods should work with nearly all the mods available on Nexus Mods.
Hogwarts Legacy is available via Steam.
Related: How to Download Gun Mod for Hogwarts Legacy on Touch Tap Play


Published: Feb 27, 2023 04:02 pm