As in many Soulslike games before it, your healing items in Lies of P are the lifeblood of the entire experience. They determine how many mistakes you can make in combat, how long you can last between Stargazers, and how many risks you can take when dealing with bosses. For this reason, you’ll want to gather as many Pulse Cells, Lies of P’s answer to the Estus Flask, as you can. But just how can you do that? If you’re unsure of how to increase your Pulse Cell capacity in Lies of P, then this is the guide for you.
How to max out your Pulse Cells in Lies of P
You’ll begin Lies of P with three Pulse Cells at your disposal, but you can amass up to ten if you know where to look and what to do. The location of each Pulse Cell is as follows:
Pulse Cells 1-3: Krat Central Station
You’ll get your base allowance of Pulse Cells early on in Lies of P, during the tutorial section in Krat Central Station. After getting your first weapon and clearing a couple of enemies off the train platform, you’ll move through a large set of open doors, and see a glowing item in front of a statue. Grab this to get your first three Pulse Cells.
Pulse Cell 4: Defeat Mad Donkey
The next Pulse Cell is given as a reward for defeating the game’s second major boss, Mad Donkey. This is a difficult fight, and much more fast-paced than your opening brawl with the Parade Master, so check out our guide on beating Mad Donkey if you’re having trouble. Once he falls, you’ll be treated to a brief cutscene featuring Gepetto, after which you’ll receive your fourth Pulse Cell.
Pulse Cell 5: Defeat the King of Puppets
You’ll receive your fifth Pulse Cell for bringing down the boss of the Estella Opera House, the King of Puppets. This is a grueling two-stage fight, reckoned by many to be one of the game’s biggest difficulty spikes, so make sure you come prepared.
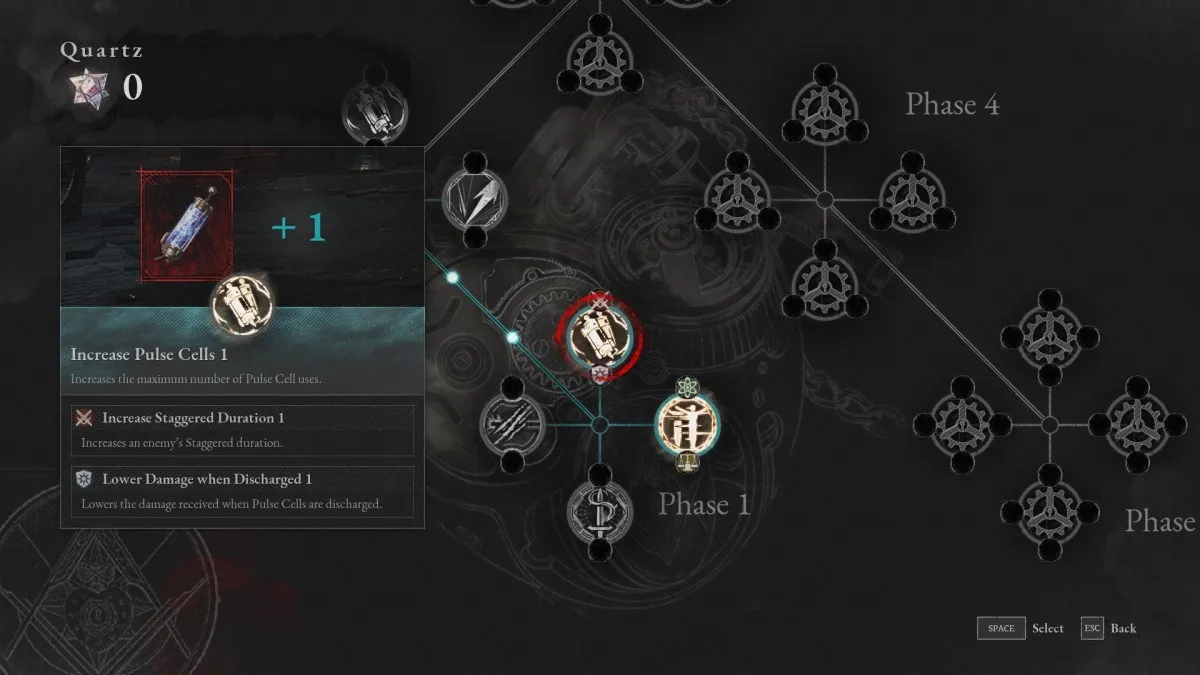
Pulse Cells 6-7: Fill out the ‘Increase Pulse Cells’ Nodes in the P-Organ
After defeating Mad Donkey and freeing Gepetto, you’ll gain access to the P-Organ, a device that lets you convert Quartz you find out in the world into permanent buffs for your puppet, by slotting purchased Perks into different Nodes. These Nodes are split up into Phases, with more powerful ones naturally being reserved for later, and you can unlock two extra Pulse Cells by slotting two Perks into the ‘Increase Pulse Cells’ Nodes in Phases one and two.
Pulse Cells 8-10: Purchase ‘Increase Pulse Cells’ Survival Perks
The Perks you can access via the P-Organ are split into different categories: Attack, Survival, Item, etc. In the Survival category, on levels three, four, and five, you’ll find Perks called ‘Increase Pulse Cells 3’, ‘Increase Pulse Cells 4’, and ‘Increase Pulse Cells 5.’ Equipping these Perks into Nodes on the P-Organ will increase your Pulse Cell capacity by one each, for a total of three additional Pulse Cells at maximum.
And that’s that: a full guide on how to increase your Pulse Cell capacity in Lies of P. In a game as difficult as this one, you’ll want to pad your life out with as many Pulse Cells as possible, so be sure to grab these as soon as you can if you’re struggling.


Published: Sep 22, 2023 12:29 pm