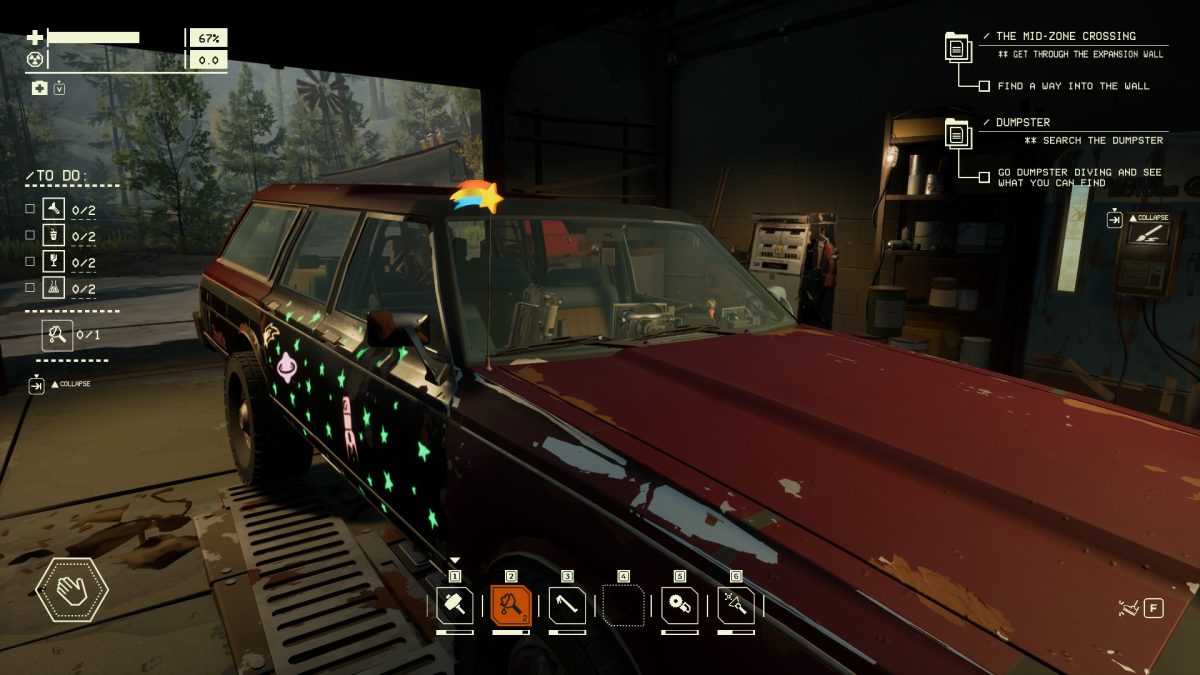
The checklist in Pacific Drive is debatably helpful in the game. It is a simple way to add something to an on-the-go checklist to ensure you collect the various materials needed for a Blueprint item. It’s helpful if you want to ensure you have everything you need while on a drive.
Add a Blueprint to your Checklist
To add an item to your checklist in Pacific Drive, you must first open the Blueprints menu. This can be done with the Tab button on the PC and with the Center button on the PlayStation. Now, you must navigate to the Blueprints menu and select the item you would like to keep track of. Press the C button on PC and the Square button on PlayStation to add the item to your Checklist.

You can add multiple instances of the same item or multiple items to your Pacific Drive checklist. You can add more to the checklist by simply hitting the C or Square button more than once. Once you have added more, you will notice the little number goes up. If you need to collect items for multiple Blueprints, this will make the journeys much easier. When you are out in the various locations, you will notice the items you need to get checked off as you collect them.
Why use the Pacific Drive checklist
I have often headed into the wilds of the Olympic Exclusion Zone needing to collect one specific item for a Blueprint. It’s a real chore having to constantly flick through the menu. With the use of the Checklist, I can keep track of exactly what I need. If there is something I use all the time, like the Repair Putty, I will just keep multiple instances of it on my list.
Some Blueprints will require some odd items that can only be found in certain areas of the map. It is nice, especially when searching in the dark, to know if you have picked them up. The checklist takes into account things you have in your lockers, backpack, and trunk in Pacific Drive.


Published: Feb 21, 2024 12:47 pm