Fade to Silence has left Steam early access. As you can see in our official review and technical review, it’s a visually appealing game that keeps you on your toes, punishing you for your mistakes. Unfortunately, a handful of bugs, crashes, and shallow mechanics also leave it feeling under the weather. Still, if you did pick it up, you might want to know how you can survive this bleak, frozen hell. That’s why we’ve got this Fade to Silence survival guide for you with some tips to keep you warm and fuzzy.
You Have My Bow (And My Axe!)
Since Fade to Silence is an action-survival game, your first priority is to ensure that you have the tools to gather resources. These would be your bow and felling axe. Their crafting requirements are:
- Bow – 2x pristine wood, 2x fiber
- Felling Axe – 1x salvage, 1x pristine wood, 1x fiber
Pristine wood can be found as world loot in various spots near your camp or from felled trees (once you craft an axe). The same goes for salvage, which can be scattered at random spots. As for fiber, you get this from crafting grub root, which is easily found near deer grazing spots.
You should have what you need to keep your bones and your belly warm. Note that gathering spots will deplete after a few runs. Each spot you “claim” will be open for future followers to gather resources from, though they tend to deplete it quickly as well.
Bring The Right Tools

This was what I had from the early game to the late game. I even forgot to equip a satchel until later.
Make sure that you bring what you need when you’re heading out. 12x firewood is a must in case you get caught in a blizzard and there’s a shelter nearby. Alternatively, just bring a makeshift shelter. Poultices (restores current health) and tonics (restores max health) have their use as well — the latter is when effects such as hypothermia have “locked out” a portion of your health bar.
That dog sled summoning item and stacks of arrows will be explained later. In any case, here are the crafting requirements for the above items:
- Makeshift Shelter – 24x firewood, 1x pristine wood
- Healing Poultice (current health) – 6x eldritch essence, 3x bloodhaw, 1x grub root
- Healing Tonic (max health) – 6x eldritch essence, 3x blightbane, 1x grub root
Bobsledding And Pouches
As mentioned in our official review, the dog sled does have janky controls, but it’s still the best way to get around. To obtain these tamed buddies, you’ll need to cleanse monster nests inside corrupted outposts. Afterward, you’ll need to build a Sledding Kennel in your camp/refuge.
Once you’ve got a sled ready, “tag” those gathering spots, put some resources in the sled’s stash, and pray you don’t encounter bugs or crashes. You can use a summoning item to get those doggos back where you are if the sled magically disappears or gets stuck.
You might’ve noticed that I had extra inventory space. Those are from woven pouches. The requirements are:
- Woven Pouch – 6x fiber
- Sledding Kennel – 32x firewood, 4x pristine wood
Camp Construction And Followers

The upper right side of the UI has numerous icons. The one on the left (crystal icon) shows when your camp is about to be raided by monsters.
Try to grab a follower as soon as possible. You’ll know you can do this when a notification tells you that an event is nearby. Recruiting a follower will allow you to assign them to different tasks — gathering, building, or crafting.
While adventuring, you might’ve noticed “tainted resources” (wood and meat). Only your followers with the relative specialty (woodcutting or hunting) will be able to craft these into usable resources. You need specific buildings for these tasks. Also, don’t forget to build a hut for each follower you recruit. Here are the requirements for these structures:
- Hut – 48x firewood, 4x pristine wood
- Woodcarver’s Corner – 12x firewood, 4x pristine wood
- Butcher’s Corner – 12x firewood, 4x pristine wood
Cleansing Outposts And Combat
Outposts give you the following benefits:
- tons of resources found via a strongbox
- an extra continue (Flame of Hope)
- an eternal fire that never goes out
- revealing the entire area
- a means of fast travel to your camp or to other outposts
Needless to say, you want to clear them in a jiffy. The problem, though, would be the enemies.
From the early- to mid-game, these creatures are pushovers:
- Spitters and impalers fire ranged blobs (the latter are quite deadly). They can also run after you to explode. It’s best to hang back and shoot them with arrows (that’s why I usually bring two to three stacks).
- Rippers and soul rippers have a devastating melee combo but they’re hilariously inept. From a few feet away, right click to do a strong attack. Keep backing away, and just mash that right click to start your attack’s animation whenever you regen stamina.
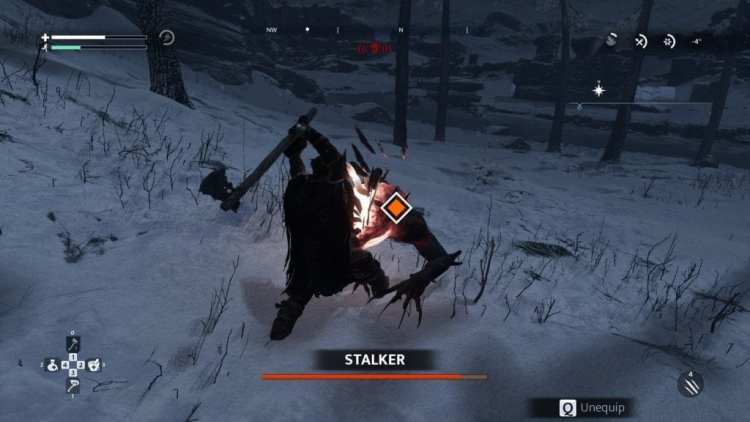
- Stalkers are more annoying since they burrow and rush you. Time their rush, then dodge sideways. Follow-up with your melee attack and dodge sideways as soon as they burrow again.
- Hellvines can sometimes pop up from nests. Just wait for them to get close, hit that parry button, then do a strong attack.
Without spoiling anything, other mobs can be quite deadly. Still, they might have predictable patterns that you can exploit.
Save Scumming Versus Surviving Bugs
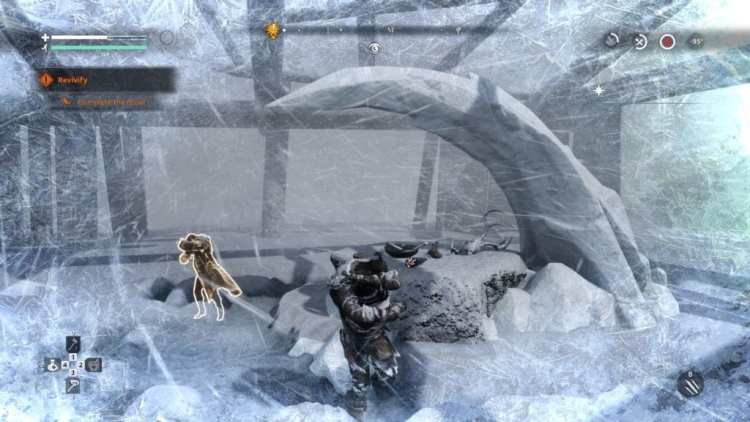
This is part of a scripted event for this follower. My previous try actually had a “random” blizzard happen in the middle of the dialogue.
Although visually stunning, Fade to Silence has several bugs that can hamper your progress when playing Survival Mode. Since the game autosaves often, there’s a chance that a glitch (sleds getting stuck, your character getting stuck, enemies shooting through textures, and more) might cut your run short.
One particularly annoying instance happened to me when I traveled to the next zone, only for my sled to get stuck on a cliffside. I reached a shelter with a sliver of health left as a blizzard slowly froze me. I was inside, safe and sound… until a random mob (which I couldn’t see) somehow lobbed a boiling pustule through the roof and on my head!
My character died, but I still had a couple of continues. I did have to make my way back to where I was before.
Given that Fade to Silence lacks polish in certain areas — areas which are integral to the survival aspect — you might consider save scumming so you don’t get frustrated when the game screws you over. Your save file can be found in “C:/Users/<Your username>/AppData/Local/FadeToSilence/Saved/SaveGames.”
Simply make a backup folder and copy the “autosave.sav” file before you head out. I’ve only done it a couple of times for some really distant and dangerous treks. Don’t do it all the time or it’ll ruin the moment.
That does it for our Fade to Silence survival guide. Be sure to check out our official review and technical review.






Published: Apr 30, 2019 09:25 am