The second level of the Magic DLC for Escape Simulator is the Chronomancy Hall, and conquering its many puzzles is a challenge indeed. Here’s how to escape the hall!
I’ll be taking you through the most efficient way to solve the escape room. Once you’ve escaped, you can stick around at the end to get all eight secret Tokens!
The Time Staffs
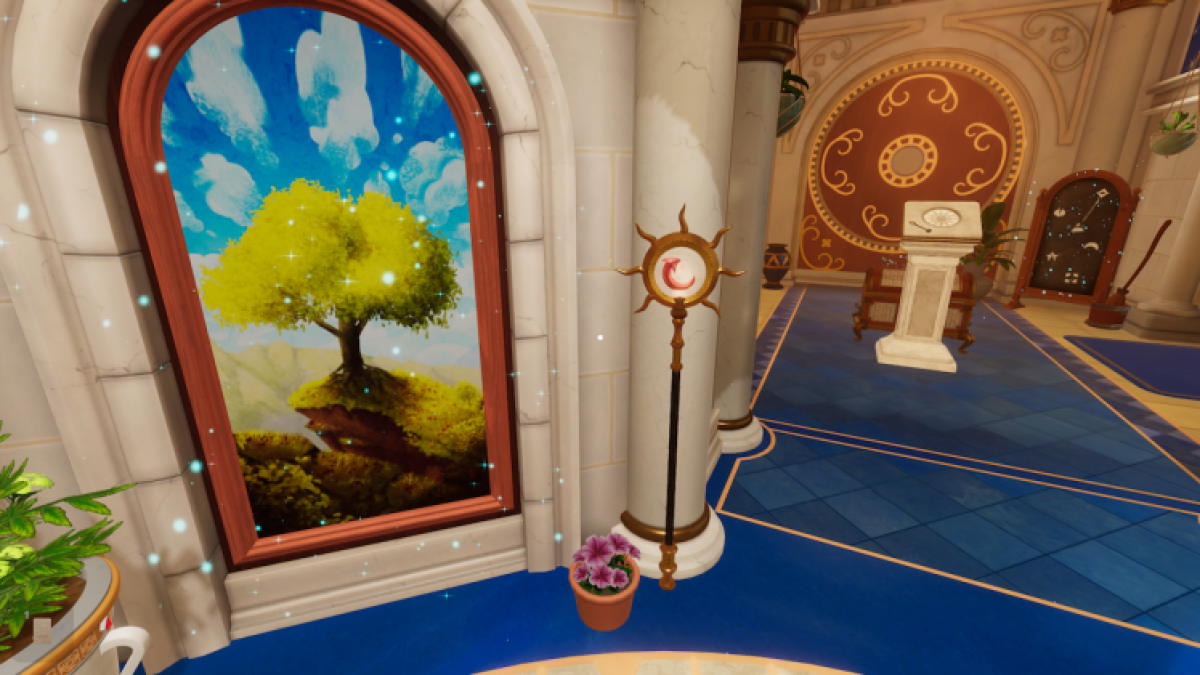
First things first, we’ve got to find the Time Staffs left by our master. A note in front of us when we start mentions that one will cycle time forward, and the other will revert time backward, but only on items with a magical aura, i.e. any object with blue sparkles.
To find these Time Staffs, we first must find the Time Staff that pushes time forward. I’ll be calling it the Future Staff. Thankfully, it is sitting right next to the painting of the tree, you can’t miss it. We will use the Future Staff to find the Past Staff, the Time Staff that reverts time.
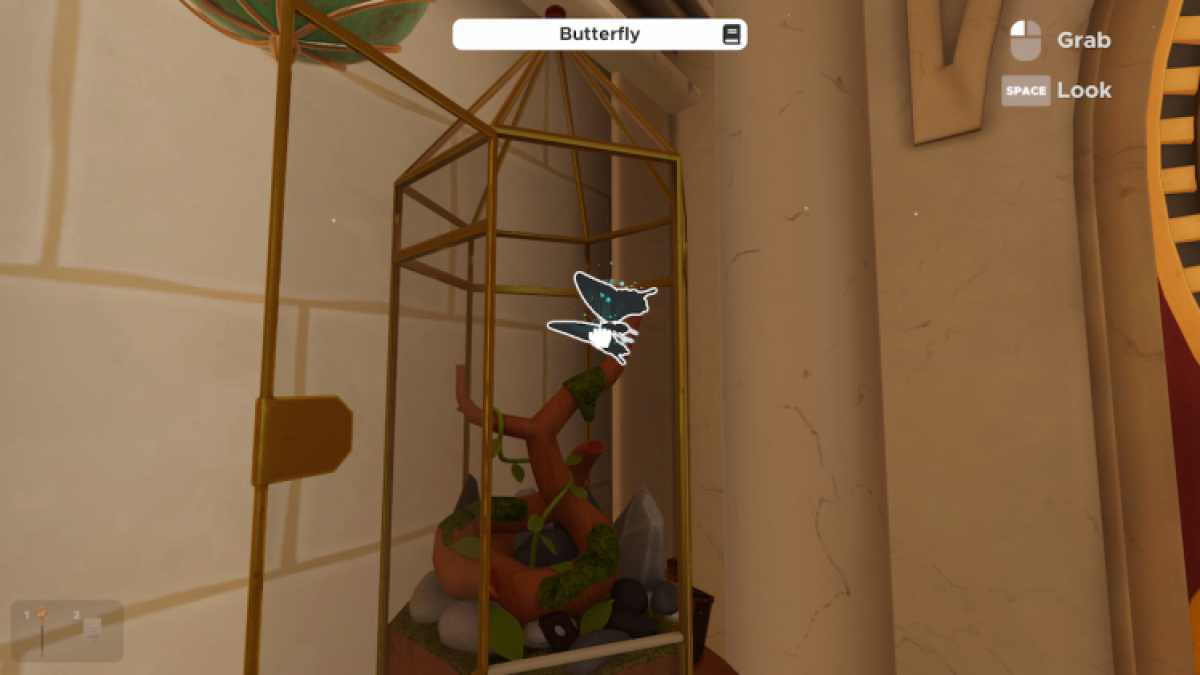
If you walk to the end of the second chamber, you’ll find a glass cage with a Caterpillar in it. Open the door and equip your Future Staff. When looking at the Caterpillar, you should see that the reticle changes to a curved arrow. When pointing at something with a magical aura, you can hold left-click to affect the time of that object.
Use the Future Staff on the Caterpillar until it turns into a butterfly. Grab it.
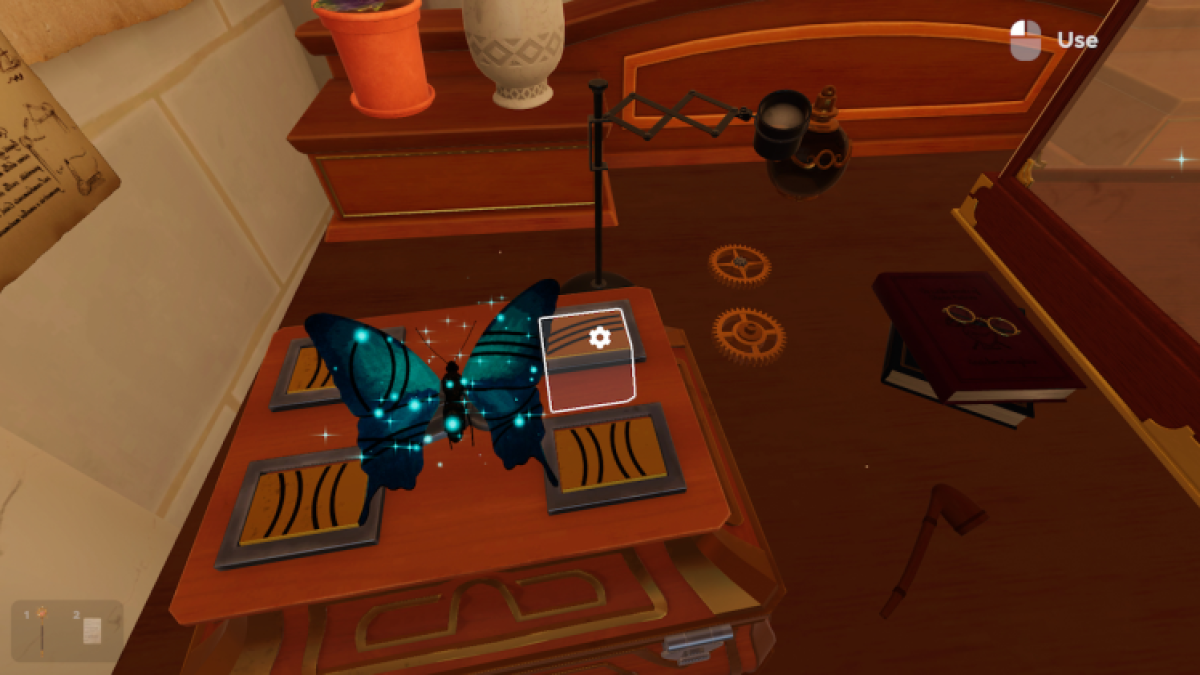
The four wings on the butterfly each have some black lines arcing across them. To the left of the cage, there is a desk. On this desk is a box with a butterfly icon and four dials. We must match the dials with the line pattern on the wings of the Butterfly to open the box.
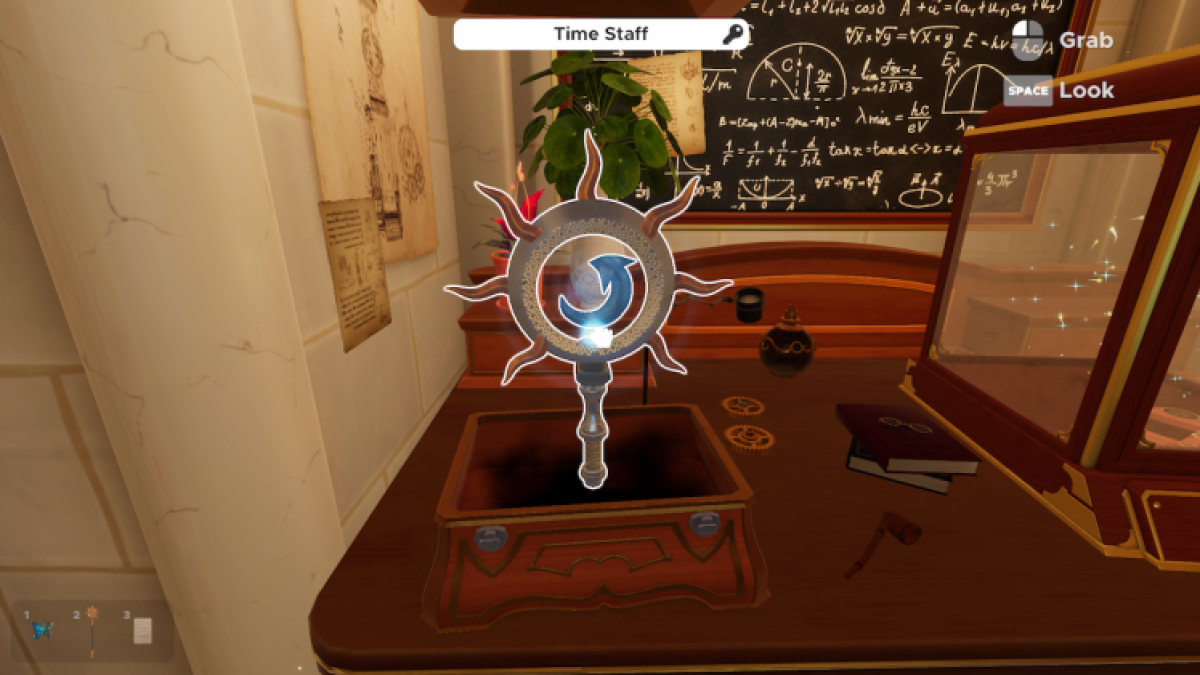
Upon doing so, we’ll unlock the Past Staff.
Forming the Table
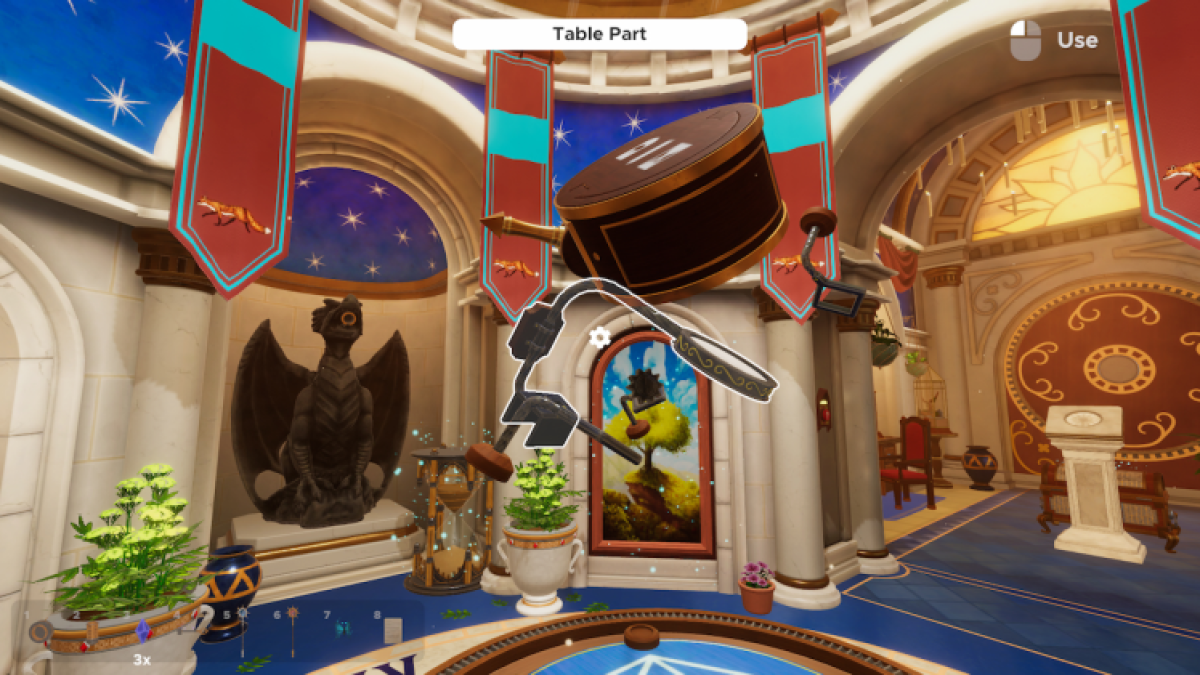
With our Time Staffs, we can start solving a larger puzzle back in the first room. We need to assemble that floating Table. You may notice that around the platform below, there is a clock without any hands.
When looking in the top right drawer of the desk in the second room, we will find a strange piece of paper that shows a clock, with animals all around it. We need to assemble the creatures in the Chronomancy Hall and put them in their positions on the Clock. I would suggest pinning the note for easier reference.
Placing the animals on the Clock
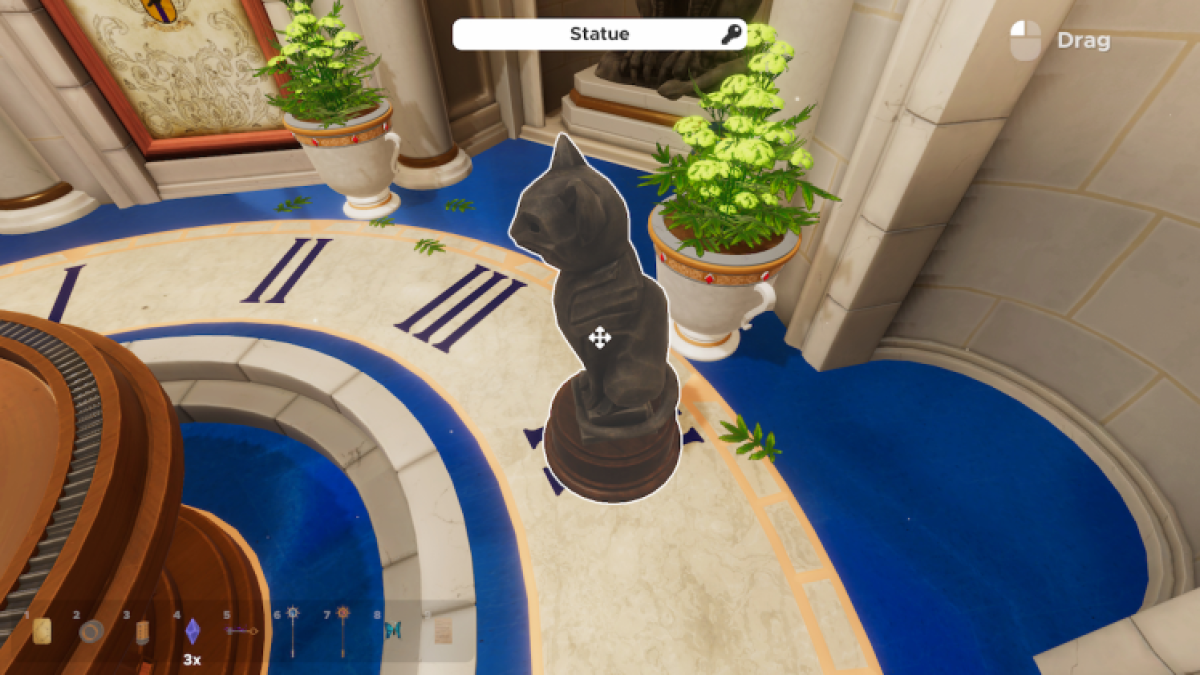
First things first, we’ll start with the Cat Statue, as it is assembled and is right next to the Clock in the first chamber. Drag it over to the IV numeral, as in the note, the cat is at the fourth number.
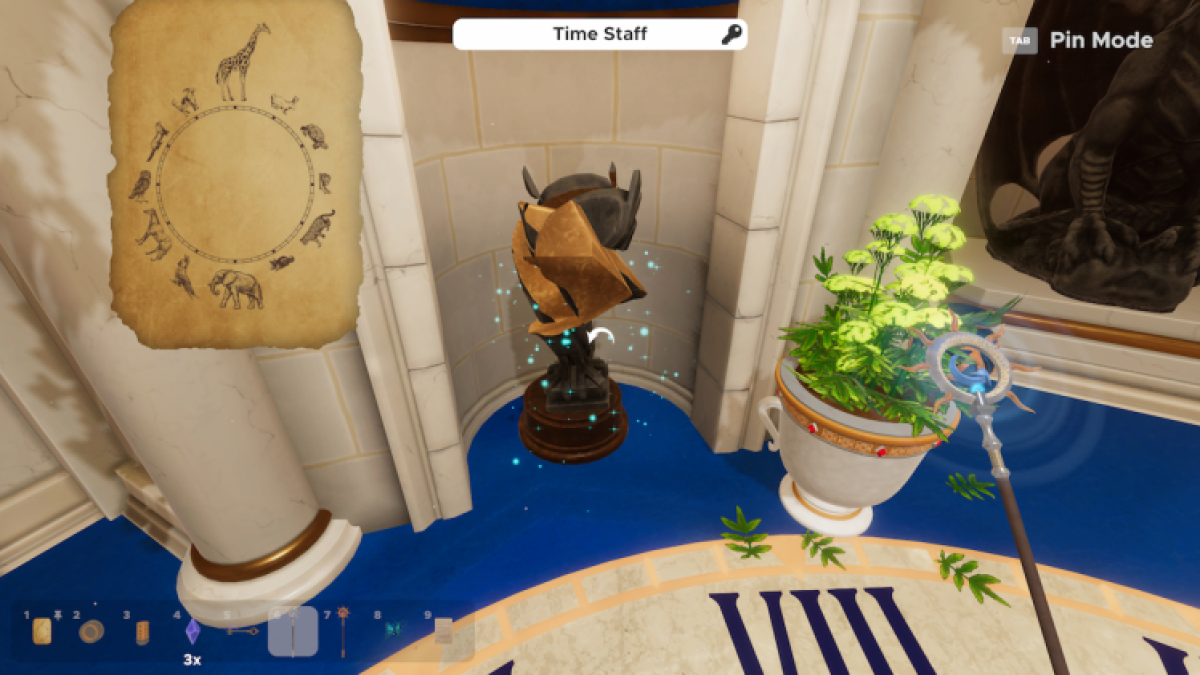
Next, go to the crumbled statue and use the Past Staff to revert it back into an Owl Statue. On the note, the Owl sits at 9 O’Clock, so drag the statue over to IX.
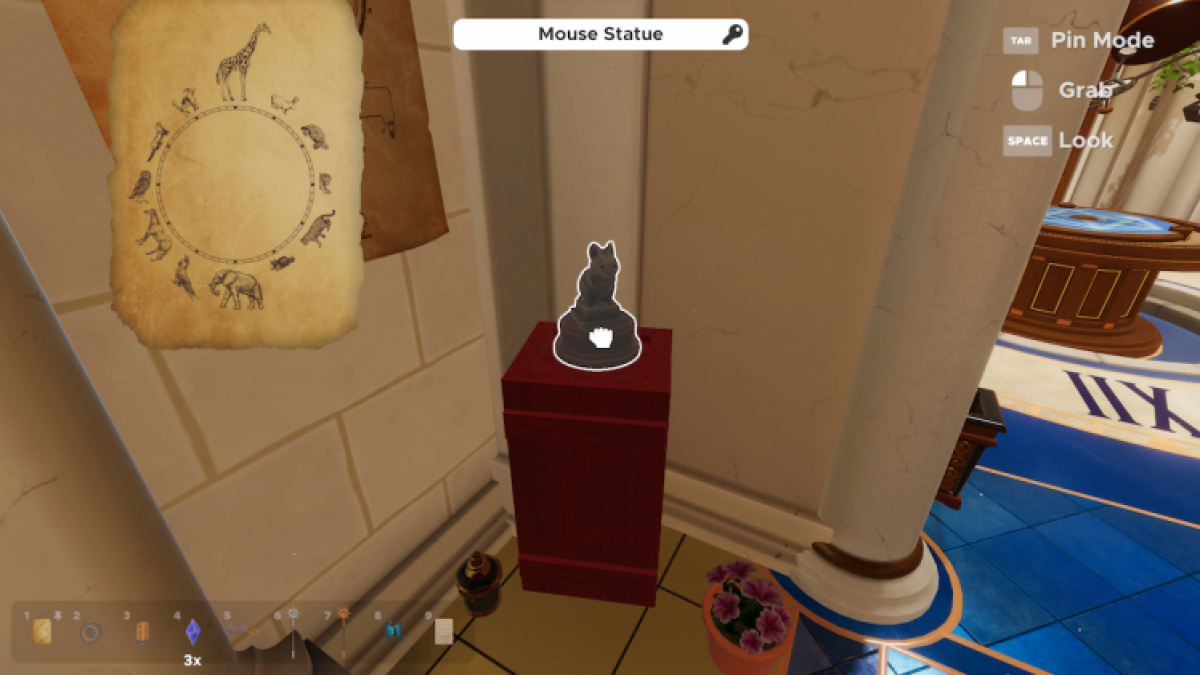
For the final statue, we need to head back into the second room. There is a Mouse Statue on a red crate in the corner. Grab it and place it on V, next to the cat.
With all the Statues in their rightful place, you’ll see three arms get brought down. We’ll need to do a little more work before the whole Table comes into place.
Three Time Echo Crystals will fit into each of the three arms. So let’s find them!
Finding the Time Echo Crystals
Now, to complete the Table in the first chamber, we need to find the three Time Echo Crystals hidden around the room.
The First Time Echo Crystal
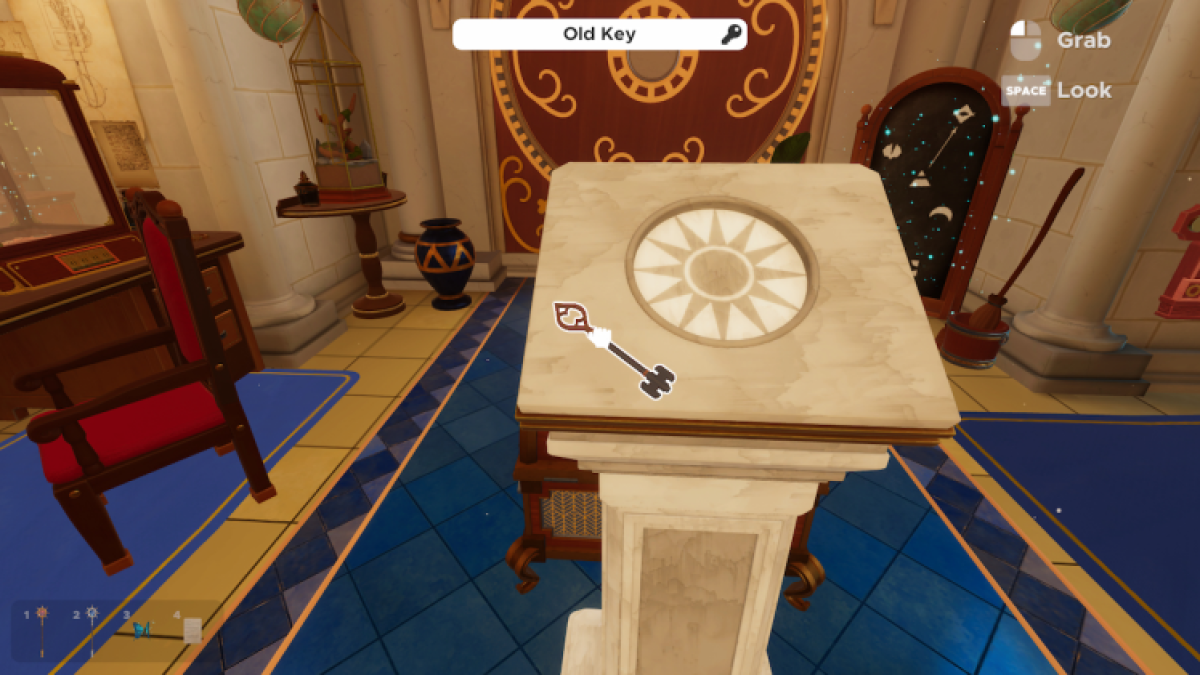
Grab the Old Key on the stand in the middle of the second chamber. Behind it to the left is a small circular contraption in the wall with three key holes. The Old Key can unlock all three of those locks, but it will break upon the second lock.
You must use the Past Staff on the Key to revert it to its original state. Then, pick the Old Key up again and use it on the third lock to open the contraption and reveal a Time Echo Crystal.
The Candelabra
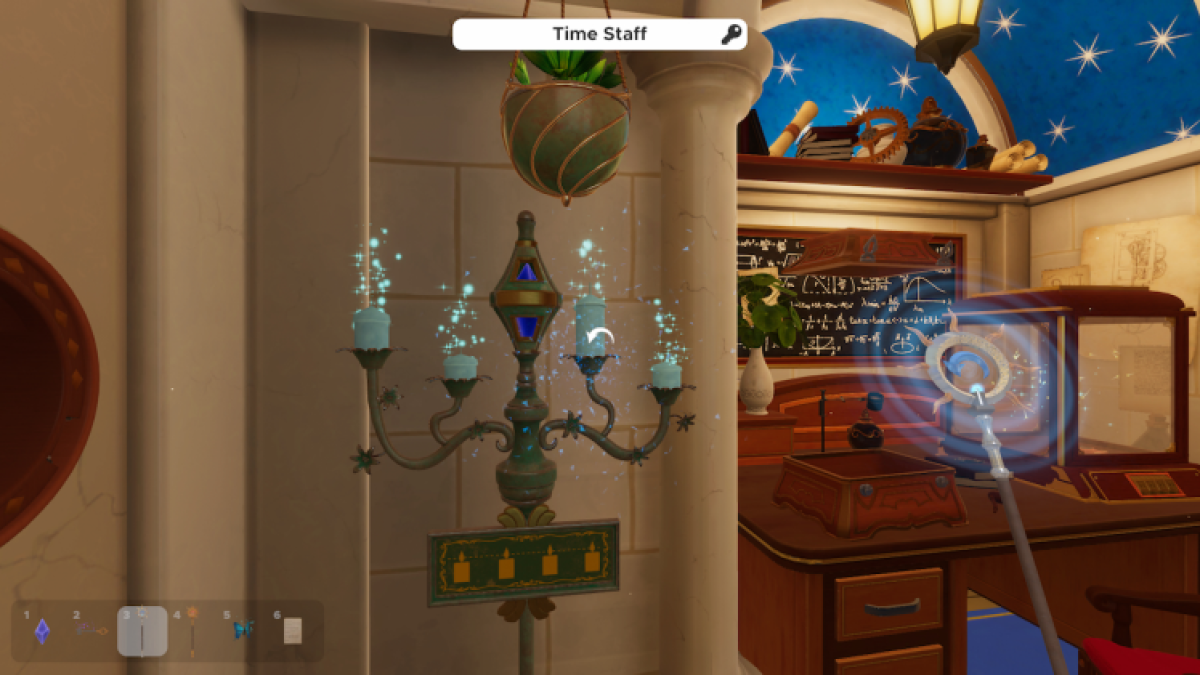
Right next to where we found the first Time Echo Crystal is a Candelabra. A sign reads that all Candles need to be lit and the flames of equal height.
To do this, use the Past Staff to revert the Candles back to being lit again. Then, reorganize the Candles by picking them up and swapping them. Place the largest Candle on the lowest arm and the smallest Candle on the highest.
This will unlock the chamber, revealing another Time Echo Crystal.
Opening the Sigil Lockbox
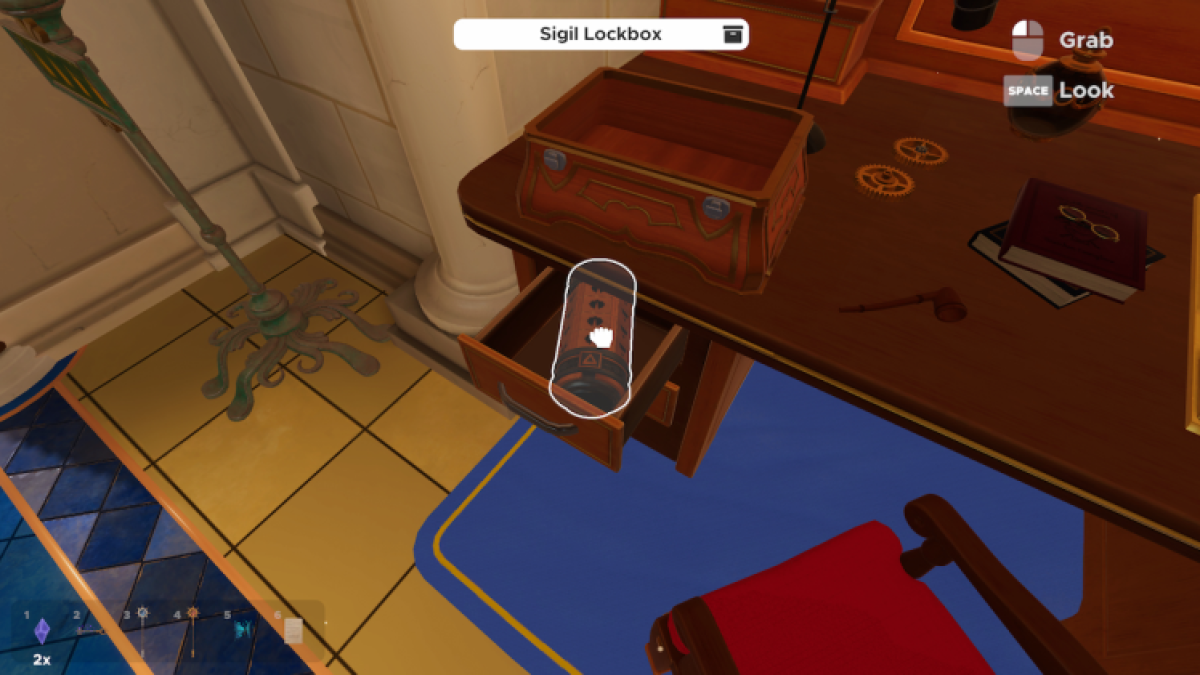
The Sigil Lockbox contains the final Time Echo Crystal we need. You can find it in the top right drawer of the desk in the second chamber. To open it, we need to find the right combination.
The sigils on the lockbox are the same as on the chalkboard across the room from where we got it. There is one arrow from one Sigil to the next. Using the Past and Future Staffs, we can find the full sequence of Sigils, forming the combination below.
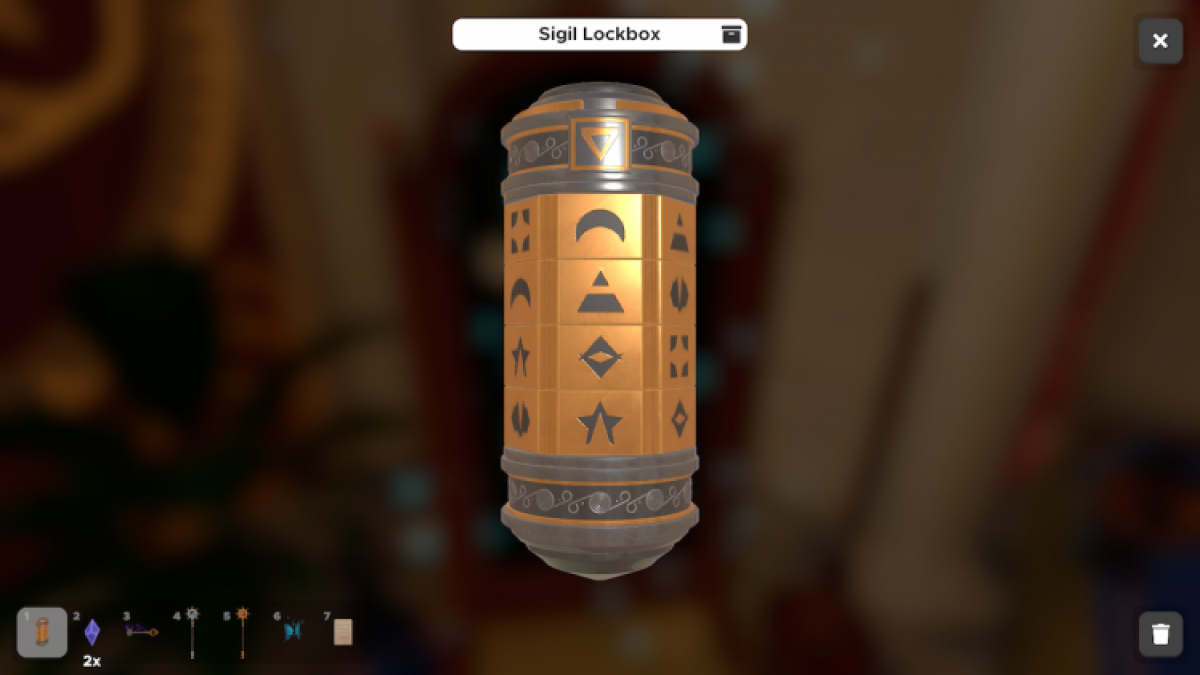
Once it’s complete, the top will pop off, and you can rotate the Sigil Lockbox to grab the final Time Echo Crystal inside.
Completing the Table
We now have all the Time Echo Crystals to populate the Table in the first chamber. Go back to the Table and, with the crystals equipped, insert one into each of the arms. The rest of the table will come down, and a spectral projection will appear.
The Projection Puzzle
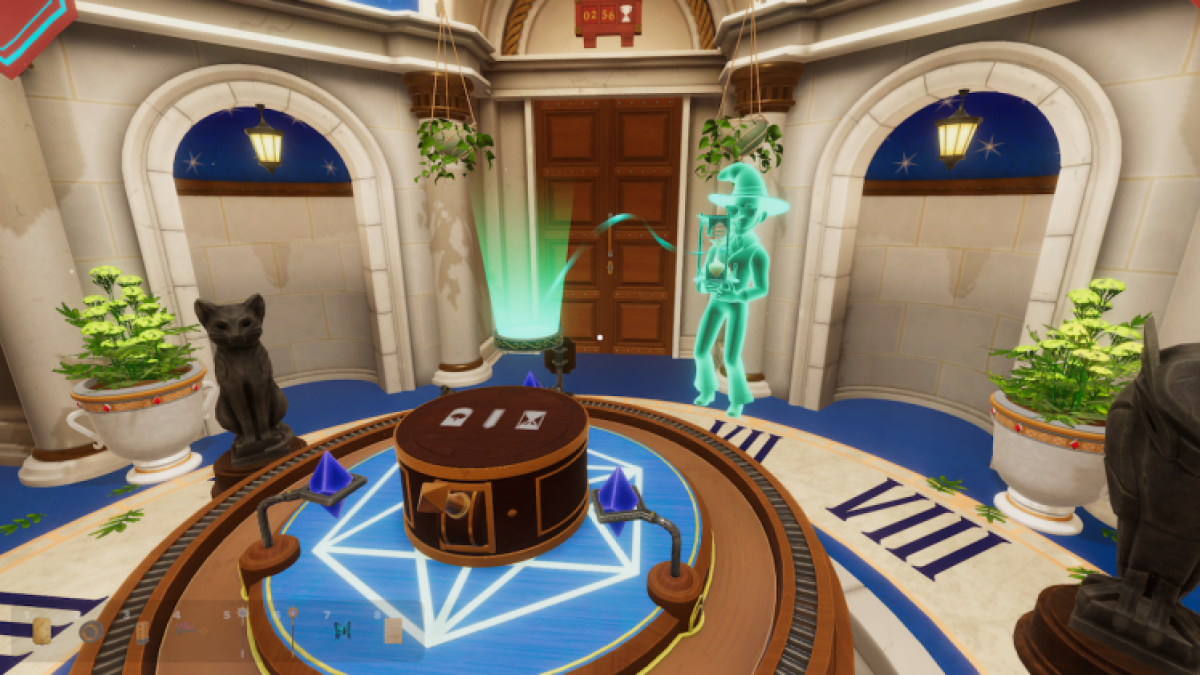
With the Table finally complete, we can solve the puzzle it establishes to open the compartment in the middle. Ignoring the projection for now, if you look to the middle of the table, you’ll notice a box with a switch and three symbols. The symbols hint toward the three conditions you must set before the switch will work.
The three Time Echo Crystals will each hint at one of the three conditions needed to work the switch.
The Hour Glass
When initially forming the Table, the projection is shown holding an Hourglass, with the sand on the penultimate rung.
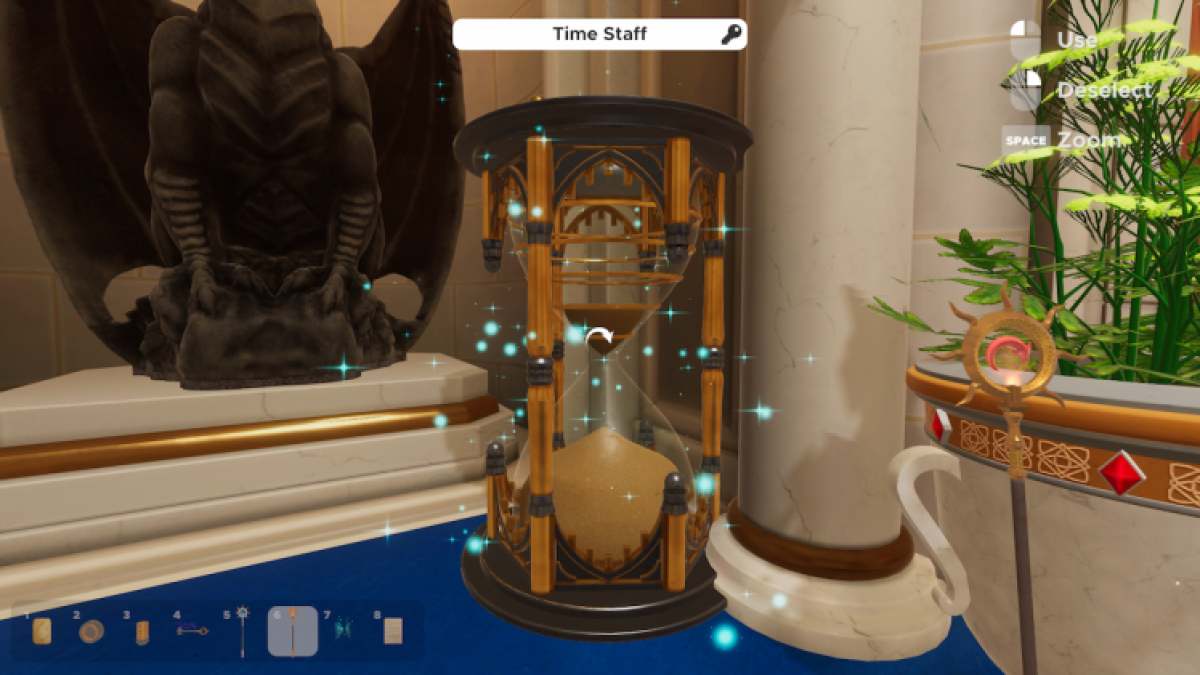
You need to go over to use your Future Staff to lower the sand levels in the Hourglass until it matches the Hourglass the projection is holding.
With that sorted, head over to the apparatus above the Time Echo Crystal that spurs the projection. On it is a yellow bauble. Press it to send the apparatus to the next crystal for the next hint.
The Tree Painting
Once you’ve sent the apparatus over to the next Time Echo Crystal, the projection can be seen huddling over a campfire next to the painting of the tree.
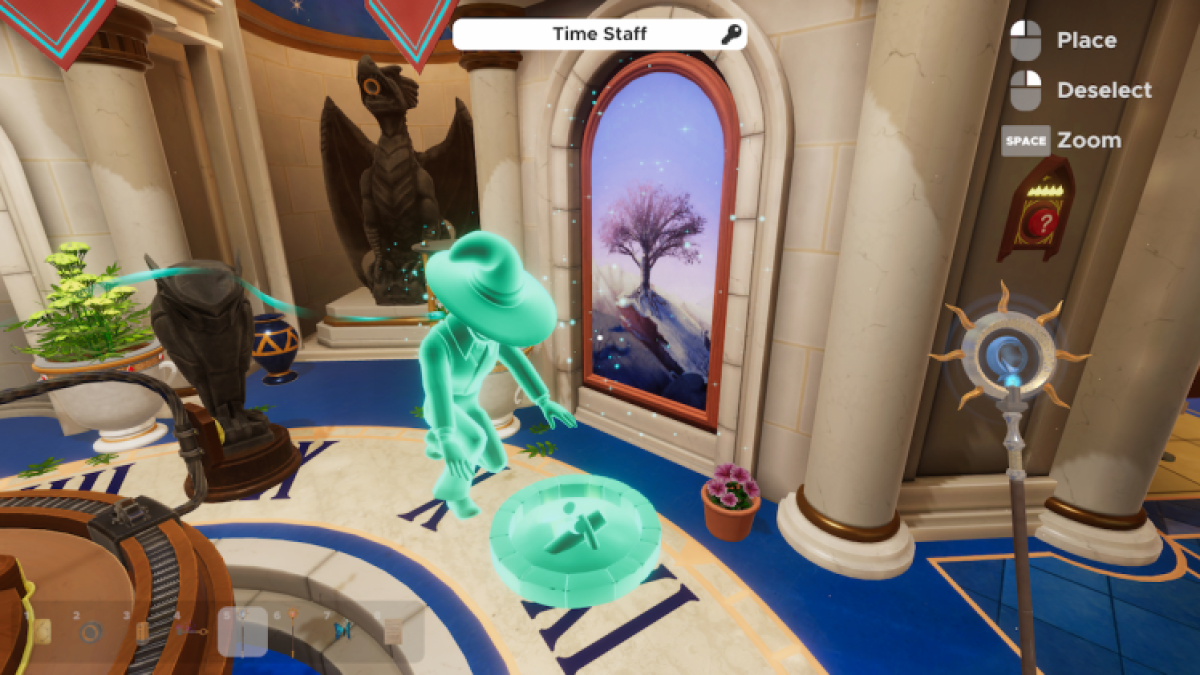
Using your Future Staff, you can change the seasons on the painting. Do this twice until it’s Winter, a season that would give the projection a cause for his cold.
Send the apparatus over to the final crystal.
Points for Ravenclaw
The Projection is now pointing at the tapestry depicting numerous creatures on shields. He is pointing at the Raven.
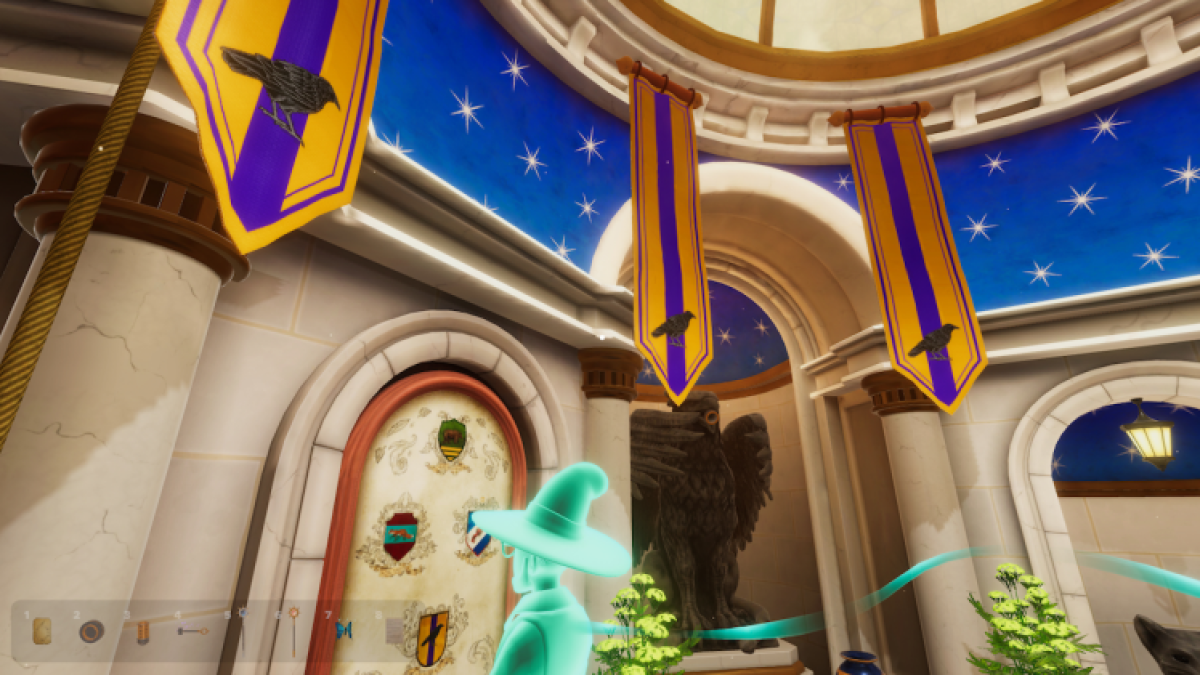
Next to the tapestry is a thick rope that hangs from the ceiling. Upon activating it, the banners adorning the first room will change to one of the animals on the tapestry. Click it twice to change them to the Raven.
Flicking the Switch
Now that all three conditions have been met, we can return to the switch in the middle of the Table. Activate it to reveal a Chest Dial Piece, a Dragon Crystal, and a Griffin Crystal. Take them all. We will see to the Chest Dial Piece later. For now, we will use the Crystals.
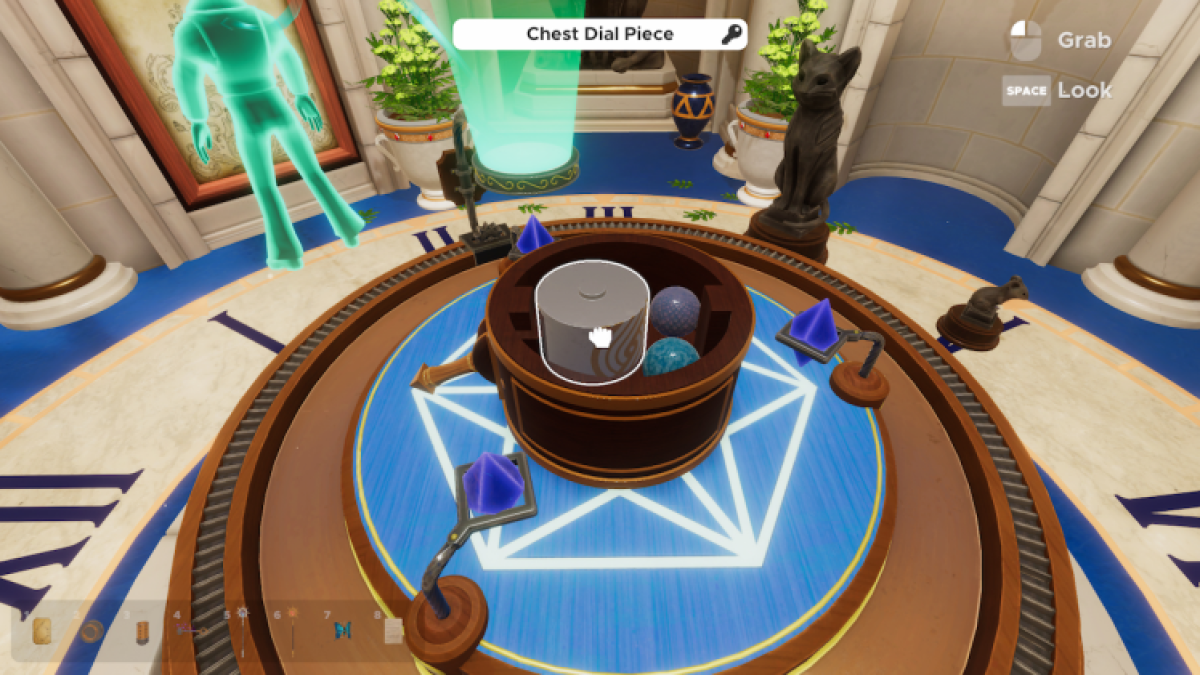
Creating the Sundial
We are nearing our escape, but before then, we must use what we found in the Table to create a Sundial. A couple steps will be needed to construct it, and another then to solve it.
First things first, we will use the Dragon and Griffin Crystals.
Solving the Griffin Puzzle
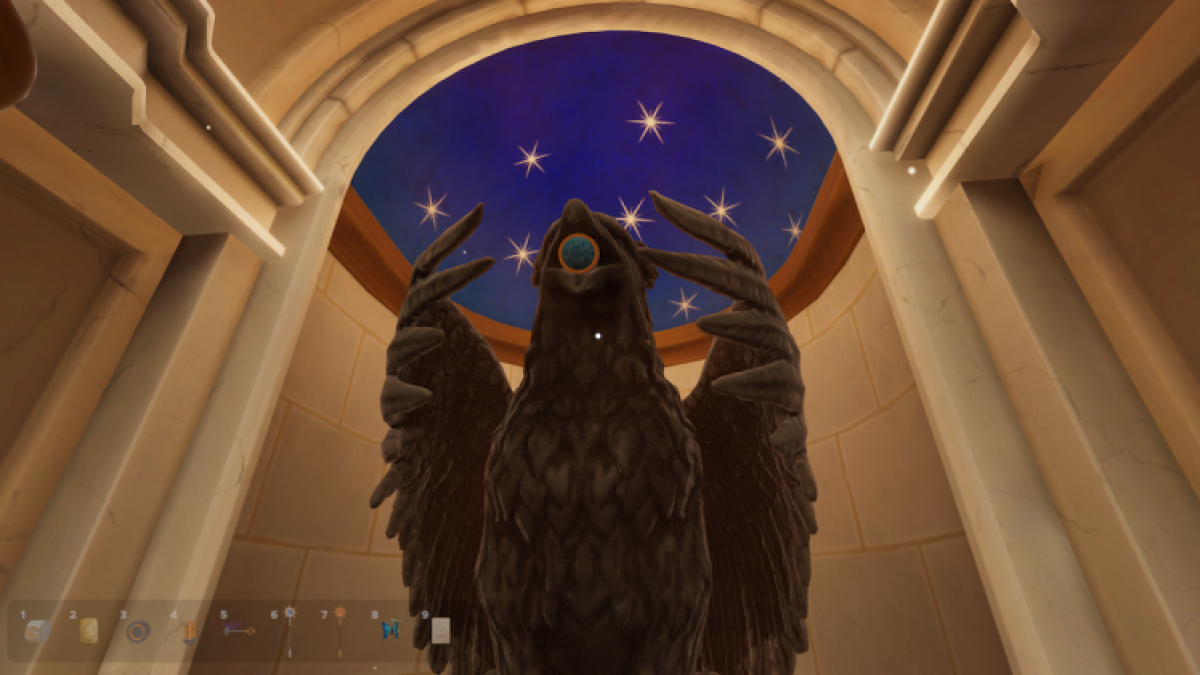
With the Griffin Crystal, head over to the grand statue of the Griffin to the right of the first room. Insert the Griffin Crystal into the slot in its head, and it’ll rise, revealing a puzzle.
This puzzle demands you to use the slider to reveal four digits line by line. With that limited information, you need to estimate the order of the numbers for the combination lock.
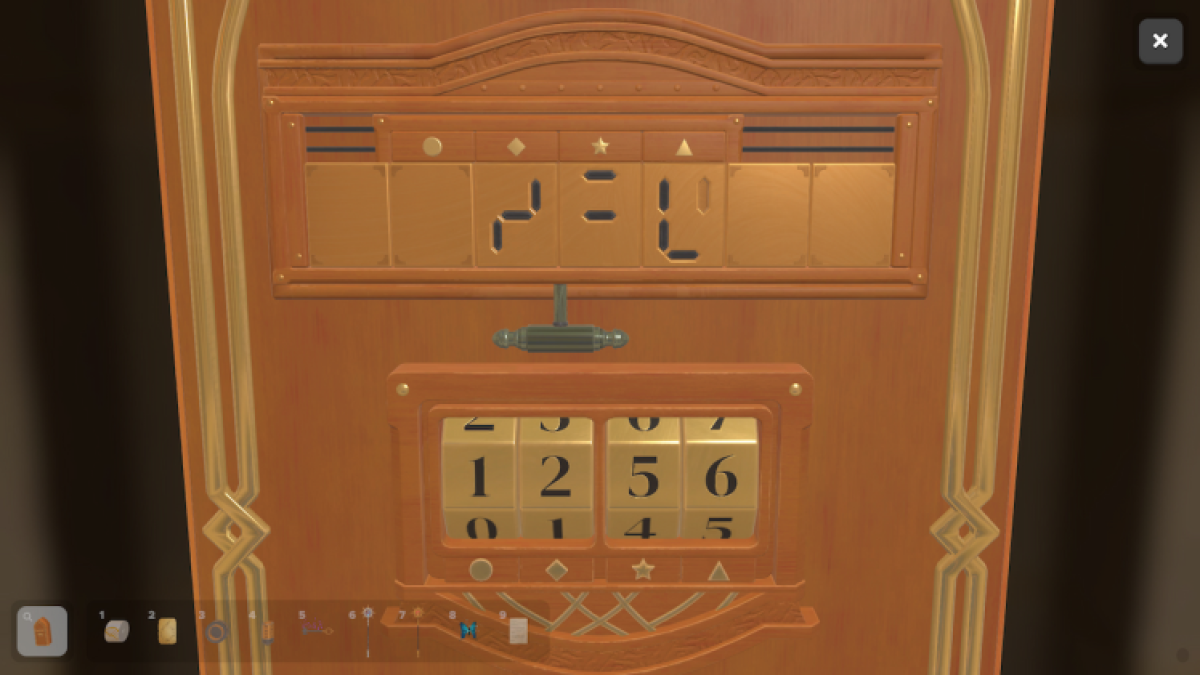
Upon some rigorous sliding, you’ll come to the combination of 12:56.
A great magical beam will shoot from the Griffin. Time now to complete the Dragon’s puzzle.
Solving the Dragon Puzzle
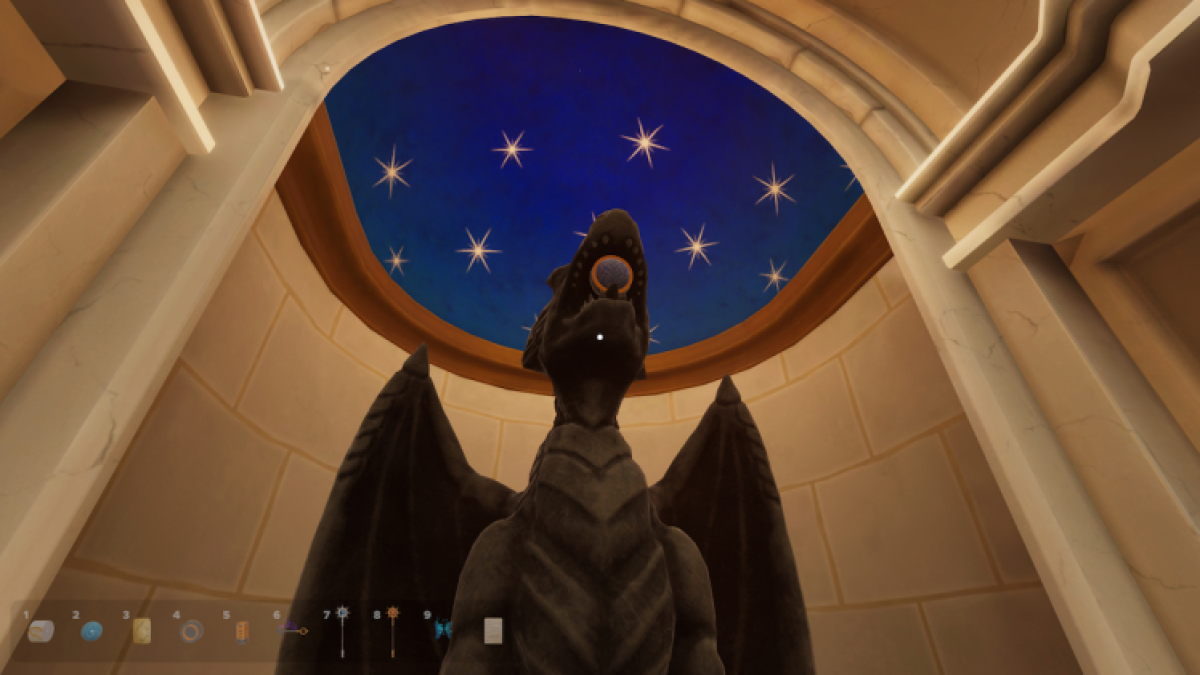
Like we did with the Griffin Statue, head over to the Dragon Statue and insert the Dragon Crystal. It will rise to reveal another puzzle to solve.
To solve this puzzle, we need to form the four digits, using the line combinations that the letters are telling us to. If a letter is upside down, then we flip the lines that they represent. If we follow this logic, we’ll get the combination 12:58.
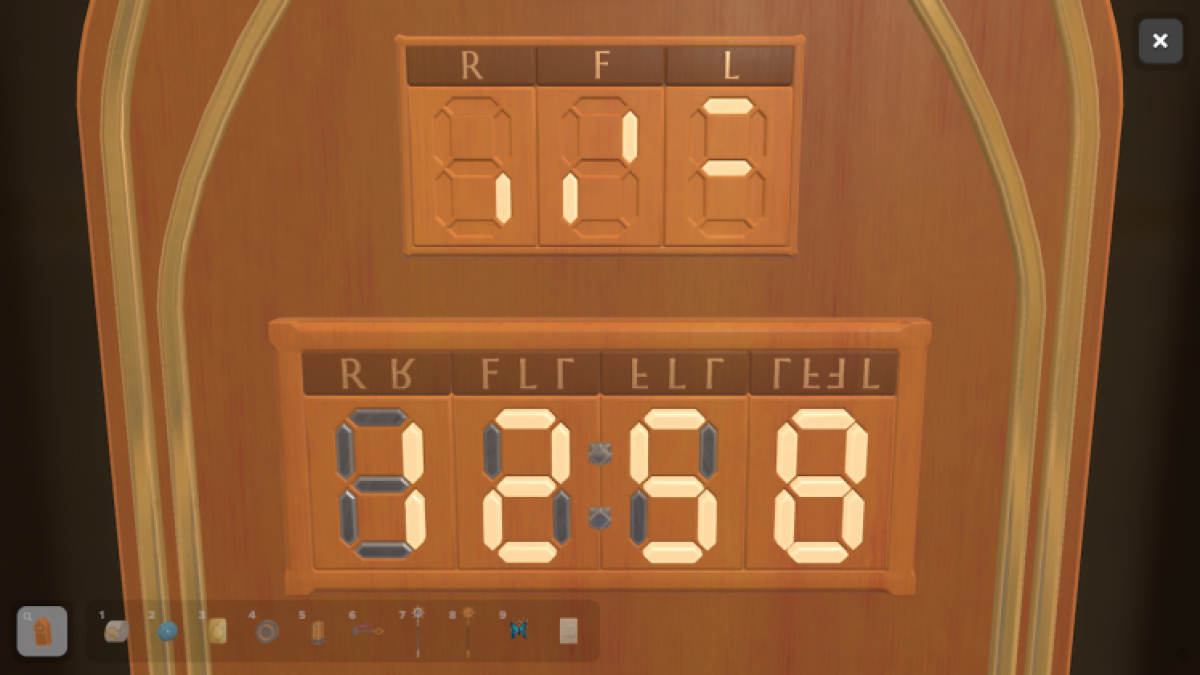
Like last time, a magical beam will meet with the Griffins, and they’ll transform our table into the base of a Sundial. The only thing missing now is the Sundial itself. For that, we’ll need to use the Chest Dial Piece we got from the table.
Getting the Sundial
To complete our Sundial, we need the actual Sundial piece. Going back into the second room, there is a Chest behind to the Pedestal. You’ll notice that two dials are present and spinning, but two are absent. We already have one, so insert it into the chest. Let’s grab the final one.
Finding the last Chest Dial Piece
To unlock the final Chest Dial Piece, we need to grab the second Clock Frame that’s locked in the glass container that’s brimming with stardust.
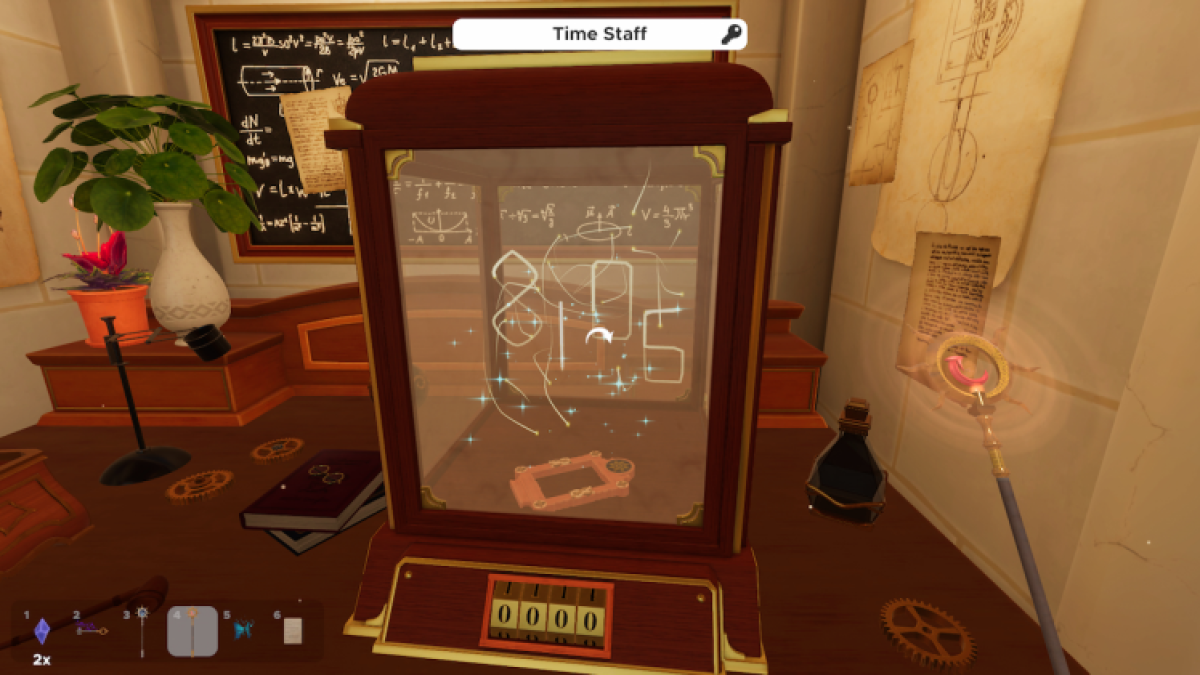
Using your Future Staff on the stardust will reveal a code that’s needed to unlock the display. Configure the combination lock to 8106 to unlock the display and grab the Clock Frame.
With this Clock Frame, we can head over and reunite it with the other Clock Frame on the blackboard of numbers. Upon placing them both down, they will start sliding across the board in a particular direction.
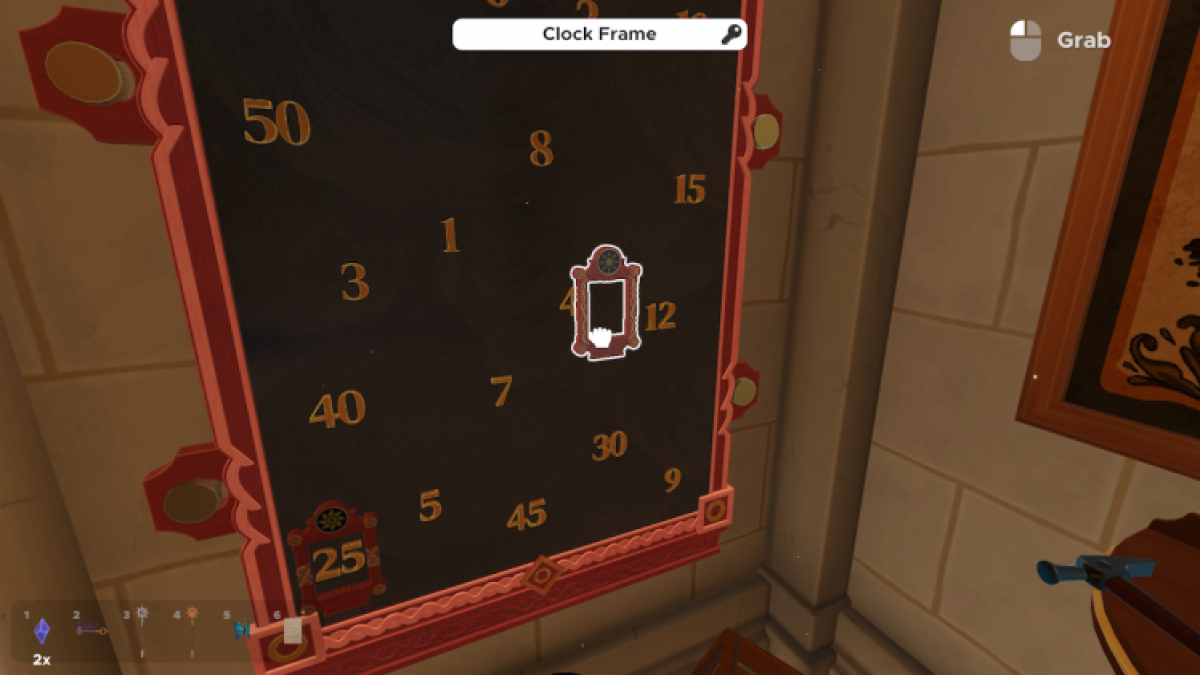
The Clock Frame we just liberated will only settle on the number 25, and the Clock Frame already there will only settle on 12. Each clock frame has a slightly different symbol of the sun, ones that correlate to the Grandfather Clock directly opposite the board.
Grab and drag the hour hand until it sits on 12. When you go to move the minute hand, the hour hand will also move. Rotate the minute hand until it reaches the halfway point till minute 25. Then, correct the hour hand. Keep slowly moving and correcting until the clock reads 12:25.
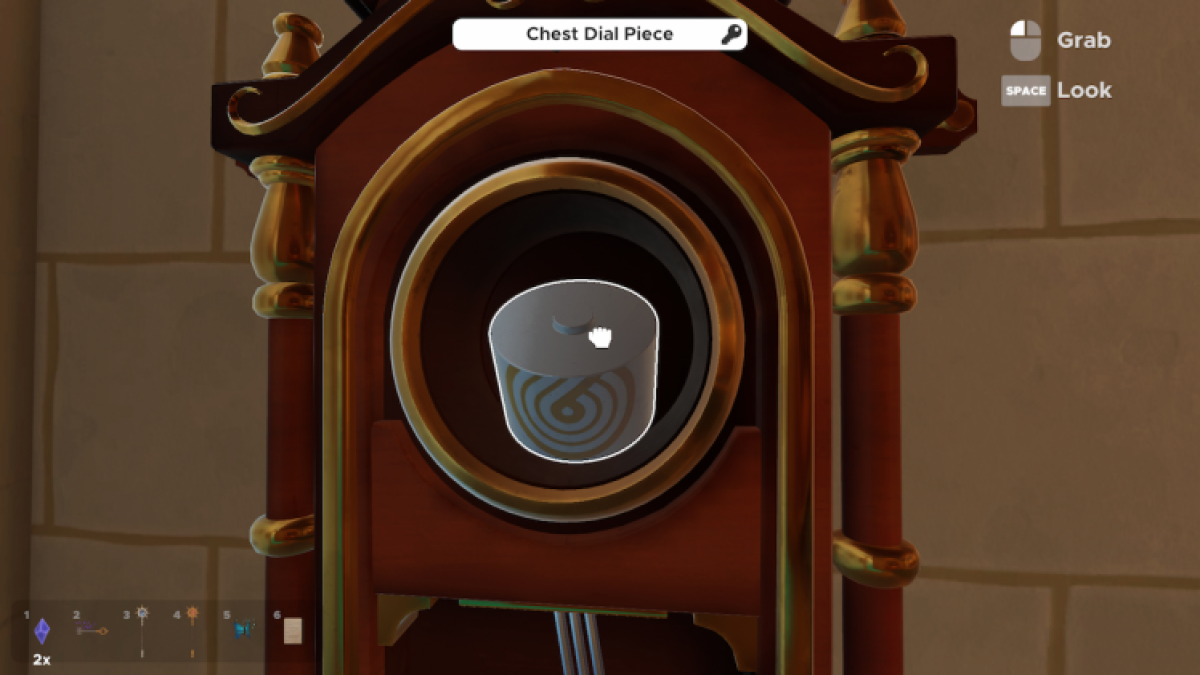
Then, the clock face will disappear, showing you the last Chest Dial Piece. Pick it up.
Place this Chest Dial Piece into the chest. We can now open the Chest.
Opening the Chest
To unlock this Chest, the patterns on all four Dial Pieces need to be connected. The Time Staffs can be used to move the pieces.
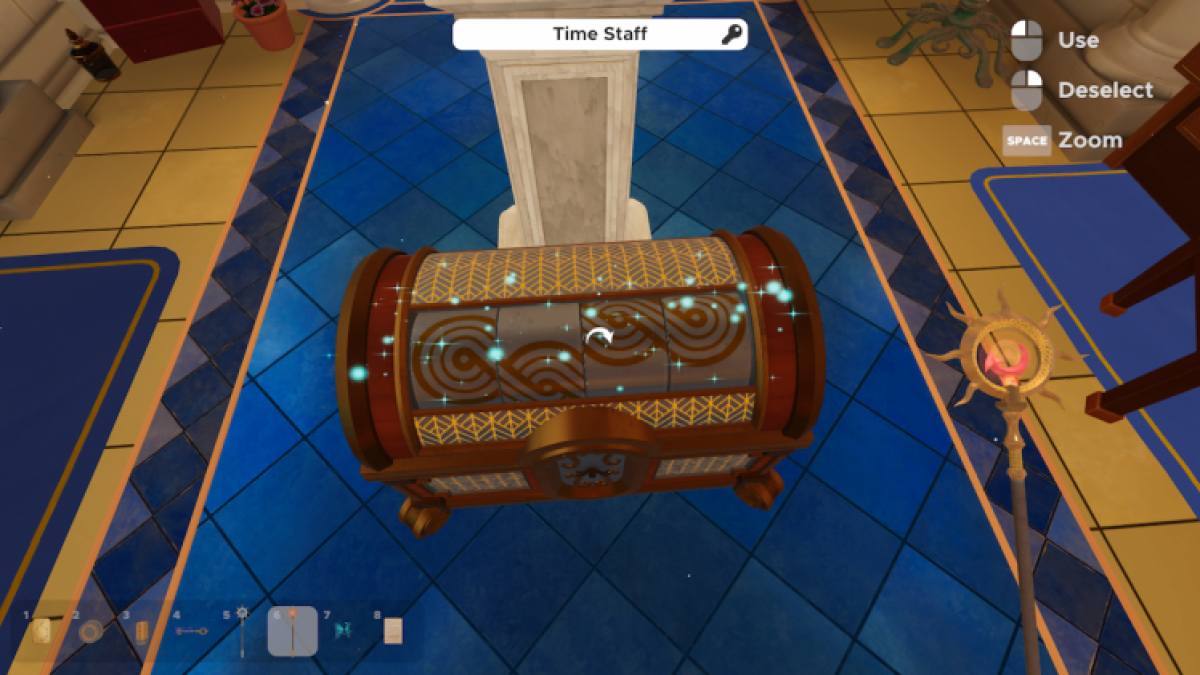
Finally, when the Dials are in the same position, they will rotate one more time before popping the Chest open, revealing a Sun Model and the Sundial. Take these pieces.
Completing the Sundial puzzle
Go back to the Sundial Table in the first room. Place the Sundial in the center and place the Sun Model in the holder above it.
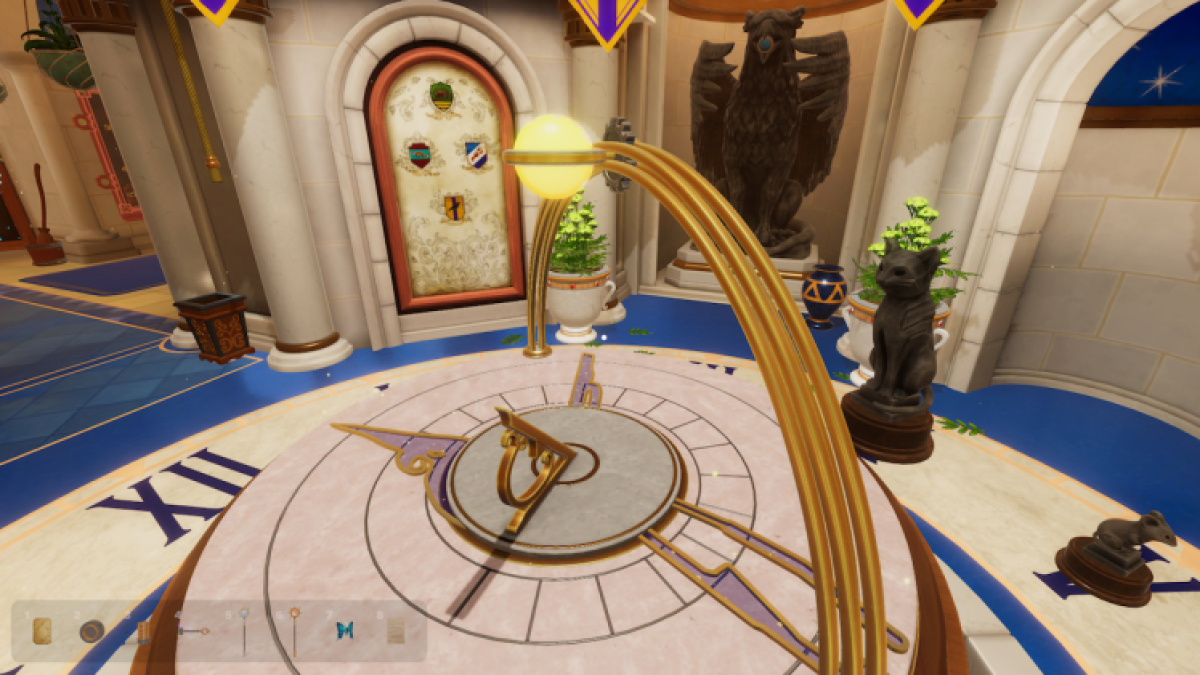
There are three magical outlines superimposed on the Sundial. We need to rotate the Sundial and move the Sun Model to recreate all three of those shadows. This is rather difficult, so as a tip, try to recreate the length of the shadow more than the shape of it. That’ll tell you that your sun and dial orientation is almost perfect. This is an easier goal than worrying about the exact shape when starting out.
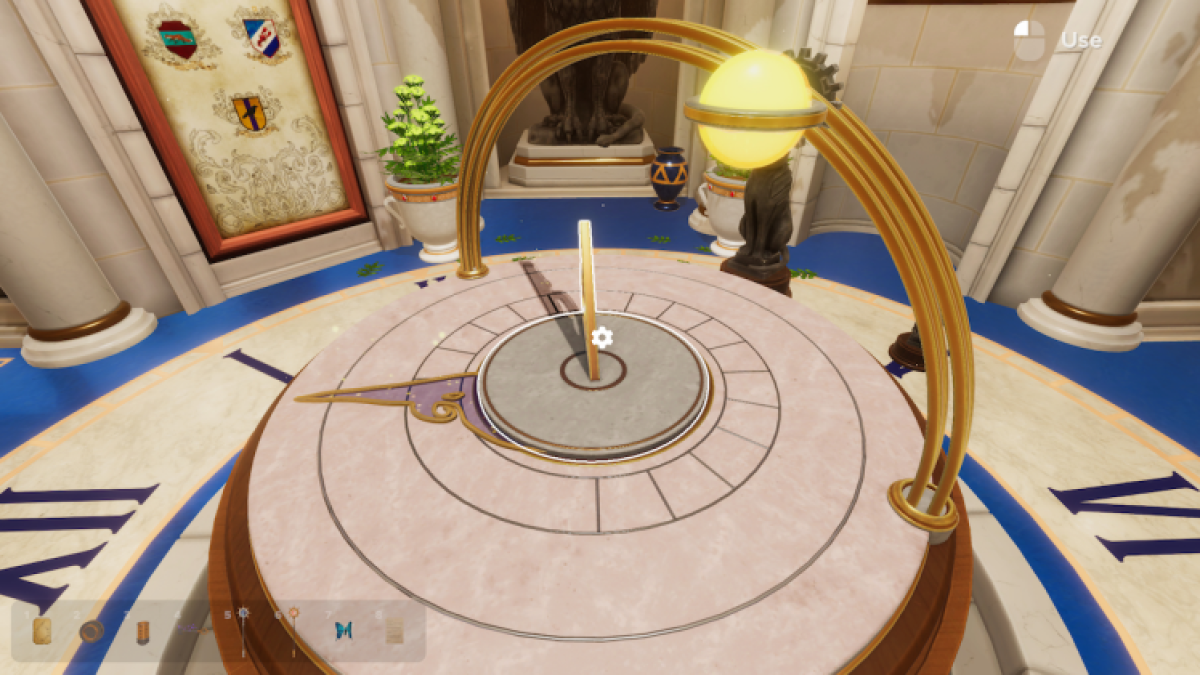
Solving all three shadows will reveal the Sun Sigil, which is the tool for our final puzzle.
The Astral Sigil Puzzle
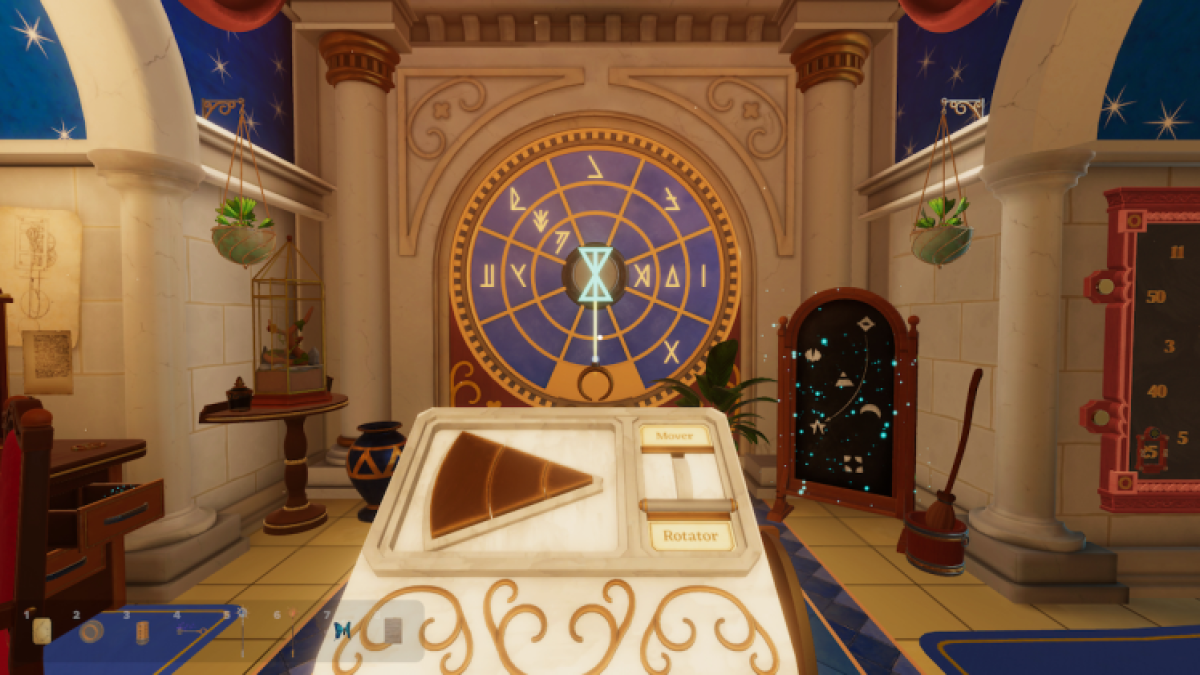
Place the Sun Sigil in the Pedestal in the second room to transform both the Pedestal and the circular structure into an astral chart of sorts. In the middle is a Sigil. We will be combining the Sigils to recreate the one in the middle.
Using the three buttons on the pedestal, orientate the chart so it looks like the one below. I have also circled the three Sigils we will need to pass through to create the desired Sigil.
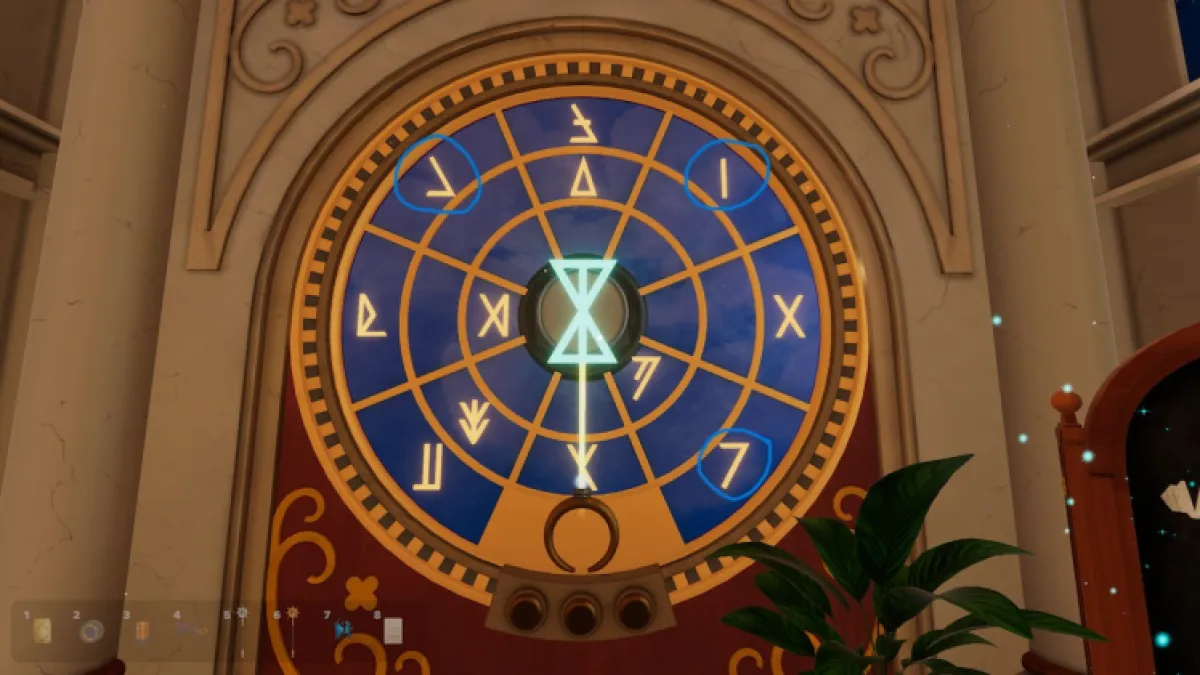
On the Pedestal, activate the Handle to change from Rotator Mode to Mover Mode. We can use the buttons on the handle to move the circle. Any Sigil that the circle bumps into will be collected, so you need to move the circle through the three desired Sigils without touching any others.
With the path I set out, it is possible to do, just make sure to change rings to avoid obstacles.
Once all the correct Sigils have been passed through, the center will dissolve and reveal the Key you need to escape.
Well done!
Hunting for Tokens
Now that we’ve escaped, we can stay behind and look for Tokens. Below are all the ones I’ve managed to find so far. These ones are super well hidden, so I’ll keep updating this article as I find more.
An Apple a Day
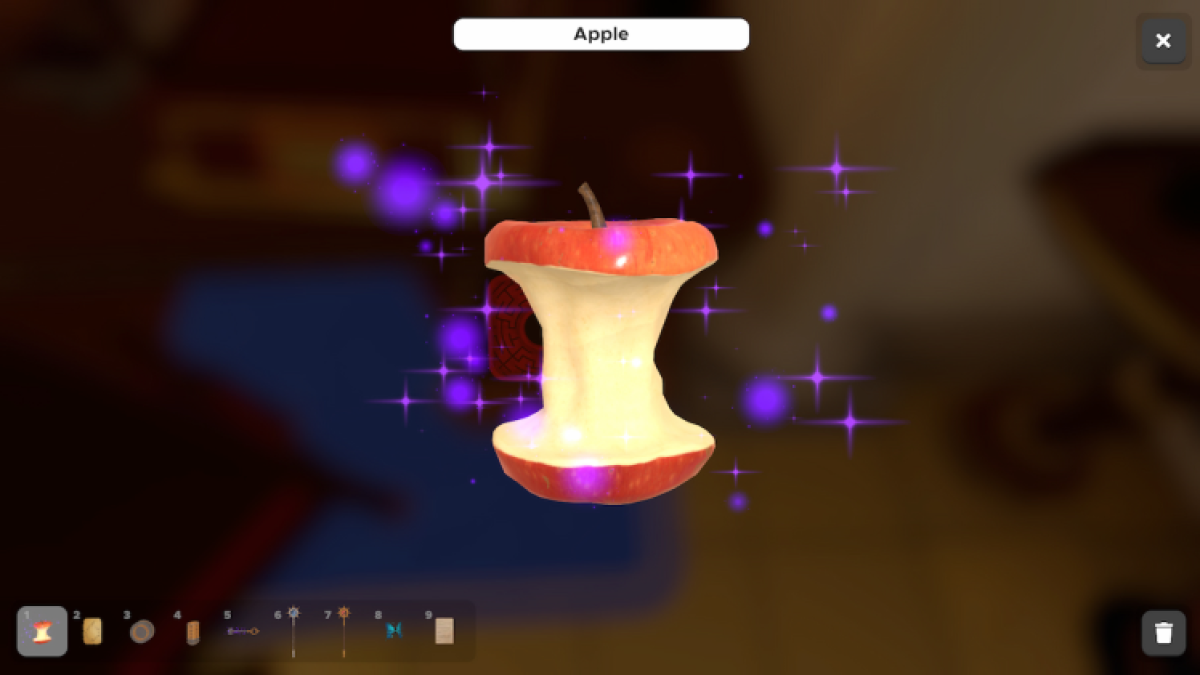
In the top left drawer of the desk in the second room, an apple is present. You can use the Future Staff to eat away more at the apple. When it’s just the core, you can pick it up and observe it in your inventory. A Token is inside.
A Caterpillar’s friend
In the Caterpillar cage, on the bottom, a Token is hiding in the earth.
A Numbers Game
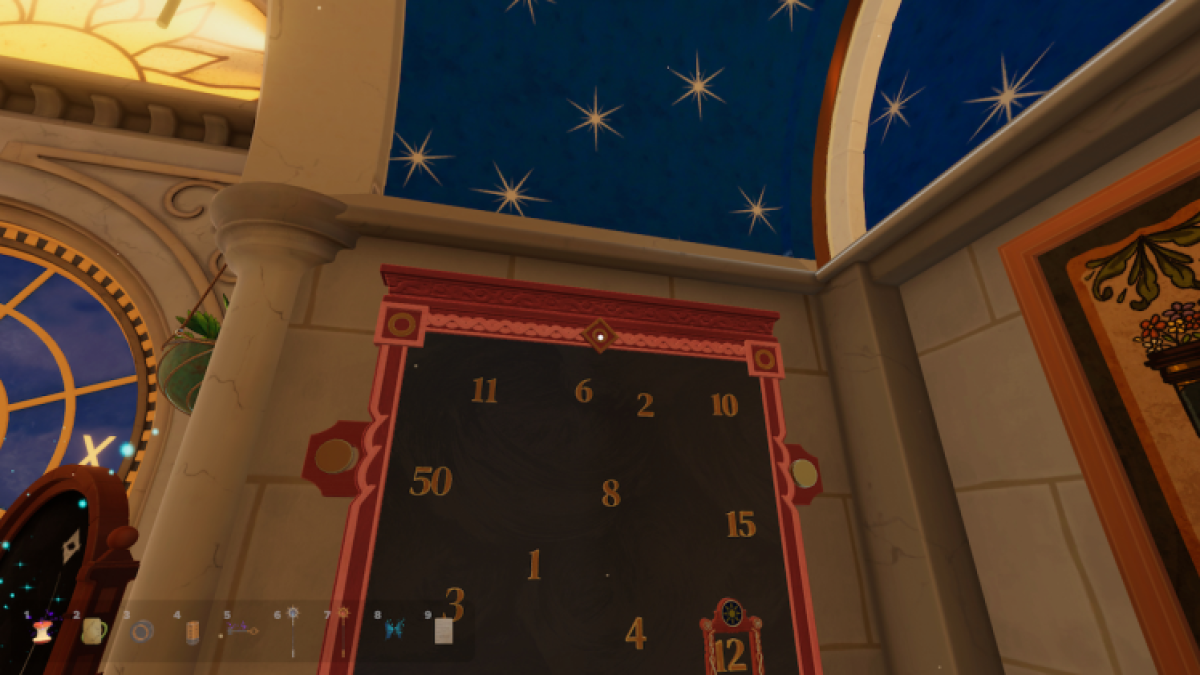
A Token can be found in the frame at the top of the number Blackboard. It is inside the ornamental diamond-shaped carving.
Masterpiece
If you use your Time Staffs to change the picture of the tree until it’s displaying autumn, a Token will appear in the bottom right.
Now that you know how to escape the Chronomancy Hall in the Magic DLC for Escape Simulator, why don’t you check out how to escape the Magic Shop and find the secret Tokens there?




Published: Feb 23, 2024 12:28 pm