Botany Manor consists of five chapters of challenging puzzles that even seasoned puzzlers may struggle with. If you’re having a hard time with any of it, or want a helping hand throughout the game, then I’ve got your back.
I will take you step by step through the game, pointing out all the clues and the process along the way. During my walkthrough of Chapter One, I’ll explain the processes with more depth to help those struggling to understand the systems so you can breeze past the Chapters after that.
Good luck, and happy planting!
All Botany Manor Chapters
- Chapter One – A Fresh Start
- Chapter Two – Survivors of Adversity
- Chapter Three – Peculiar Petals
- Chapter Four – Botanical Allies
- Chapter Five – Climbing Up
Chapter One – A Fresh Start
Our Chapter One walkthrough of Botany Manor will also cover the short introduction that’s technically not a part of Chapter One. Read on to find out how to grow your first plant and begin the game!
Starting out in Botany Manor
You’ll start Botany Manor in a very foggy greenhouse. At the far end, something glimmers.
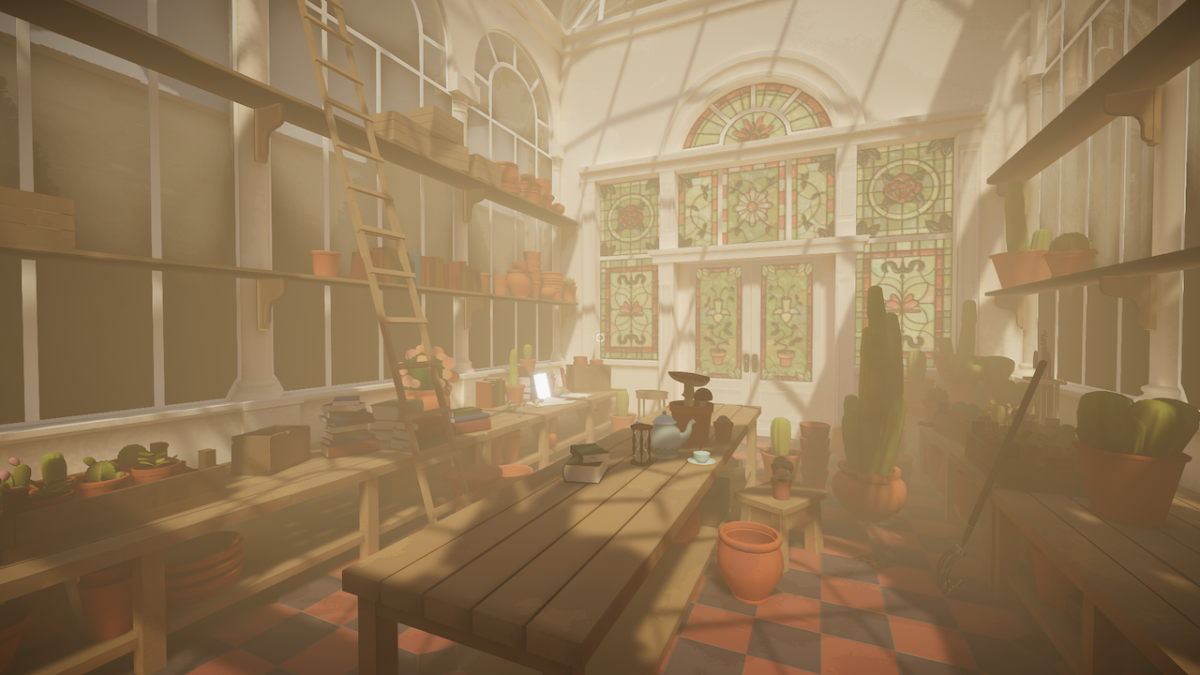
It’ll turn out to be a note and a parcel. You can interact with objects by pressing “E” for keyboard or “A” for controllers. The note will address you as Lady Arabella, who’s returned to the manor to embark on some research.
There are many notes around the game that add flavor and story, although aren’t integral to the game. I won’t be mentioning such notes moving forward. Although I’d strongly recommend reading through them all.
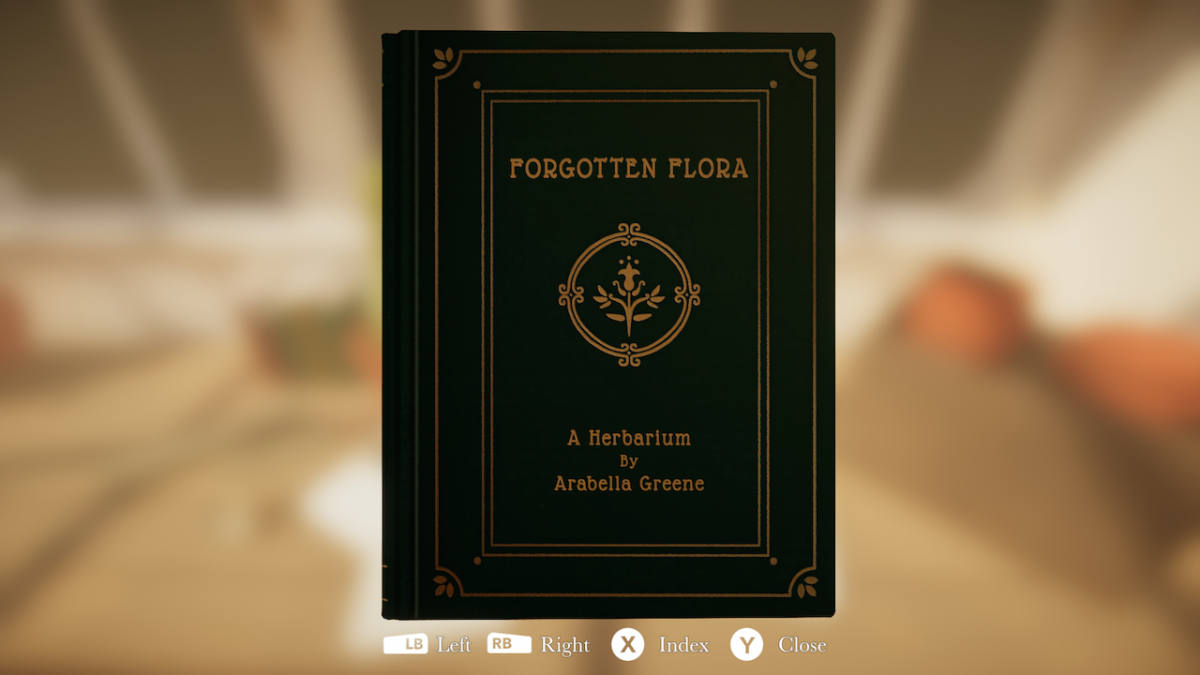
Upon opening the parcel, you’ll reveal an empty herbarium titled “Forgotten Flora.” This is the research Lady Arabella has returned to the manor for. To complete her herbarium.
This Herbarium is how you’ll progress through the game. There are five chapters, each with different plants that you need to make bloom by solving puzzles to fill out your Herbarium.
You’ll find maps in the Herbarium that will take you through the manor as you unlock rooms through progressing through the chapters. Each chapter’s pages will reveal to you the plants you need to complete, their associated clues, and an index of all clues found / yet to be found for that chapter.
There isn’t much in the Herbarium right now, so you can close it and walk through the doors to begin the first chapter.
How to grow Windmill Wart in Botany Manor
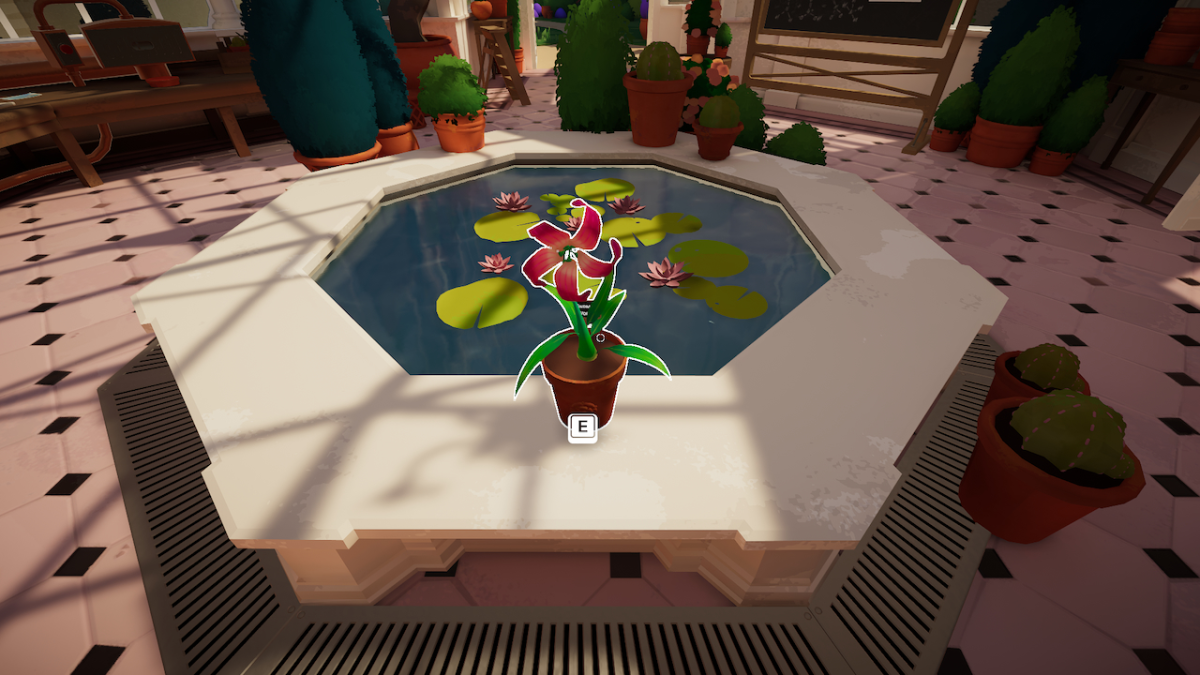
Chapter One only consists of one plant — the Windmill Wart. Arabella’s entry on the plant says that the plant can clear the smoggy air in the conservatory. To move forward, you need to grow it.
Windmill Wart seed packet location
First things first, we’ll need to find the seed packet before we go about growing the Windmill Wart.
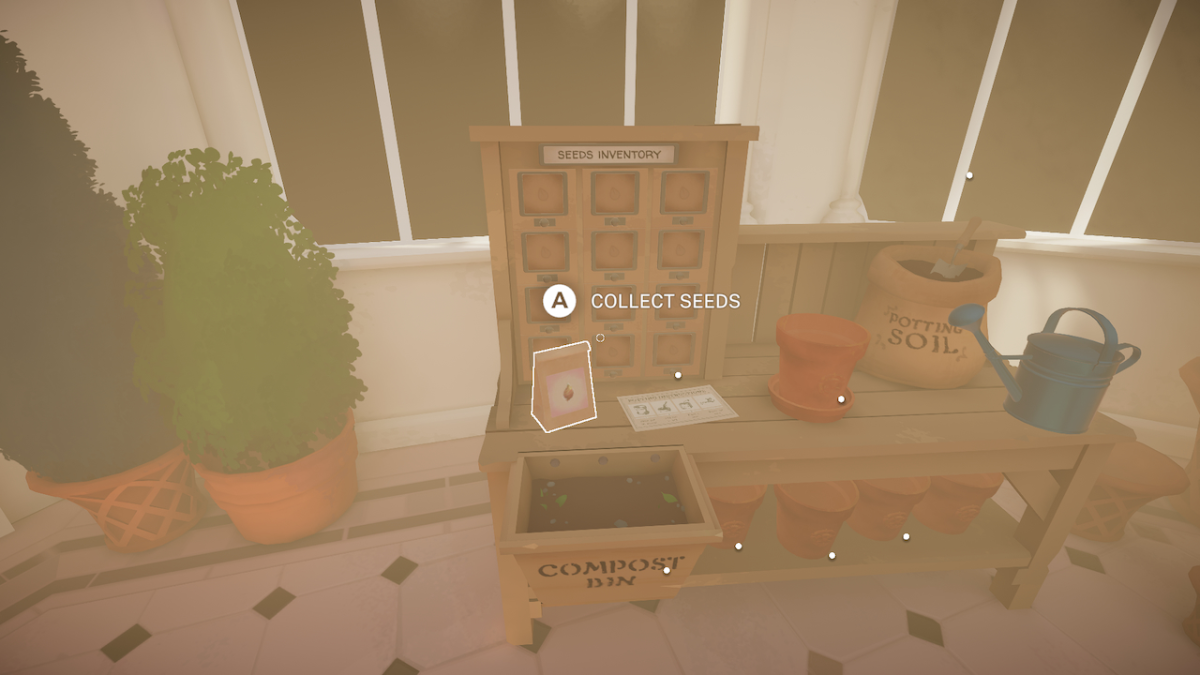
Immediately to your left will be the potting station, with the Windmill Wart seed packet right on it. Interact with it to collect it. You’ll receive the entry in the Herbarium.
You’ll now also notice the seed entering the Seeds Inventory in the potting station.
How to sprout the Windmill Wart
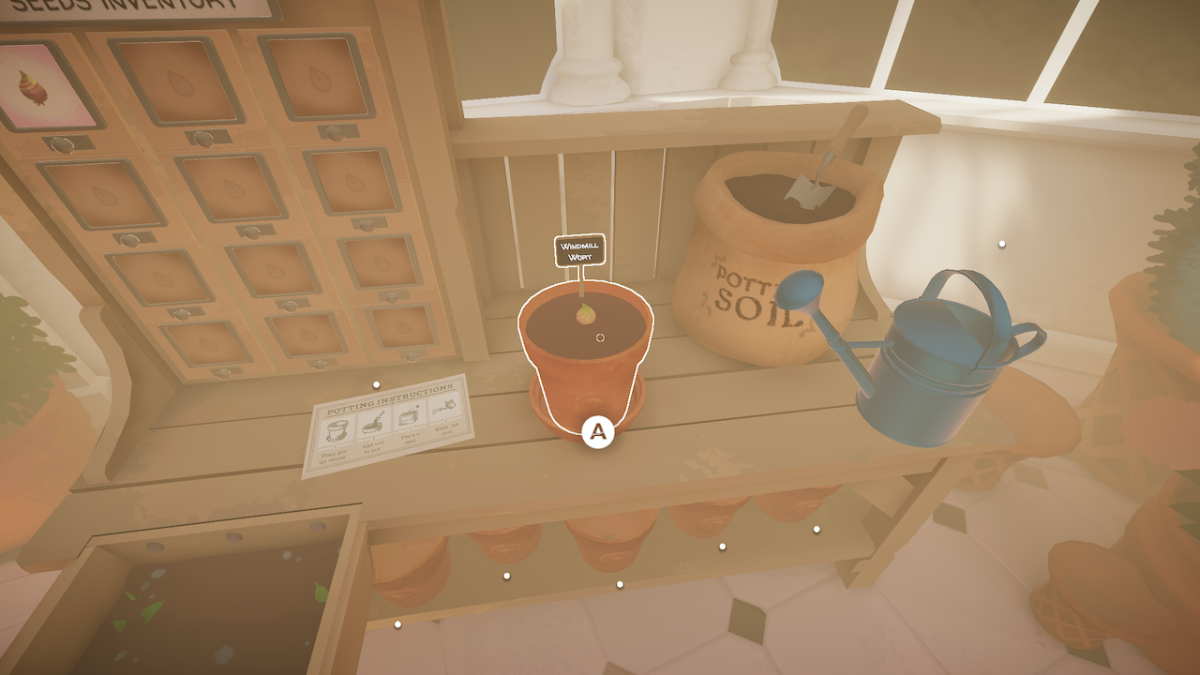
As it’s the first plant in Botany Manor, the Windmill Wart is easy to pot. At the potting station, complete the following steps:
- The Plant Pot is already on the disk, so you can interact with the Potting Soil to fill it with soil.
- Look at the Windmill Wart seed in the Seeds Inventory and interact with it to input the seed into the Plant Pot.
- Interact with the watering can.
With this process completed, you’ll notice the Windmill Wart seedling sprout from the seed.
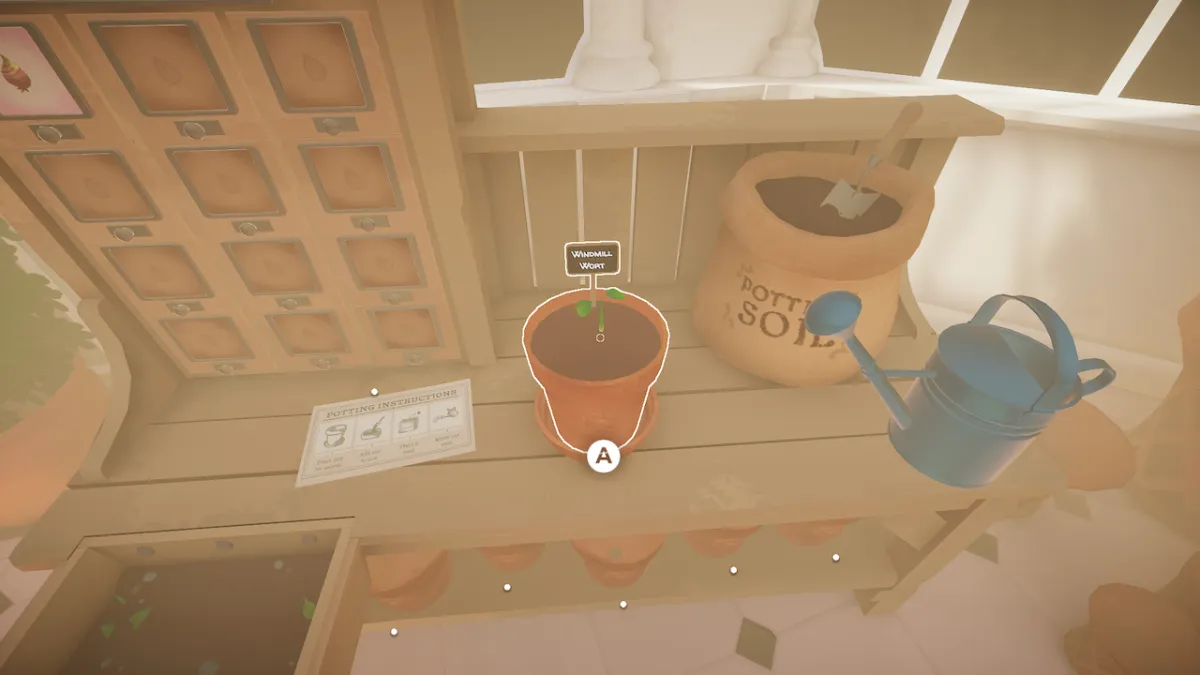
Potting the plants and sprouting them may be a puzzle itself for future plants — it may not always be this easy!
Now that we’ve successfully sprouted the Windmill Wart, we can try to bloom it, which will require some puzzle-solving skills.
All Windmill Wart clues locations
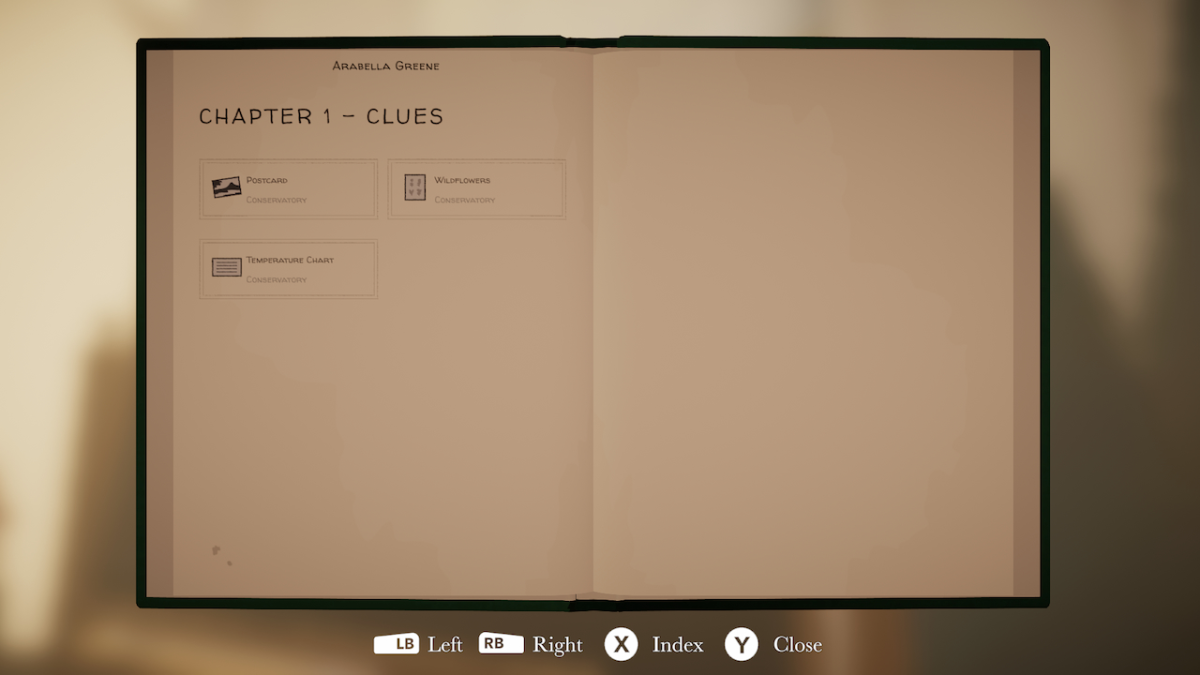
To bloom and grow any plant in Botany Manor, we need to figure out the process. The clues are what we’ll be using to do that.
In every chapter in Botany Manor, clues will be scattered around the rooms associated with that chapter. It’s up to you to tie the clues together to bloom each plant. Upon successfully pairing the right clues with a plant, the Herbarium will seal them in place so you know you’ve got the correct clues for that plant.
In Chapter One’s case, there’s only one plant, so all clues will tie to the Windmill Wart. We’ll still have to find them and insert them, however, before we can figure out what we need to do.
Here are all the clues and their locations for the Windmill Wart in Botany Manor:
1. Postcard.
The Postcard can be found on the table at the far end of the conservatory, next to the newspaper.
2. Wildflowers.
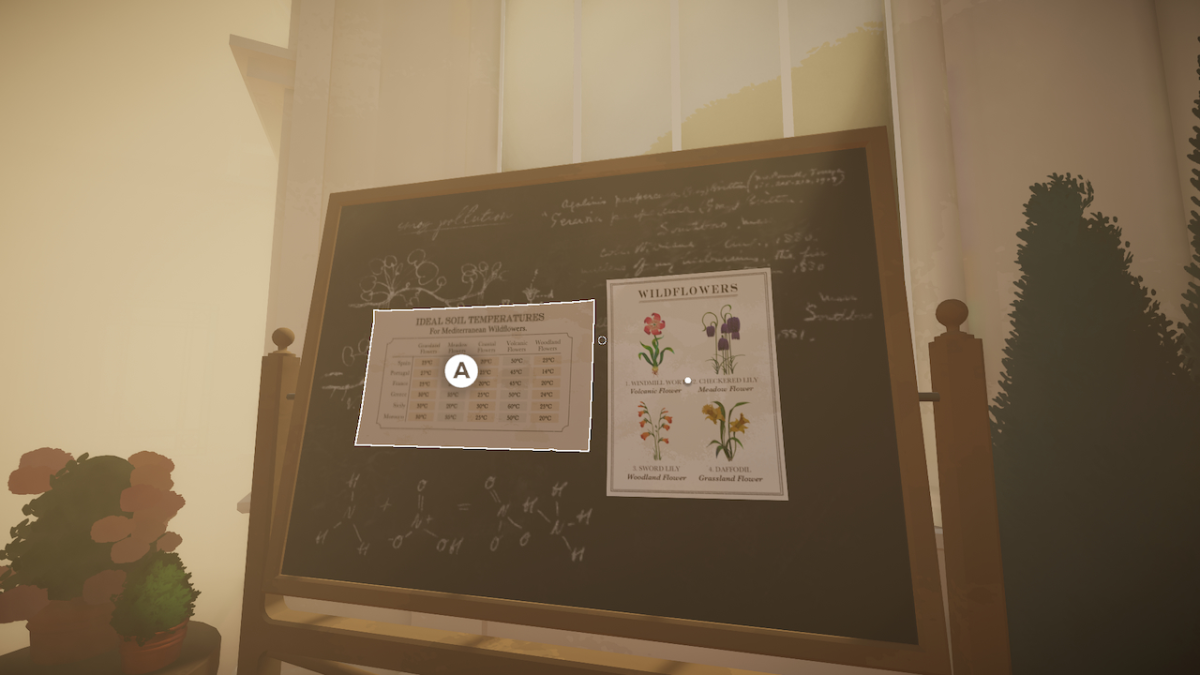
The Wildflowers illustrations can be found on the blackboard to the right of the entrance.
3. Temperature Chart.
The Temperature Chart can be found on the blackboard to the right of the entrance.
With all the clues collected, we can add the clues to the Windmill Wart entry.
Head to the page and select “Add Clue.” Select any of the clues we’ve found. Do this for all three clue entries. You’ll notice the clues becoming permanent fixtures in the page.
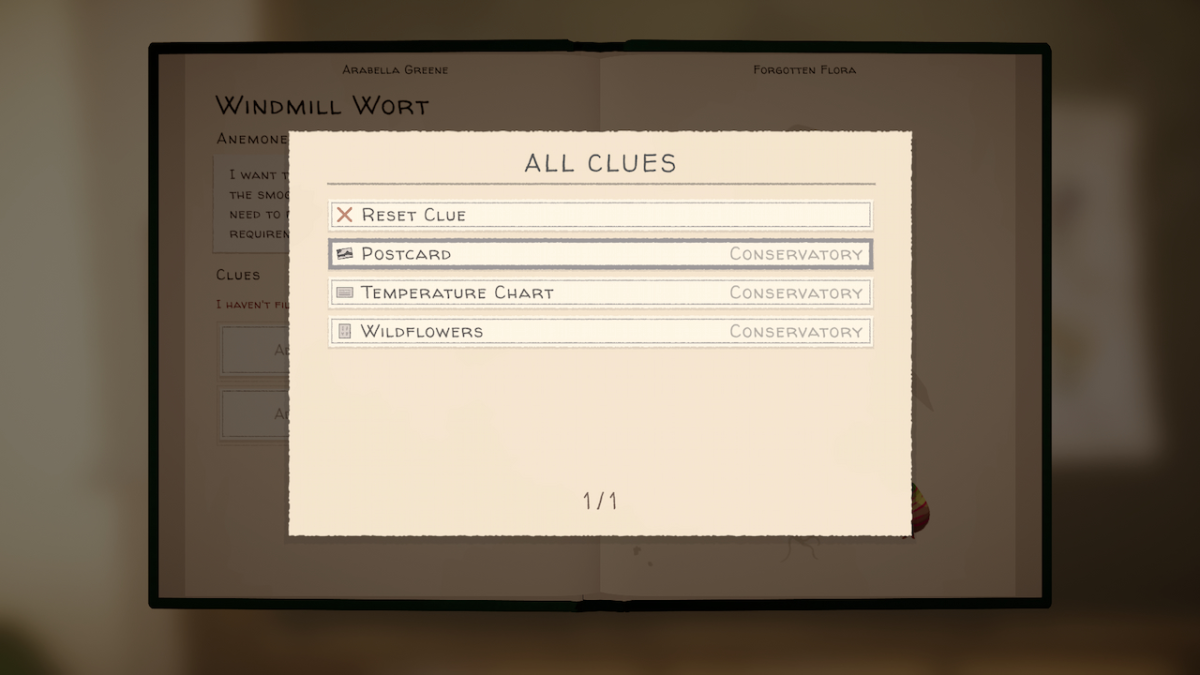
This means that we have all the right clues and can observe them in greater detail to piece together how to bloom the plant.
How to bloom the Windmill Wart
Let’s piece together the clues to figure out how to grow the Windmill Wart plant in Botany Manor.
Finding the right temperature
The entry of the Windmill Wart connotes that we’ll need the right temperature for it to bloom. The clues will help us find it.
The Postcard tells us that the Windmill Wart exclusively grows in Sicily.
The Wildflowers illustration shows us that the Windmill Wart is a Volcanic Flower.
Using this information, we can use the Temperature Chart to find out the perfect soil temperature for the Windmill Wart. By using the Sicily row and Volcanic Flowers column, we can pinpoint the temperature 60°.
Now that we know the right temperature, all we need to do is place the Windmill Wart somewhere that’ll reach 60° to stimulate it to bloom.
Raising the temperature to grow the Windmill Wart
You’ll notice two extra features of the conservatory: The Boiler and the Heat Vent. We’ll be using these to raise the temperature.
Firstly, pick up the Windmill Wart Seedling and place it in front of the Heat Vent.
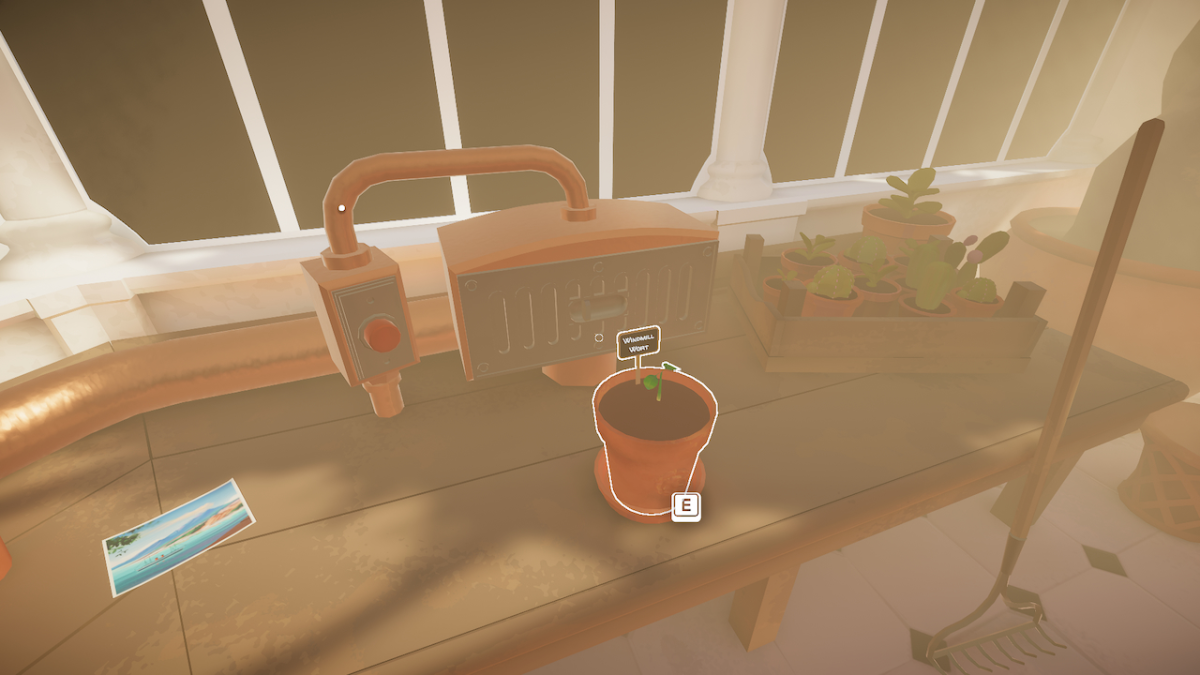
Now, go to the Boiler to up the temperature for the Heat Vent. Look to the left side of the valve and interact with it to increase the temperature. Keep doing this until the dial on the left points to 60°.
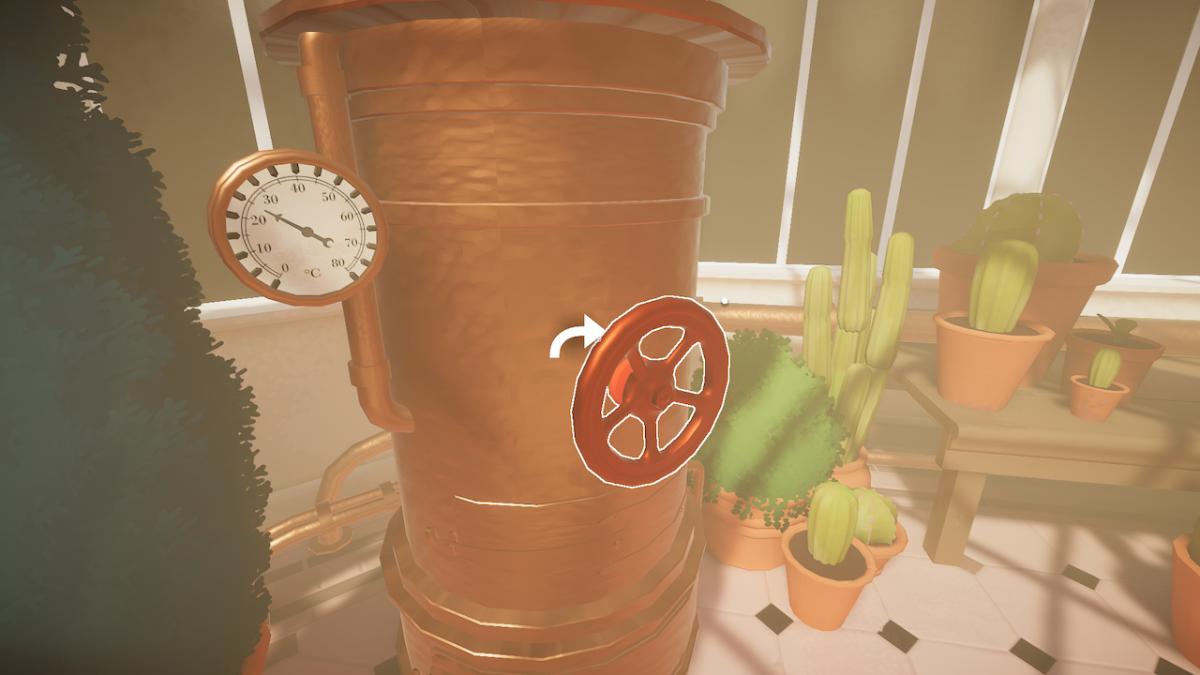
Now that we’ve got the right temperature, you can return to the Heat Vent and your Windmill Wart Seedling.
Interact with the Heat Vent to open it, allowing the hot air to embrace the Windmill Wart Seeding.
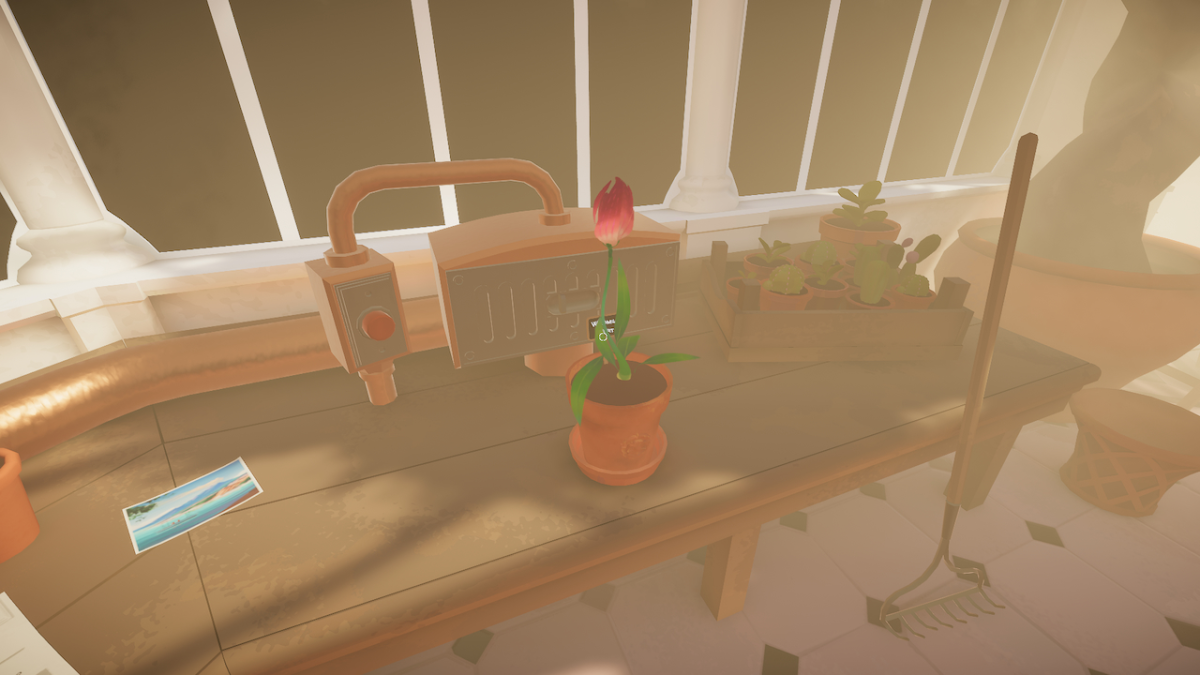
You can now watch in satisfaction as the Windmill Wart blooms!
The air in the conservatory will clear, and the Windmill Wart entry will be complete for you to see in your herbarium.

Finishing Chapter One
With the Windmill Wart grown, and your herbarium complete for Chapter One, all you can do now is exit the conservatory.
Walk along the scenic path and go through the blue door. Continue walking down the path until you get to a crossroads.
You’ll notice the Manor on your left, behind a locked gate. To unlock the gate, we’ll need the key, which we can get from the gatehouse.

Take the right path down and you’ll come across the gatehouse, with a key in the bowl on the stand. Collect it. The key is the Entrance Garden Key, and we’ll use it to gain access to the Manor.
We’ll be returning to the Gatehouse often to receive items necessary for progress after finishing certain chapters, so get familiar with the pathing.
Walk past the waterfall and into the manor. Open the door and walk into the Main Hall to begin Chapter Two!
Chapter Two – Survivors of Adversity
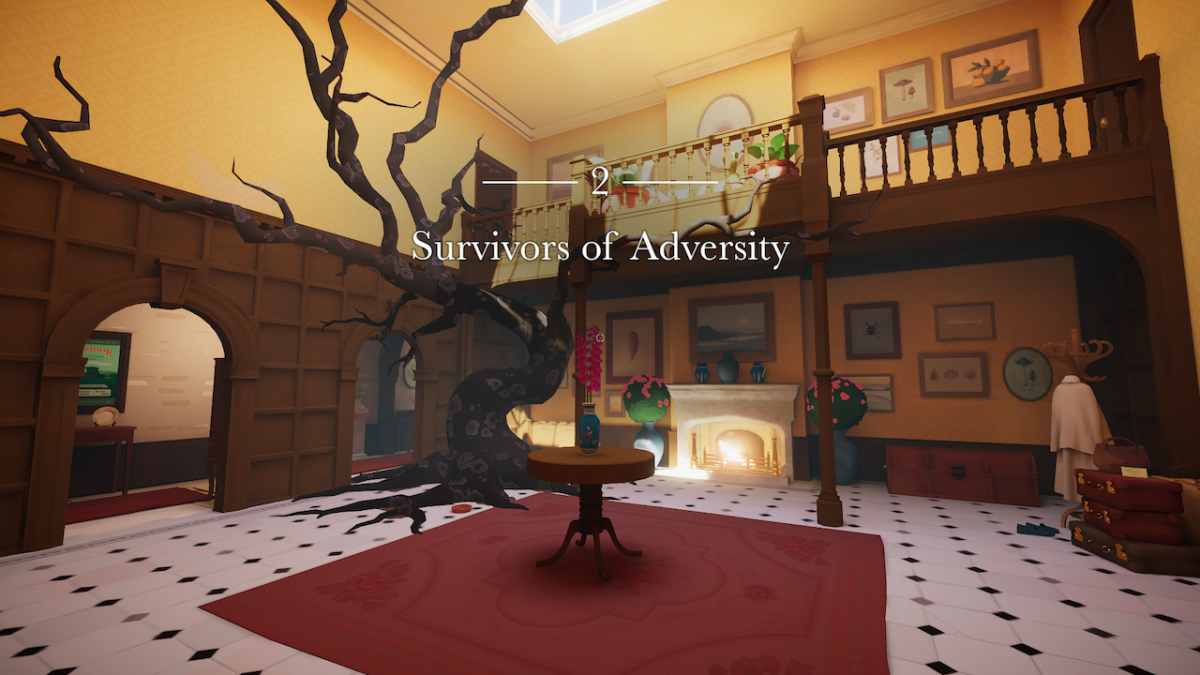
- How to grow the Fulguria in Botany Manor
- How to grow the Ash Plume in Botany Manor
- Finishing Chapter Two
Chapter Two is where the game truly begins. There are two plants to grow and a combined total of 12 clues for you to assign to the plants.
This time around — and for all future chapters — we’ll be going over the clues before we get into sprouting the plants.
Let’s begin!
How to grow the Fulguria in Botany Manor
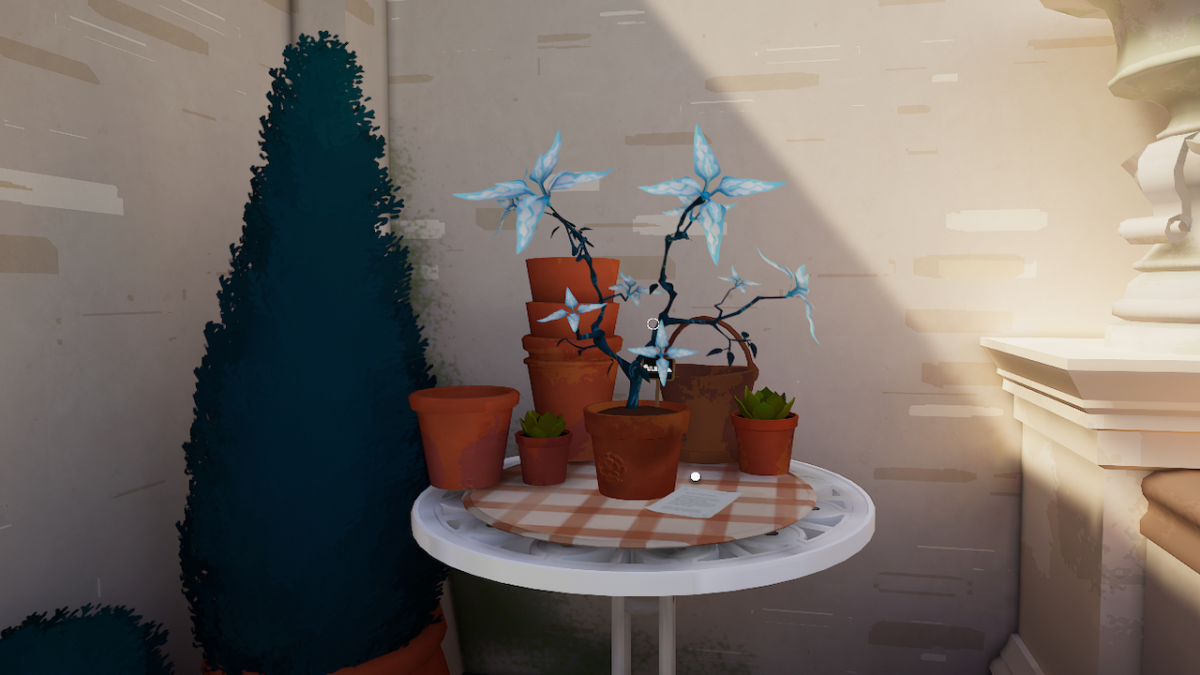
Arabella notes that she encountered the Fulguria during a thunderstorm.
Let’s go over how to grow the Fulguria in Botany Manor.
Fulguria seed packet location
Before we begin growing the Fulguria in Botany Manor, we need to find the seed packet.
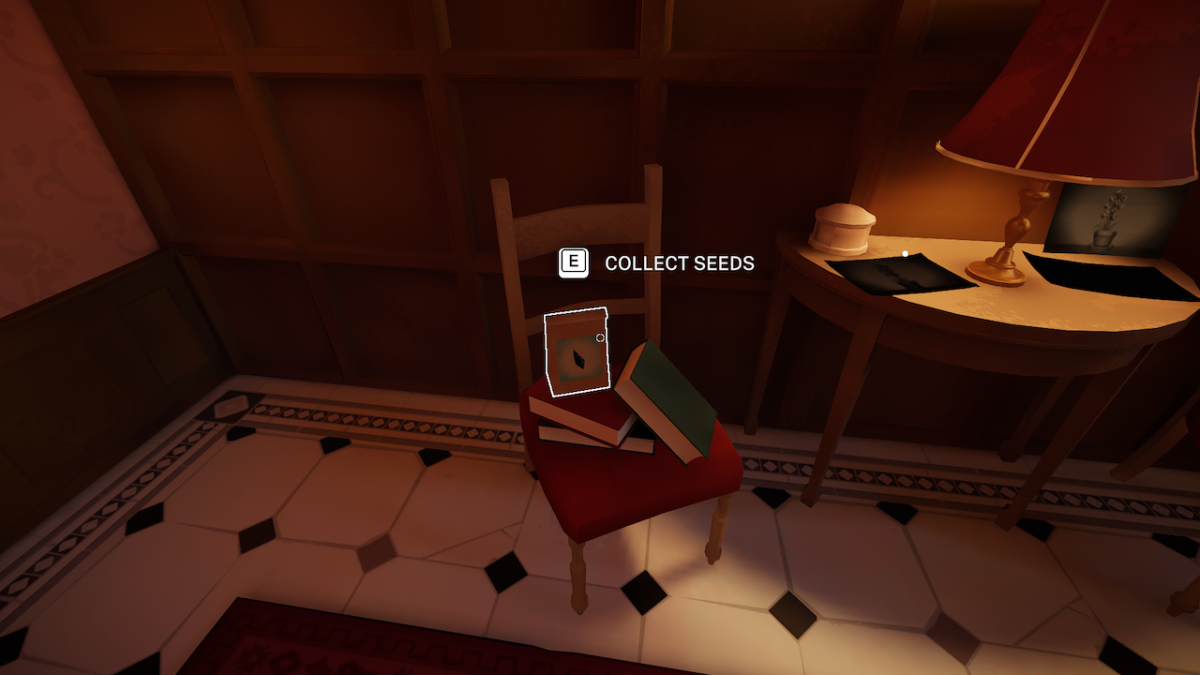
You’ll find the Fulguria seed packet on a chair in the Grand Staircase.
To get here, simply take a right when in the main hall.
All Fulguria clues locations
Finding all five clues for the Fulguria is easy, as they’re all rather close together. You’ll only need to access the Grand Staircase, the Dining Room, and the Drawing Room, which can be visited one after the other if you follow the map in the herbarium.
Although the Apothecary is also present in the chain of rooms, it’s not needed for the clues, only as part of the solution.
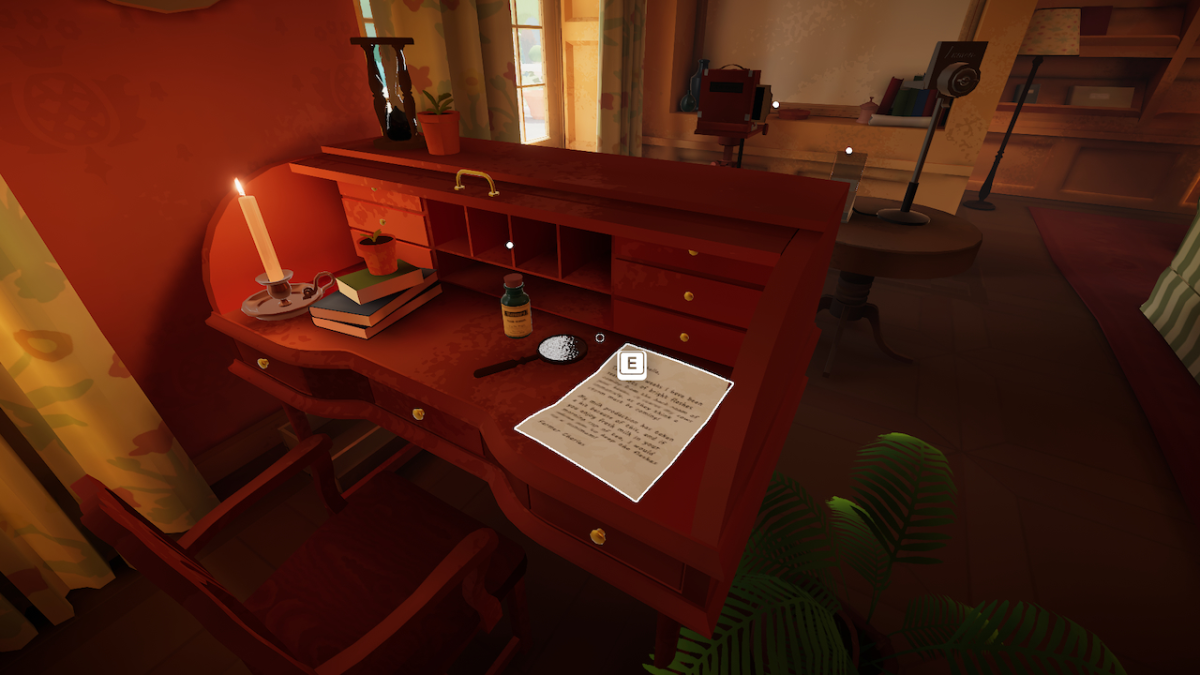
Here are all the clue locations for the Fulguria in Botany Manor:
1. Folklore Book.
The Folklore Book can be found in the Dining Room on the table with candles.
2. Flash Lamp Manual.
The Flash Lamp Manual can be found in the Drawing Room on the table by the fire.
3. Flash Powder Bottle.
The Flash Powder Bottle can be found in the Drawing Room on the desk.
4. Letter from Farmer.
The Letter from the Farmer can be found in the Drawing Room on the desk.
5. Photographs.
The Photographs can be found in the Grand Staircase on the table with the lamp.
Once you’ve found these clues, add them to the Fulguria entry in the herbarium. We can now get to solving the puzzle.
How to sprout the Fulguria
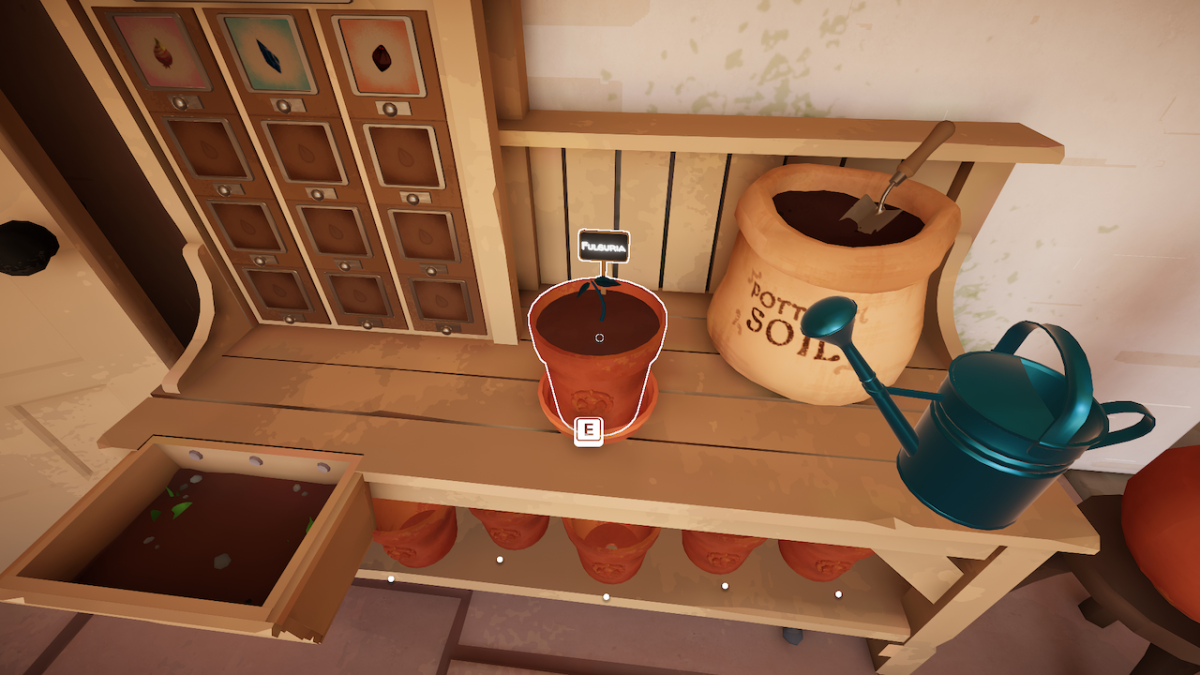
Thankfully, sprouting the Fulguria is easy. You can pot it like normal and use the watering can. It’ll sprout from the seed to become a Fulguria Seedling.
The hard part is blooming it.
How to bloom the Fulguria
To bloom the Fulguria in Botany Manor, we’ll have to examine the clues given to us and employ some chemistry.
Figuring out how the Fulguria Blooms
The Folklore Book tells us that the Fulguria only blooms during thunderstorms, which means we’ll have to simulate a crack of thunder.
The letter from the farmer tells us that there have been bright flashes in the “back room” (which can be concluded to be the Drawing Room) which are mistaken for lightning by his cows.
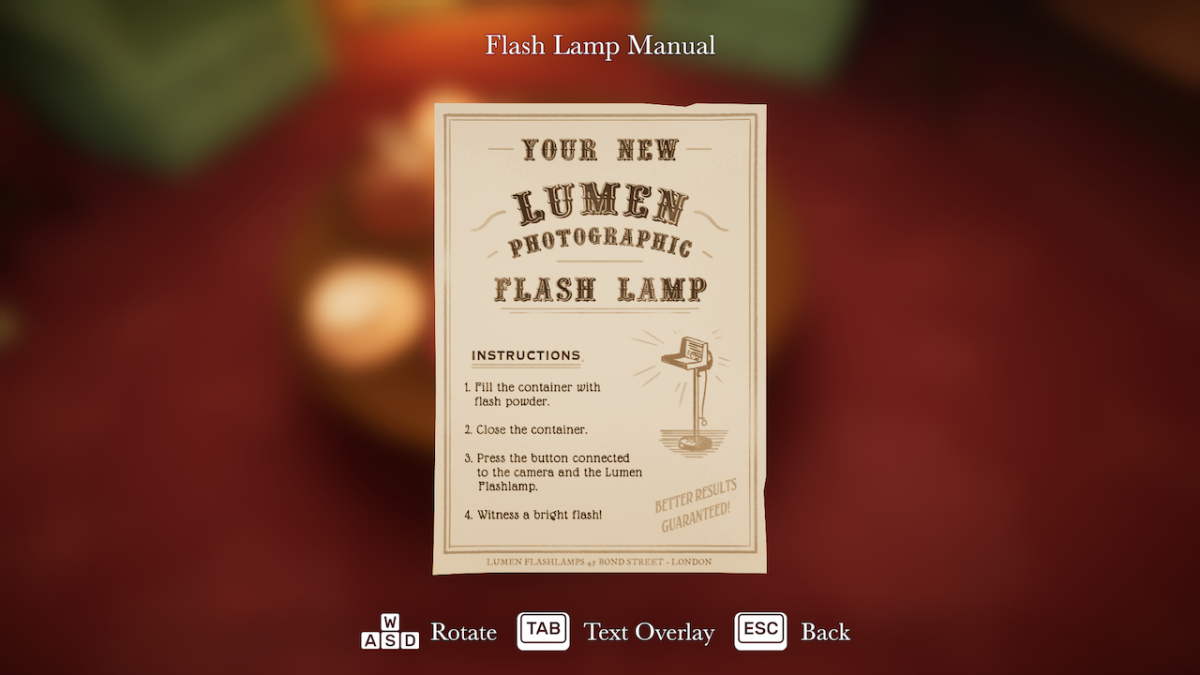
The only thing that could be producing this flashing is Lumen Photographic Flash Lamp (which we can gather from the Flash Lamp Manual) which is being used in the Drawing Room to produce a bright flash for clearer and brighter photographs.
The photographs show us the extent of the flashing light that the Flash Lamp produces. The back of the third photograph also tells us how quick it is to run out of the Flash Lamp Powder that is used to create the flashes.
So if we want to simulate a thunderstorm to bloom the Fulguria, we’ll need to operate the Flash Lamp to trick the Fulguria into blooming.
Making the Flash Powder
The Flash Lamp Manual tells us that to produce the flash, we must fill the Flash Lamp container with Flash Powder.
Unfortunately, the Flash Powder Bottle we’ve found is empty. So, we’ll need to make some more. The Apothecary has everything we need to make some more.
The Flash Powder Bottle mentions the ingredients and composition on the back of it. Inspect the bottle and turn it around to find the Chemical Composition of the Flash Powder, which is Potassium and Magnesium at a 2:1 ratio.
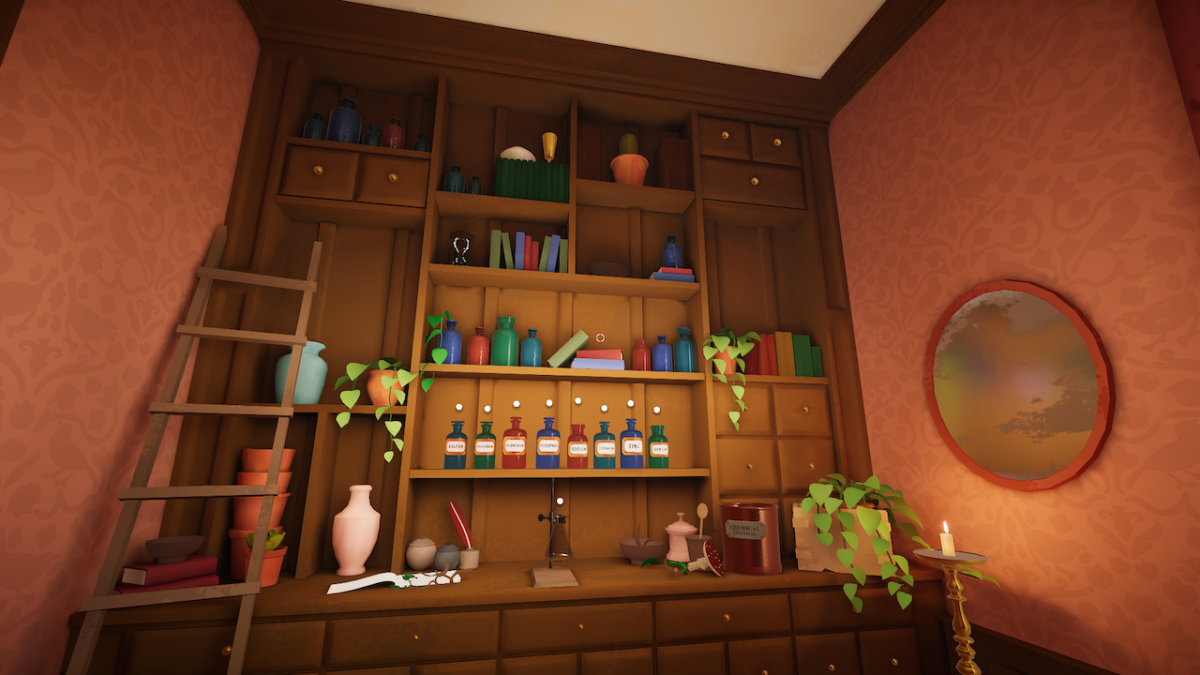
Head back to the Apothecary. You’ll find in front of you a shelving unit full of chemicals.
Interact with the Potassium twice and the Magnesium once to add them to the flask. Then, pick up the flask and return to the Drawing Room. If you made a mistake, take the flask to the Chemical Disposal to the right of the chemicals.
Go to the Flash Lamp and add the chemical concoction to the container.
Operating the Flash Lamp
With the Flash Powder safely in the container, we’ll have to operate the Flash Lamp to bloom the Fulguria.
Pick up the Fulguria Seedling and place it on the dish in front of the camera setup.
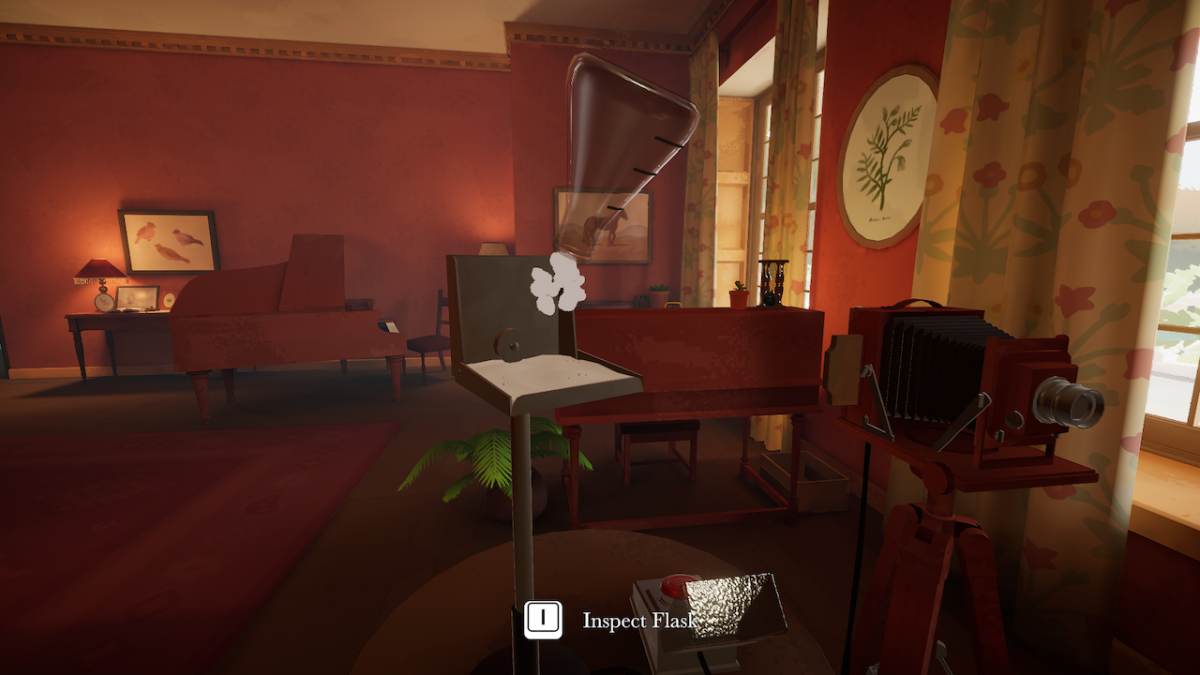
Interact with the Flash Lamp container to close it. Then, when you’re ready, click the red button to activate the flash!
You’ll take a magnificent picture of the Fulguria and it’ll bloom.
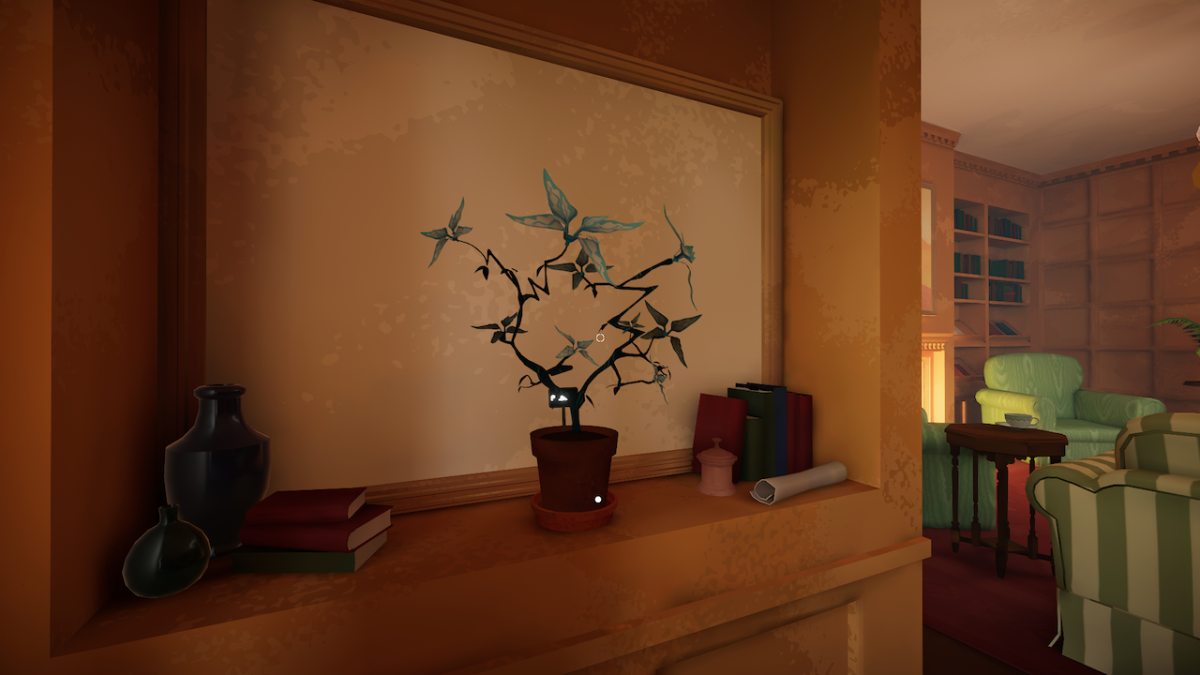
The entry of the Fulguria will be complete, and you can proceed to grow the Ash Plume to complete Chapter Two.
How to grow the Ash Plume in Botany Manor
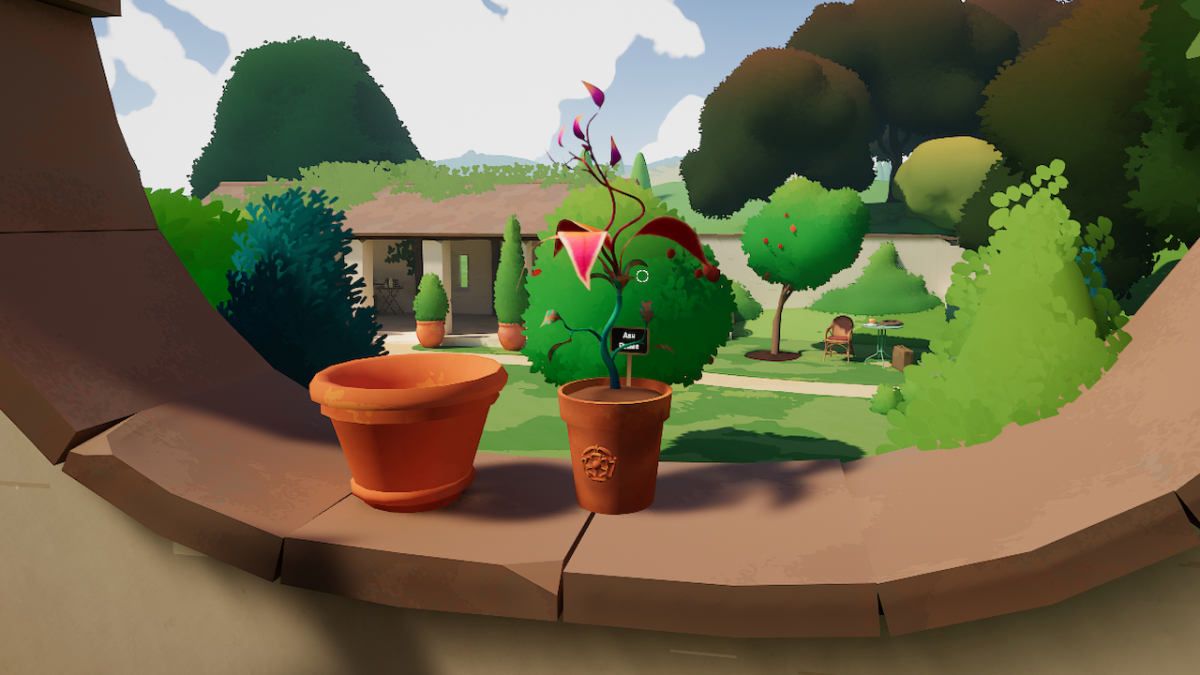
Arabella only notes that the Ash Plume may be a tough case to crack, which is a subtle clue about the sprouting process.
Let’s go over how to grow the Ash Plume in Botany Manor.
Ash Plume seed packet location
The Ash Plume seed packet is harder to locate than the Fulguria in Botany Manor, but only because it’s a little more out of the way.

You’ll find the Ash Plume seed packet in the Rose Garden, accessed through the locked Back Terrace door. We’ll need to find the Back Terrace Key to proceed.
The Back Terrace Key is in the Drawing Room in a bowl past the piano. On the first floor of the Grand Staircase, walk through the closed door to enter the Apothecary. Then, walk through the next closed door into the Dining Room. Finally, the Drawing Room will be past the next closed door.
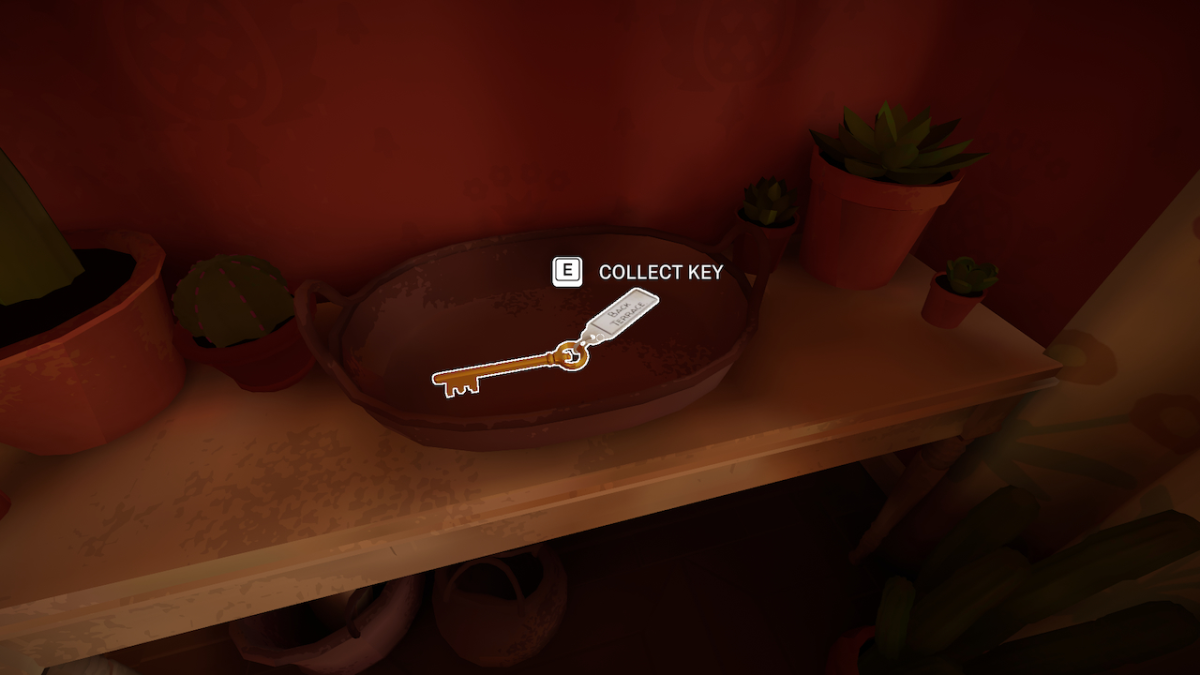
Walk past the piano to find the keys.
Make your way back through to the Main Hall and walk through it into the Screens Passage. At the end of that is the locked Back Terrace that you can now unlock.
In the Rose Garden, walk down the stairs and you’ll see the Ash Plume seed packet twinkling at you.
All Ash Plume clues locations
The Ash Plume’s clues locations are scattered a little further afield than the Fulguria’s clues were. Finding the seven clues for the Ash Plume will take you through the Rose Garden, the Screens Passage, the Kitchen, the Servant’s Hall, then finally the Kitchen Garden.

The Kitchen, however, is locked. So you’ll need to grab the key first. In the Viewpoint, attached to the Rose Garden where you found the Ash Plume seeds, is the Kitchen Key in a bowl.
Now we can hunt for all our clues uninterrupted!
Here are all the clue locations for the Ash Plume in Botany Manor:
1. Dartmoor Lecture.
The Dartmoor Lecture can be found in the Kitchen on the table before the stove.
2. Cooking Book.
The Cooking Book can be found in the Kitchen on the table in the middle.
3. Smoking Book.
The Smoking Book can be found in Kitchen Garden on a table before the Smokery.
4. Seed Log.
The Seed Log can be found in the Rose Garden on the table down the stairs.
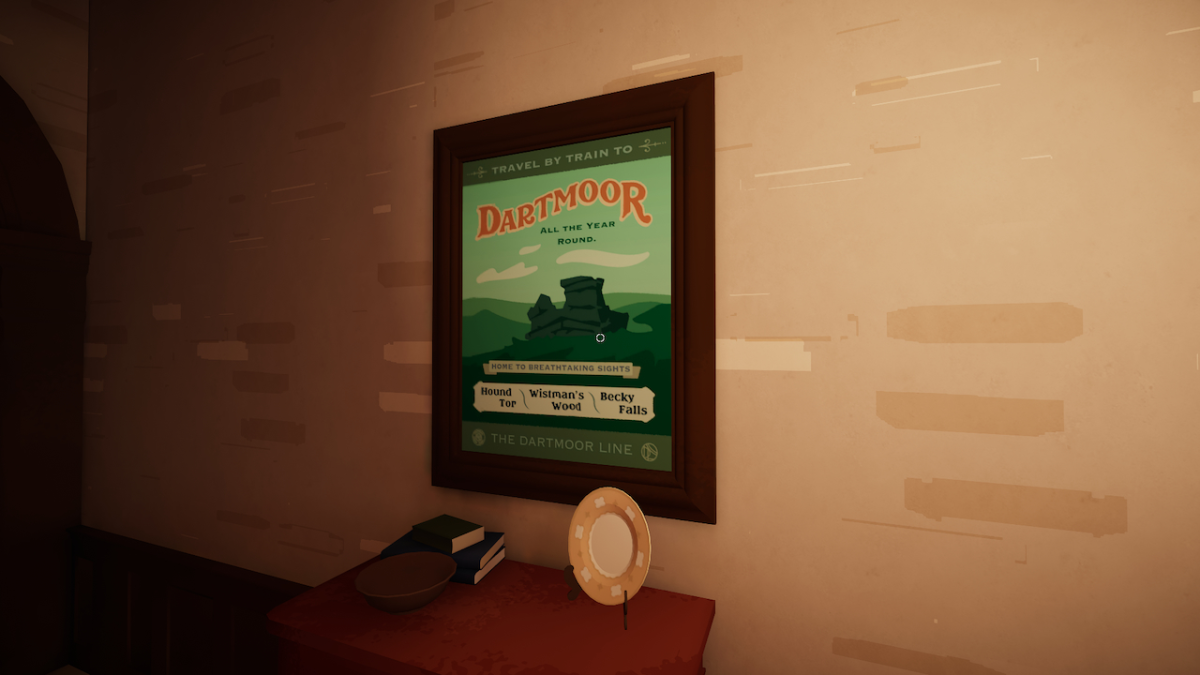
5. Dartmoor Poster.
The Dartmoor Poster can be found in the Screens Passage on the wall.
6. Pyrophiles.
The Pyrophiles Book can be found in the Screens Passage on a table.
7. Poem.
The Wistman’s Wood Poem can be found in the Servant’s Hall on the wall.
Now we’ve got all the Ash Plume clues, you can add them to the entry in the herbarium.
How to sprout the Ash Plume
Sprouting the Ash Plume isn’t as easy as the previous two plants.
Upon placing a new pot on the dish, filling it with soil, and adding the Ash Plume Seed, you’ll notice that watering it doesn’t crack the seed and sprout the plant. If you were paying attention to the contents of the clues, you’ll realize why.
We know that the Ash Plume’s seed is tough. The subtle hint Arabella gives us through the Ash Plume being a “tough case to crack” and the fact that watering it doesn’t do anything suggests this.
The Cooking Book mentions that Chestnuts, also with tough shells, are able to be cracked open thanks to fire.
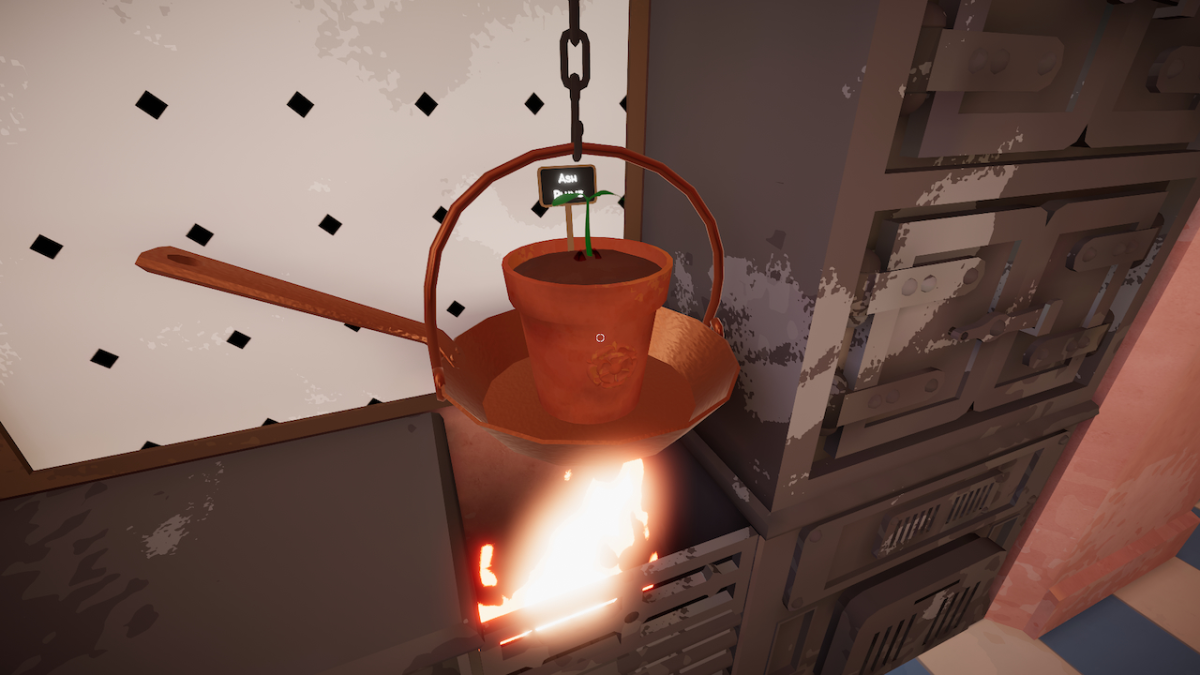
In the Kitchen, you’ll notice a lit flame with a pan hanging over it. Place the Ash Plume Seedling upon the pan, give it a few moments, and you’ll watch it sprout!
How to bloom the Ash Plume
With a sprouted Ash Plume, let’s get to blooming it.
Figuring out how the Ash Plume blooms
The Pyrophiles Book connects the Ash Plume to being a Pyrophile plant. We can see this as Pyrophiles and the Ash Plume both have tough seeds, and the Ash Plume required fire to sprout.
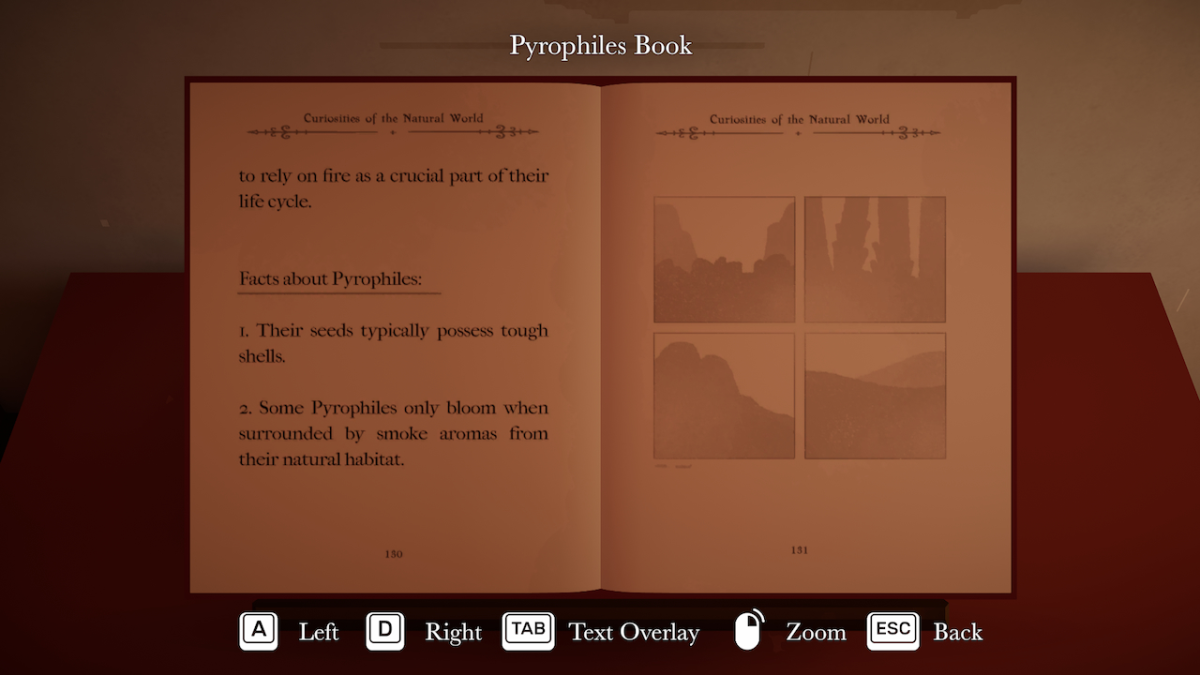
With this connection, we can learn how to bloom the Ash Plume by learning how Pyrophiles bloom, which the Pyrophiles Book tells us is by being surrounded by smoke aromas from the plant’s natural habitat.
Finding out the Ash Plume’s natural habitat
The Seed Log in the Rose Garden tells us that the Ash Plume grows in Wistman’s Wood. The Dartmoor Poster tells us further that Wistman’s Wood is found in Dartmoor.
The Dartmoor Lecture tells us that early settlers in Dartmoor used fire to clear trees to make a pasture – connecting fire and smoke with the Ash Plume’s natural habitat – Wistman’s Wood.
Creating the smoke aromas for the Ash Plume
So we know that the Ash Plume can only bloom from smokey aromas in their natural habitat, and we know that Wistman’s Wood is their natural habitat. We just now need to find out how to produce smoke.
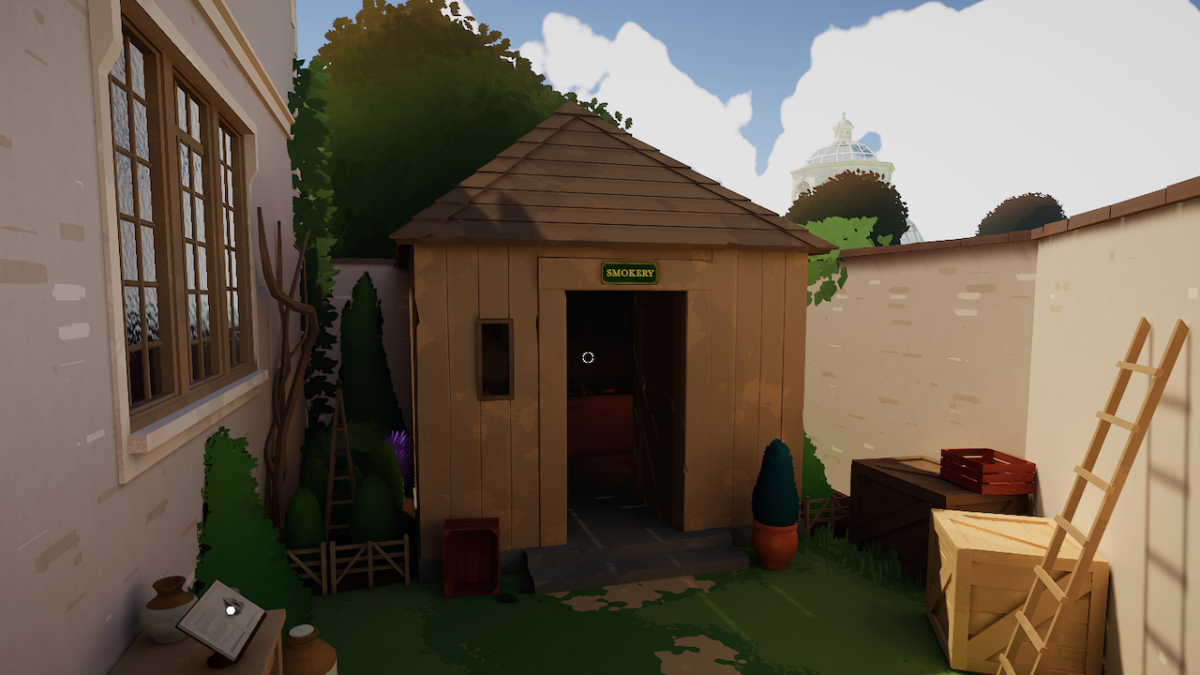
Thankfully, in the Kitchen Garden is a Smokery.
Pick up the Ash Plume Seedling and place it on the dish in the Smokery.
The Smokery Book tells us that different types of wood produces different aromas. In answer to that, the Poem tells us that Wistman’s Wood is populated by Oak trees.
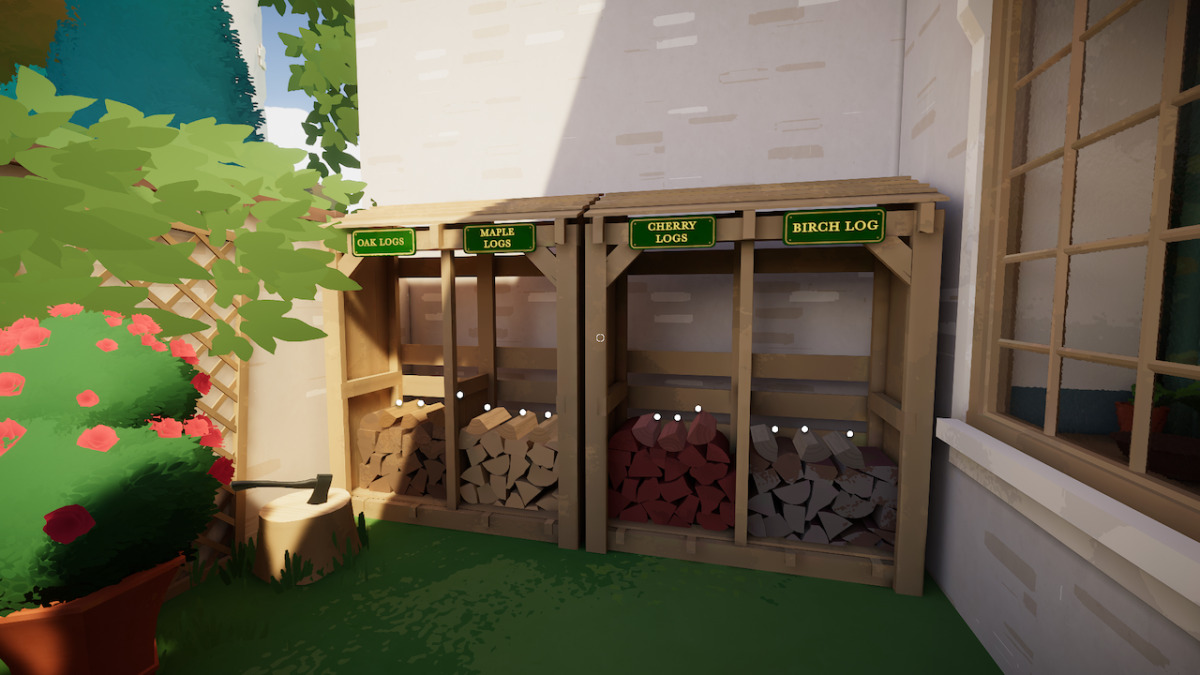
So take an Oak Log at the other end of the Kitchen Garden and carry it to the Smokery. On the floor of the Smokery, next to the dish, is an open flame. Place the log into the flame and it’ll smoke up, encouraging the Ash Plume to bloom!
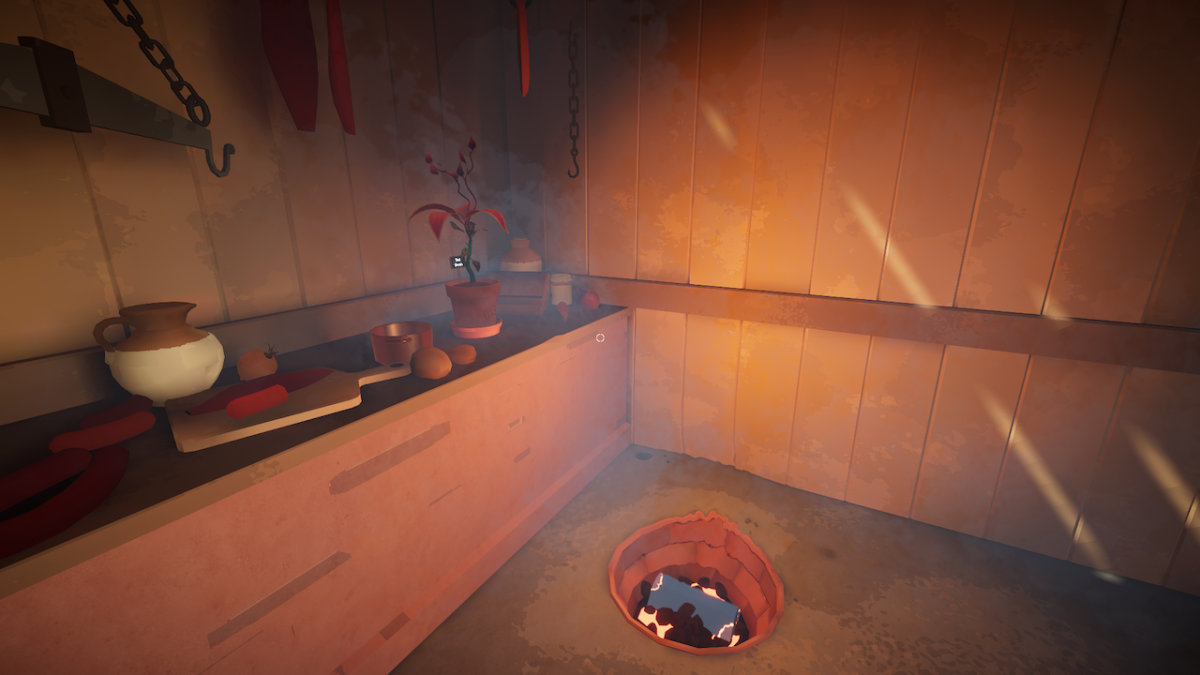
The entry for the Ash Plume will be completed.
Finishing Chapter Two
With the Fulguria and the Ash Plume entries completed, you’ll receive a delivery at the Gate House. So make your way back.
You’ll find the Orchard Key in the delivery bowl.
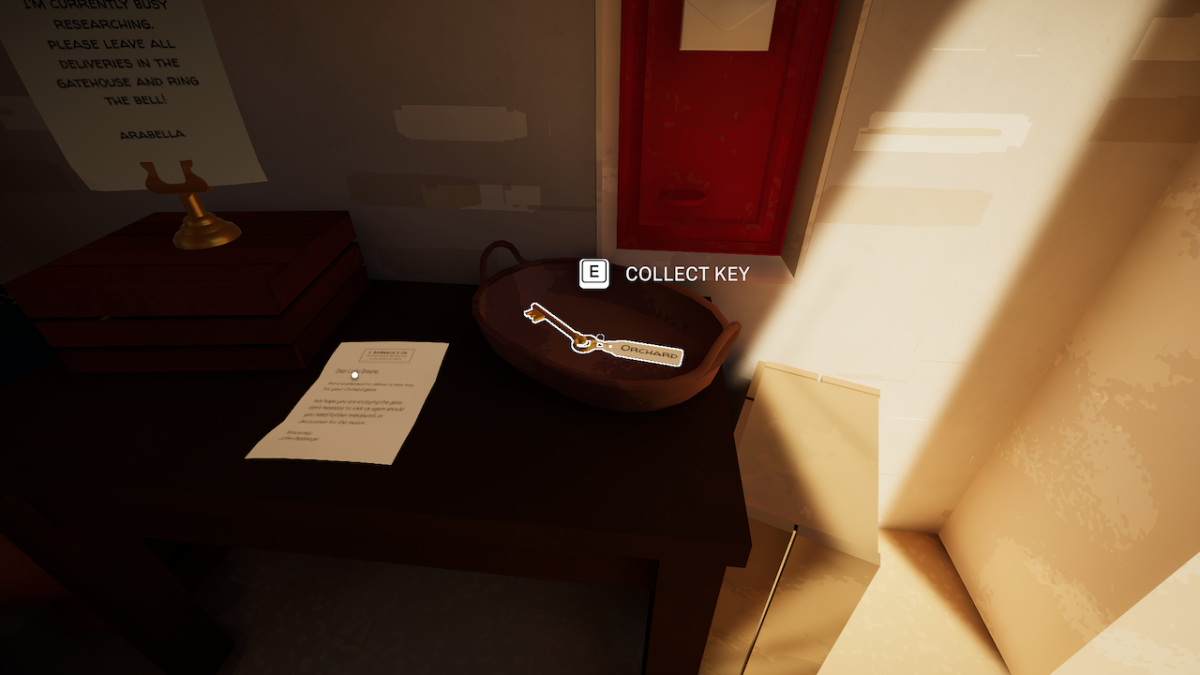
You’ll find the Orchard by walking back to the Manor and taking a left. Go through the blue door and you’ll see the locked gate with “Orchard” on it.
Chapter Three will begin!
Chapter Three – Peculiar Petals

- How to grow Pixie Tears in Botany Manor
- How to open the Priest Hole in Botany Manor
- How to grow Wolfglove in Botany Manor
- Finishing Chapter Three
Chapter three in Botany Manor brings us new areas to explore and two more plants to grow. There are 18 clues to find, although not all of them are dedicated toward growing the plants themselves.
We’ll start with growing the Pixie Tears, as that’s the easiest. Then we’ll tackle opening the priest hole and growing the Wolfglove.
Let’s get started.
How to grow Pixie Tears in Botany Manor
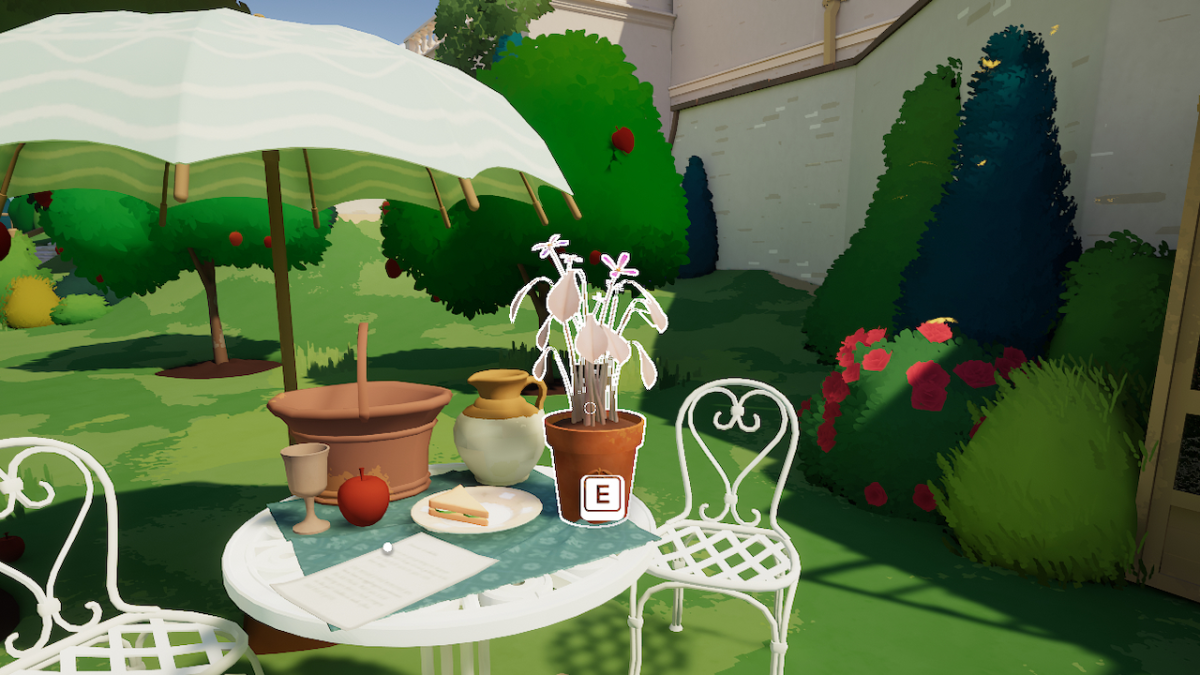
In the herbarium entry, Arabella notes that this plant is closely associated with Orchards, although she’s not sure why.
I suppose we’re about to find out.
Pixie Tears seed packet location
You’ll find the Pixie Tears in the shed in the Orchard.
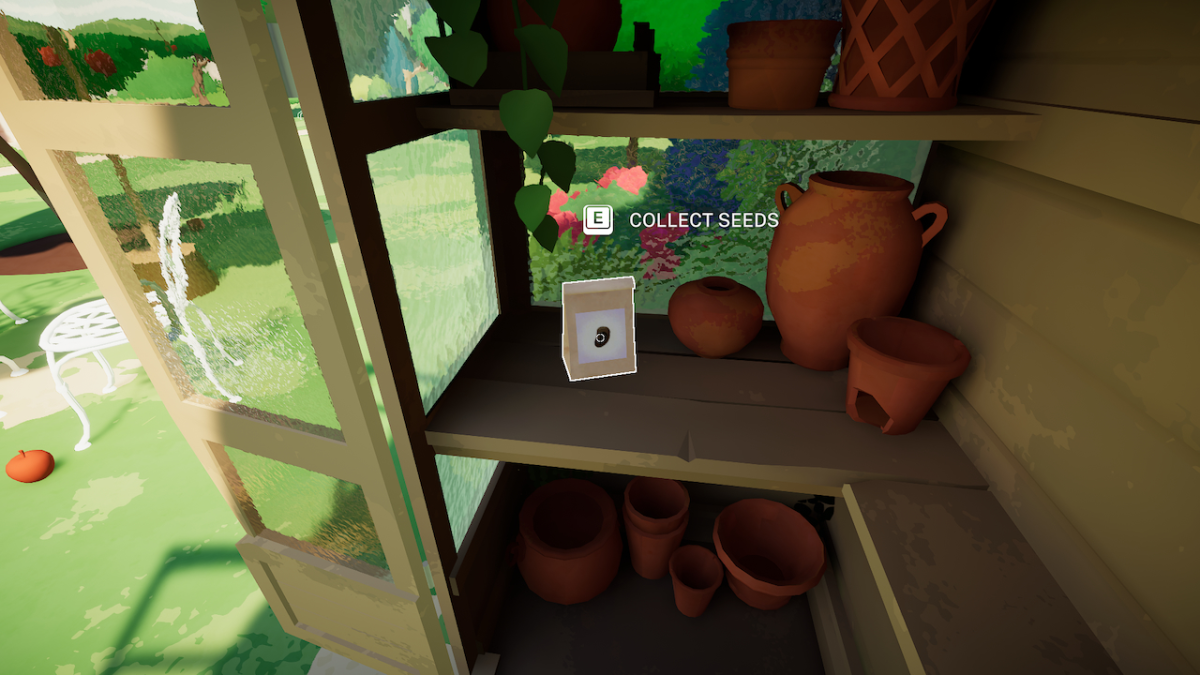
The shed itself is on the right when you enter the orchard. You’ll have to open the doors to get in.
All Pixie Tears clues locations
There are only five clues for the Pixie Tears, and like the Fulguria, the process for finding them is rather straightforward, as you’ll only need to enter the Orchard and the Cider Garden.
The Cider Garden can be accessed through the blue door on the left as you walk into the Orchard.

Here are all the clue locations for Pixie Tears in Botany Manor:
1. Apple Blending.
The note on Apple Blending can be found in the Cider Garden on the long surface to the right.
2. Cider Apples.
The Cider Apples poster can be found on the wall at the far end of the Cider Garden.
3. Microscope Slides.
The Microscope Slides can be found on the table under the covered patio in the Orchard. Make sure to open the briefcase to uncover them all.
4. Chloroplasts Book.
The Chloroplasts Book can be found on the small table under the covered patio.
5. Pot Notes.
The Pot Notes on Soil Additives can be found in the shed where you found the seed packet.
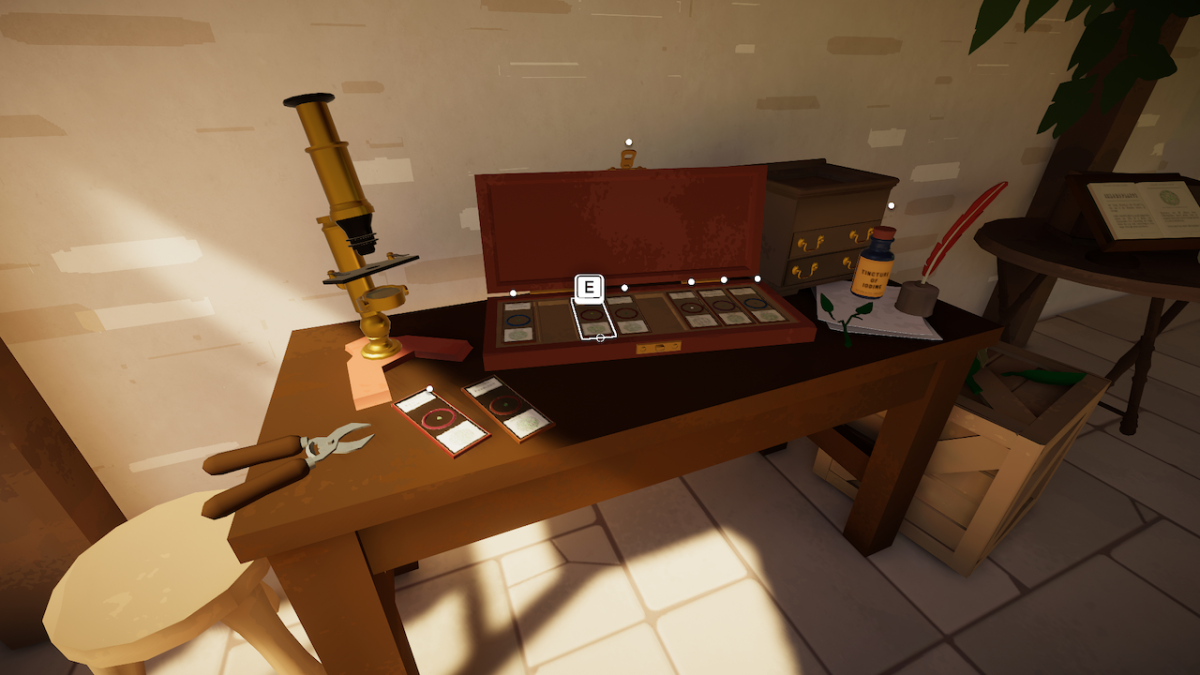
Enter all of these clues once found into the Pixie Tears’ herbarium entry.
How to sprout the Pixie Tears
There’s no special process when it comes to sprouting the Pixie Tears in Botany Manor.
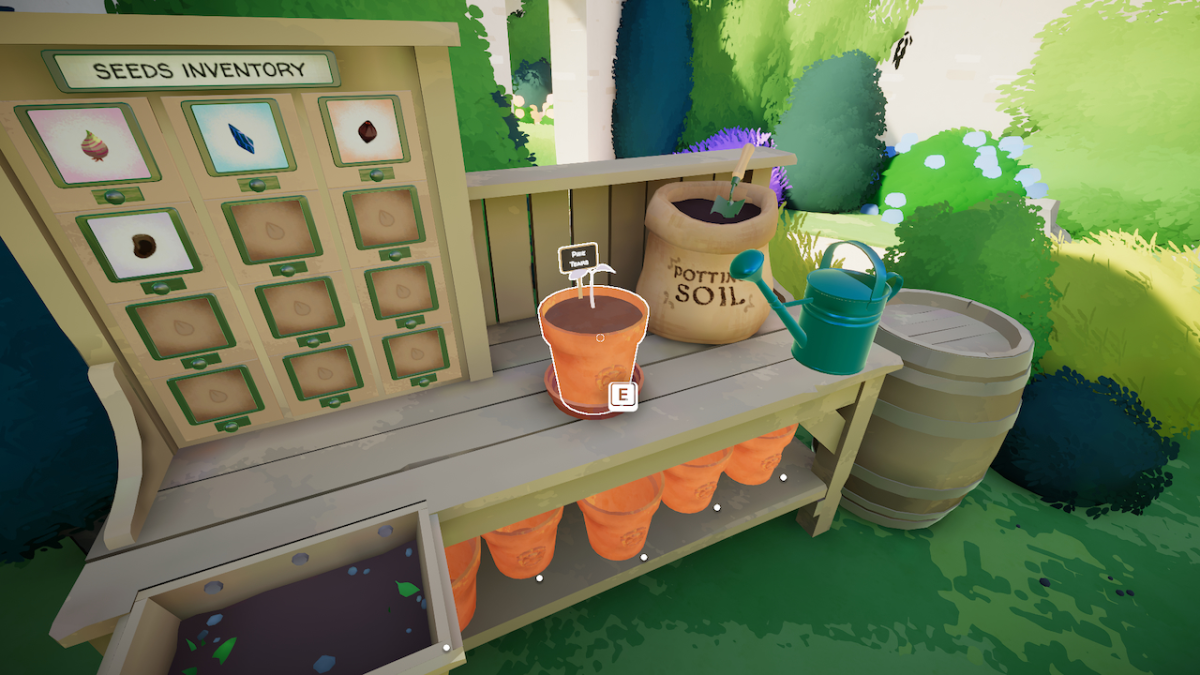
Pot the Pixie Tears seed like normal and water them to make them sprout.
How to bloom the Pixie Tears
At last, we get to making the Pixie Tears Bloom — the fun part of the game. I just hope you like math.
Figuring out how to bloom the Pixie Tears
From the Chloroplasts Book, we can find out that Chloroplasts are the organelles that produce energy for plants and allow them to grow – and we’re shown we can identify them through little green dots.

The Microscope Slides, however, show us that the Pixie Tears plants don’t contain any Chloroplasts. The book tells us that in this case, extra sugar is needed to be put into the soil to help them grow.
Thankfully, the Pot Notes show us the precise measurements of each pot if extra nutrients are needed to be put into the soil. In our case, we need to find 97g of extra nutrients. More specifically, 97g of sugar.
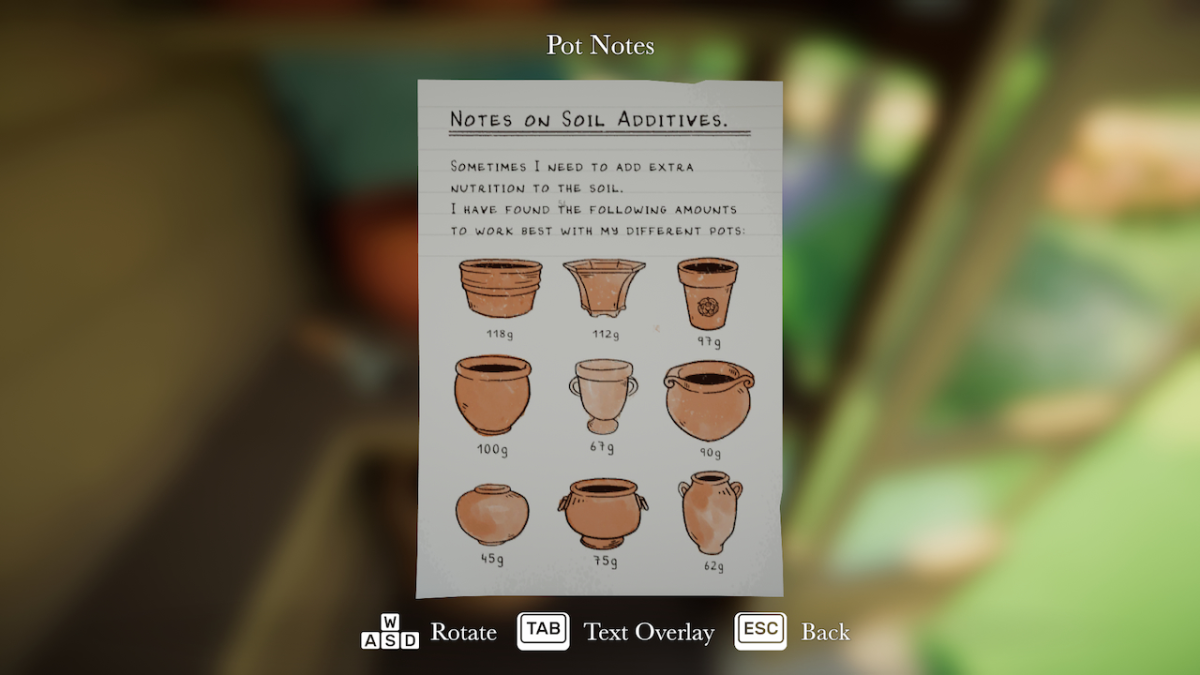
Funnily enough, we happen to be next to a Cider Garden full of apples which are bursting with sugar.
Choosing the right apples
So we know we need to add extra sugar into the soil of the Pixie Tears pot to allow it to grow.
The Apple Blending note shows us the sugar content of the apples, and the Cider Apples illustration shows us the names of the various apples around the garden, so we can identify which apples have which sugar contents.
Using this info, we must select the apples that have a combined sugar weight of 97g.
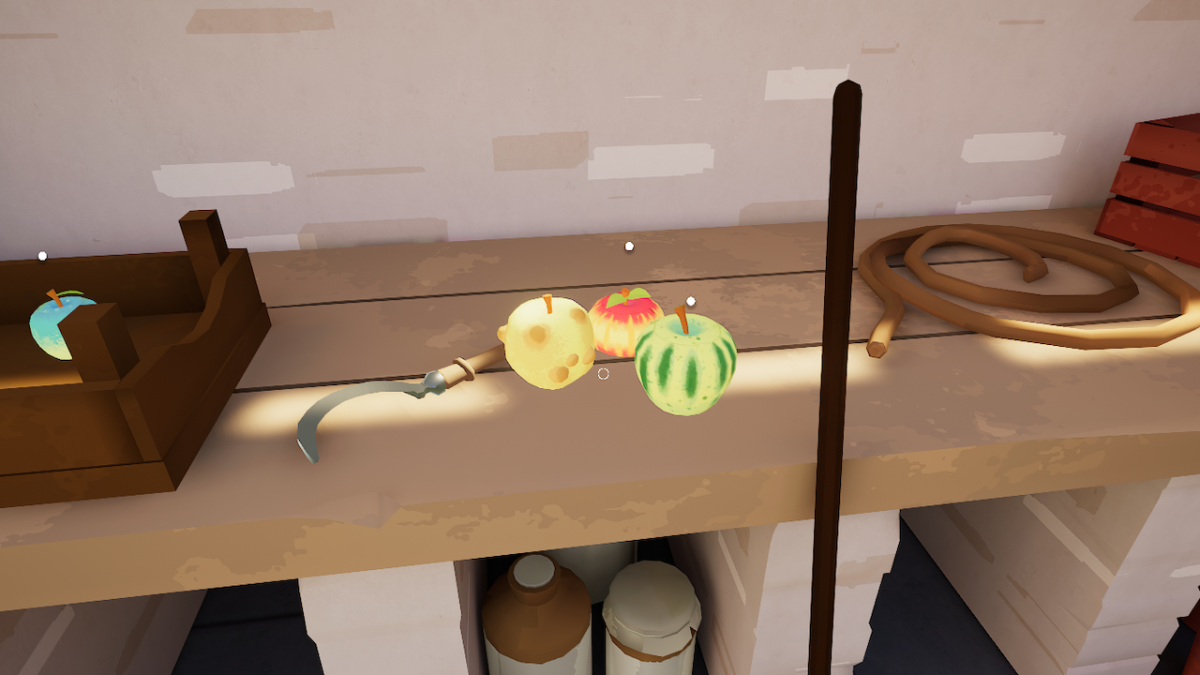
The apples you’ll need to find are the following:
- Knobbly Russet – 40g of sugar.
- Bitter Greenstreak – 23g of sugar.
- Seymore’s Delight – 34g of sugar.
The sugar content of these three apples adds up to 97g of sugar — just what we need.
Pressing the sugar into the pot
Now that we’ve identified the three apples we need, we’ve got to squeeze the juice out of them into the Pixie Tears soil to grow it.
To do that, we’ll need to pick up the Pixie Tears Seedling and place it on the dish on the ground next to the Press in the Cider Garden.
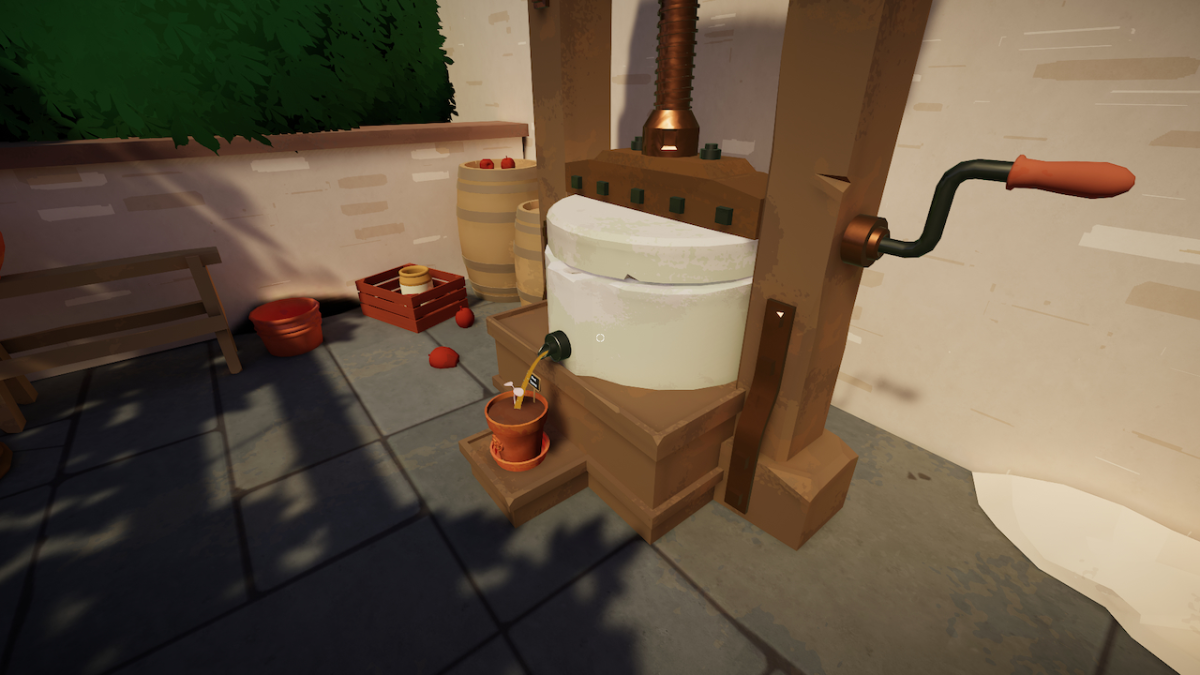
Place the gathered apples onto the Press and interact with the handle to watch the juice seep into the Pixie Tears pot.
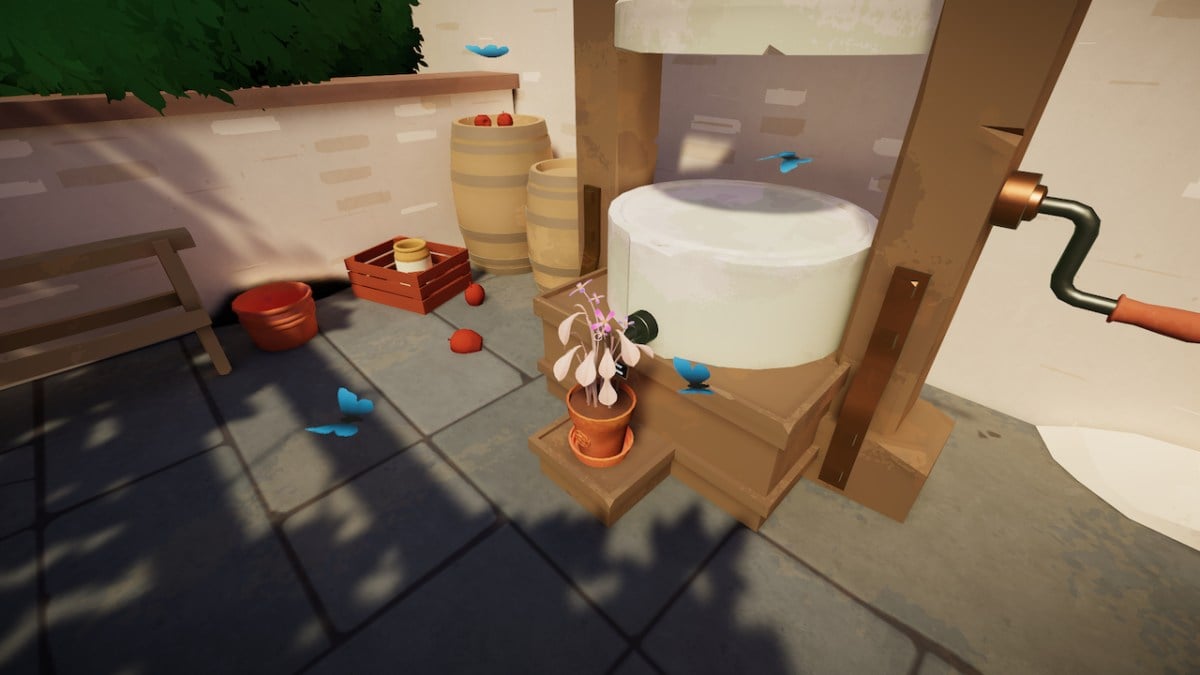
After bubbling up, the Pixie Tears will bloom!
The entry for the Pixie Tears will be completed, and you can move on to the next plant which is much more complicated.
How to open the Priest Hole in Botany Manor
The Wolfglove in Botany Manor is locked behind a whole other puzzle. Whilst exploring around, you may have noticed some clues talking about a Priest Hole, and some other clues that don’t seem to fit into any plant-blooming puzzling.
The Wolfglove itself only has seven clues, which leaves six extra puzzles. These puzzles have to do with opening a hidden Priest Hole, which is where we’ll find the Wolfglove seed packet.
Let’s begin.
All Priest Hole clue locations
You won’t be able to slot in these clues to any herbarium entry, but you’ll need to find them to understand how to solve the puzzle.
These clues are scattered across the Orchard, Kitchen, Orangery, the Painting Room, and the Pantry.
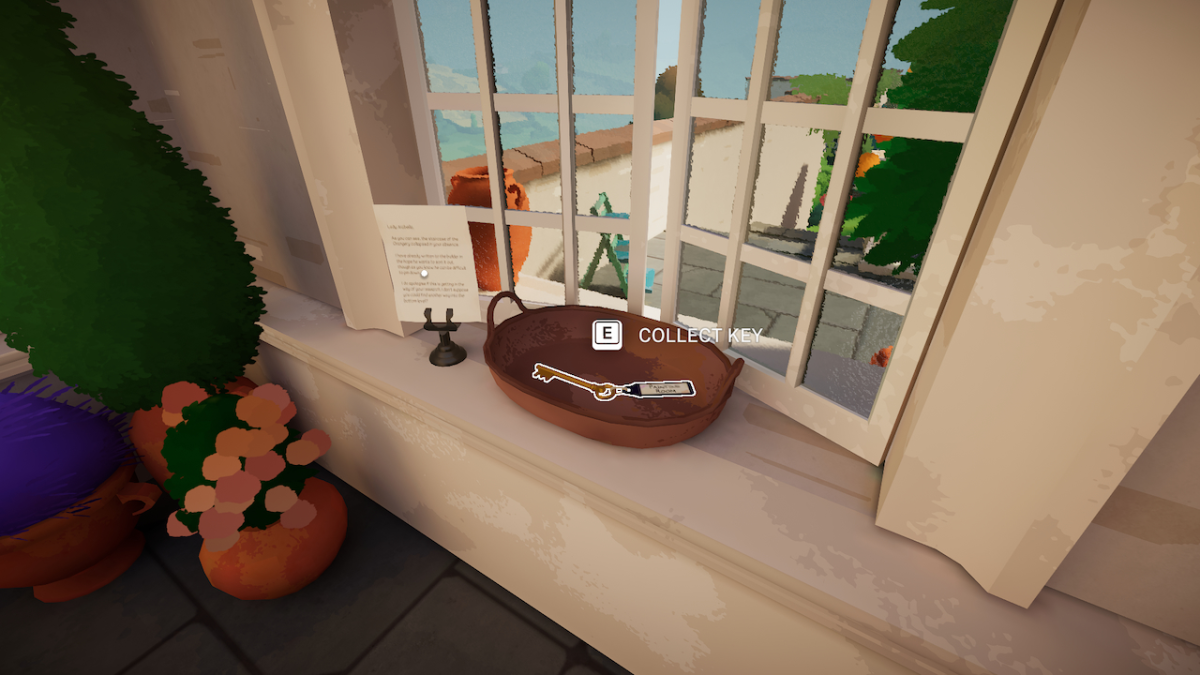
The Painting Room is locked, but we can find the Painting Room Key in the Orangery in a bowl on a windowsill. In the Orangery, you can open the door to connect the Orchard to the rest of the Manor. It also presents an easy path into the Painting Room.
Here are all the clue locations for the Priest Hole in Botany Manor:
1. Religious Blessing.
The Religious Blessing can be found in the Kitchen, on the wall above the table with candles.
2. Letter From Historian.
The Letter from the Historian can be found in the Orchard at the end of the covered patio.
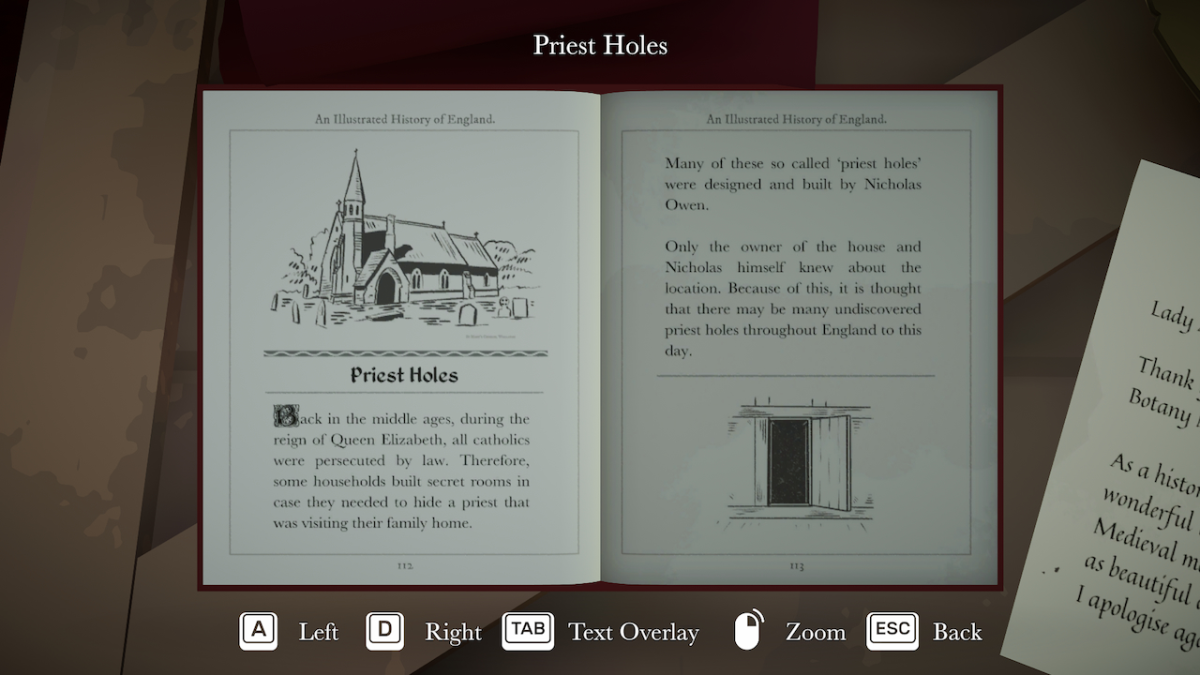
3. Priest Holes.
The book on Priest Holes can be found in the Orchard at the end of the covered patio.
4. Manor Plans.
The Manor Plans can be found on the wall in the Painting Room.
5. Symbology Book.
The Symbology Book can be found in the Painting Room, on the table below the window.
6. Mysterious Symbol.
The Mysterious Symbol can be found in the Pantry (next to the Kitchen) and is in the wall next to the weighing scales.
Again, you won’t be able to input these clues anywhere so keep a mental note of them as they all relate to opening the Priest Hole to gain access to the Wolfglove seeds.
Solving the Priest Hole puzzle
Now that we have all the clues for the Priest Hole in Botany Manor, we can go about opening it.
Identifying the Priest Hole
Firstly, the book on Priest Holes and the letter from the historian opens us up to knowing about the Priest Hole in the manor. The book tells us that manors may have built hidden chambers for Catholic priests when they were getting persecuted, called Priest Holes. The letter tells us that a historian believes the manor has one.
What really tipped me off that I may need to find and open the well-hidden Priest Hole was looking at the first floor of the Orangery.
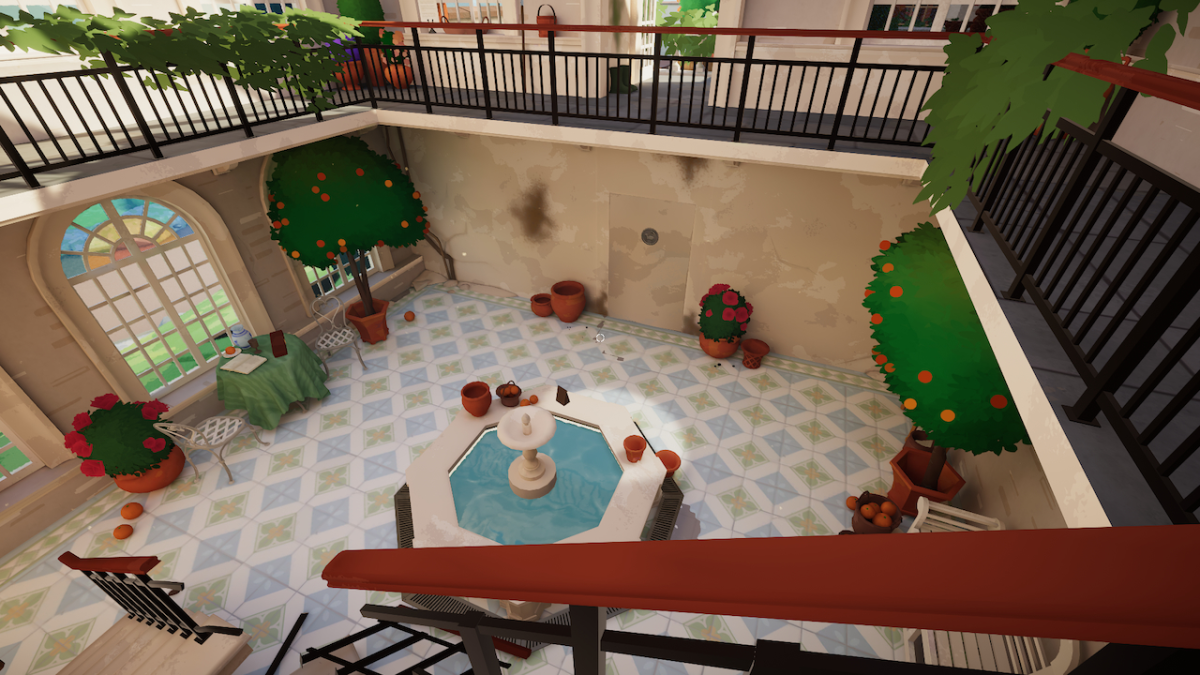
Down there you’ll find a glowing seed packet. However, we can’t get down there thanks to the broken stairs. On the far wall seems to be a secret door with a strange symbol on it. The Pantry has the same symbol, jotted down as a clue named “Mysterious Symbol.”
This Mysterious Symbol, of a lamb with a flag, is the symbol of Catholicism, which we know thanks to the Book of Symbology in the Painting Room.

Connecting those dots allows us to conclude that not only is there is a Priest Hole in the manor, but we know where it starts and ends.
The letter also reminds us that the Priest Hole may use a mechanism to unlock, and next to the Mysterious Symbol in the Pantry is a set of weights and a scale.
With all this information established, we can work on opening it and figuring out the weighing scale puzzle.
Figuring out how to open the Priest Hole
The weighing scale next to the Mysterious Symbol has four slots for weights. Keep this in mind.
Right outside, in the Kitchen, the Religious Blessing has the Catholic symbol, connecting it to the Priest Hole. The last line of the blessing tells us that the “year of construction” “is the key.”
To find the year of construction for the Priest Hole, we need to head into the Painting Room.
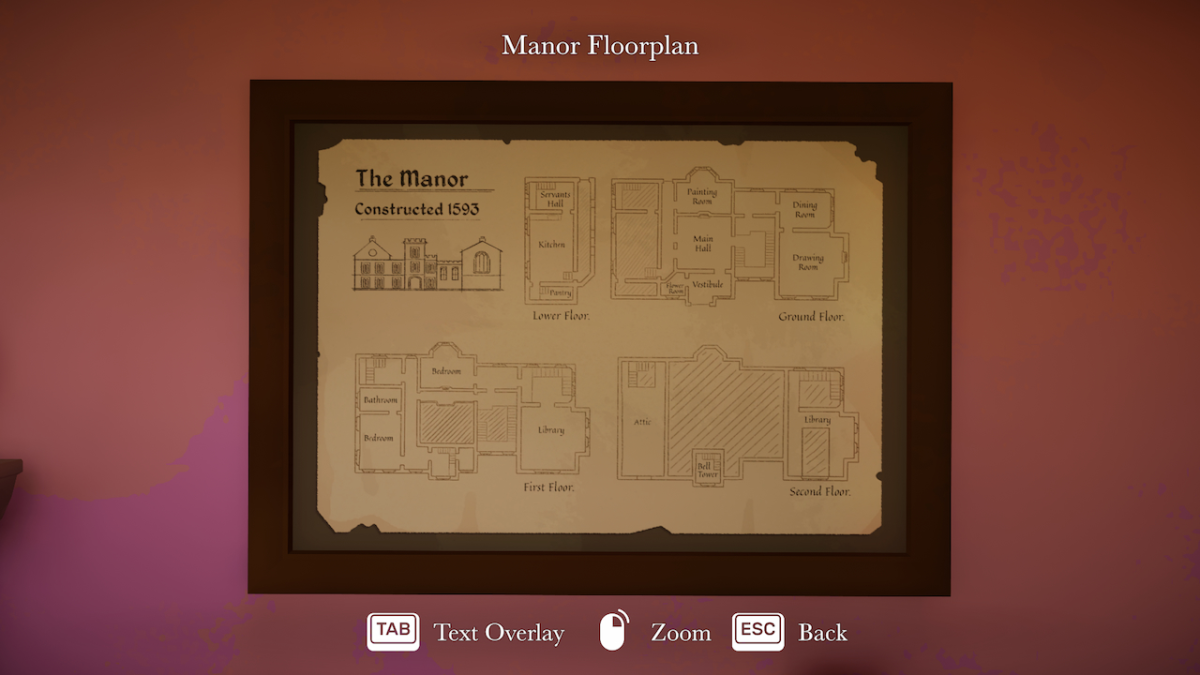
The Manor Floorplan in the Painting Room tells us that the manor was built in 1593, giving us the key.
Opening and entering the Priest Hole
Head back into the Pantry and place weights onto the scale to spell out “1593.” Upon doing so – the Priest Hole will open!
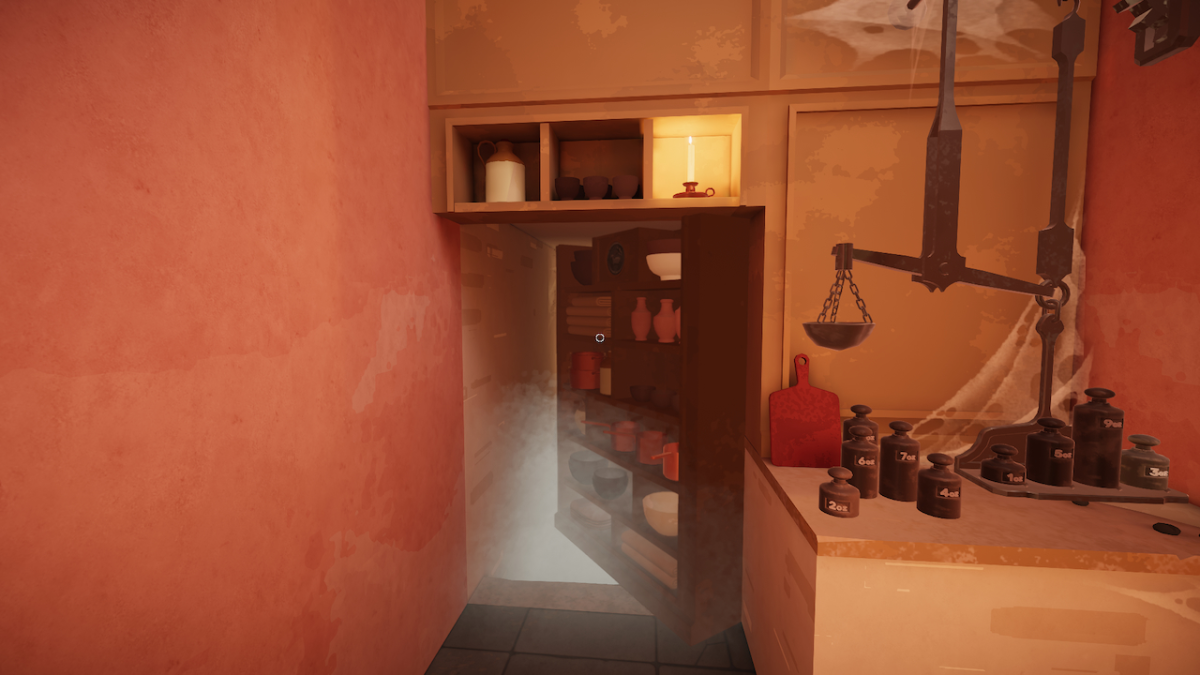
Walk through the old halls of the Priest Hole and open the door at the end. You’ll walk into the main room that priests would have hidden in.
In there, you’ll see stairs up to another door. Opening that will bring you into the first floor of the Orangery, where you’ll see the Woldglove seed packet!
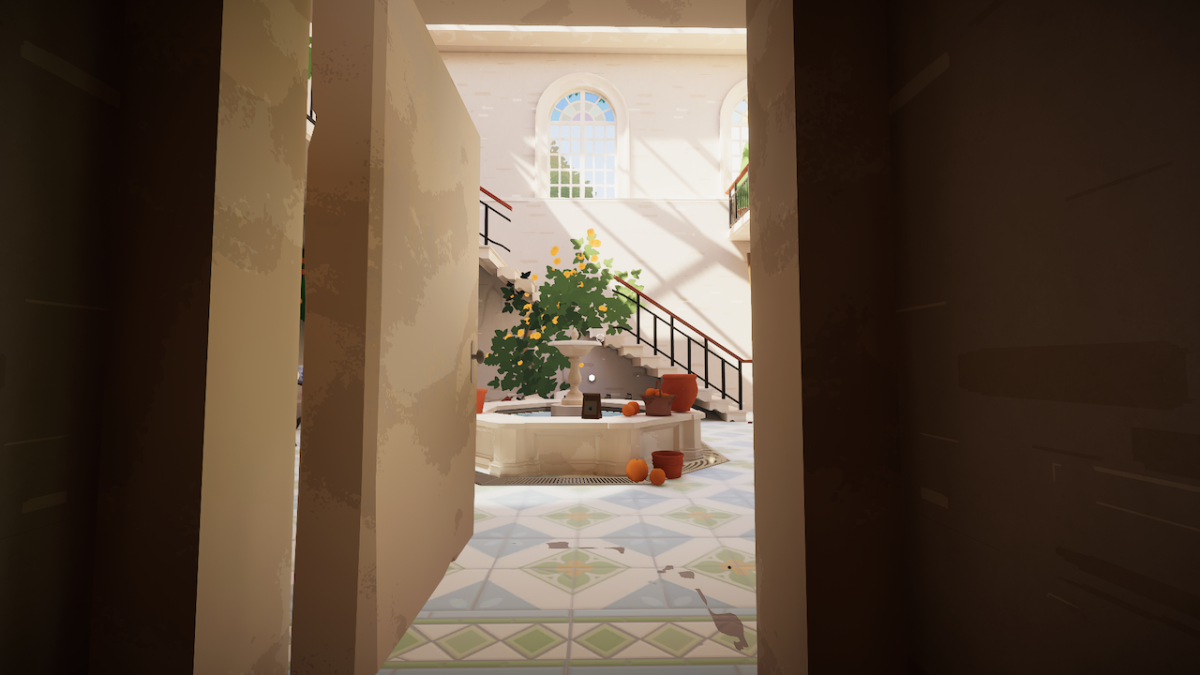
We can finally get back on track to growing the Wolfglove, which is still quite the challenge by itself.
How to grow Wolfglove in Botany Manor
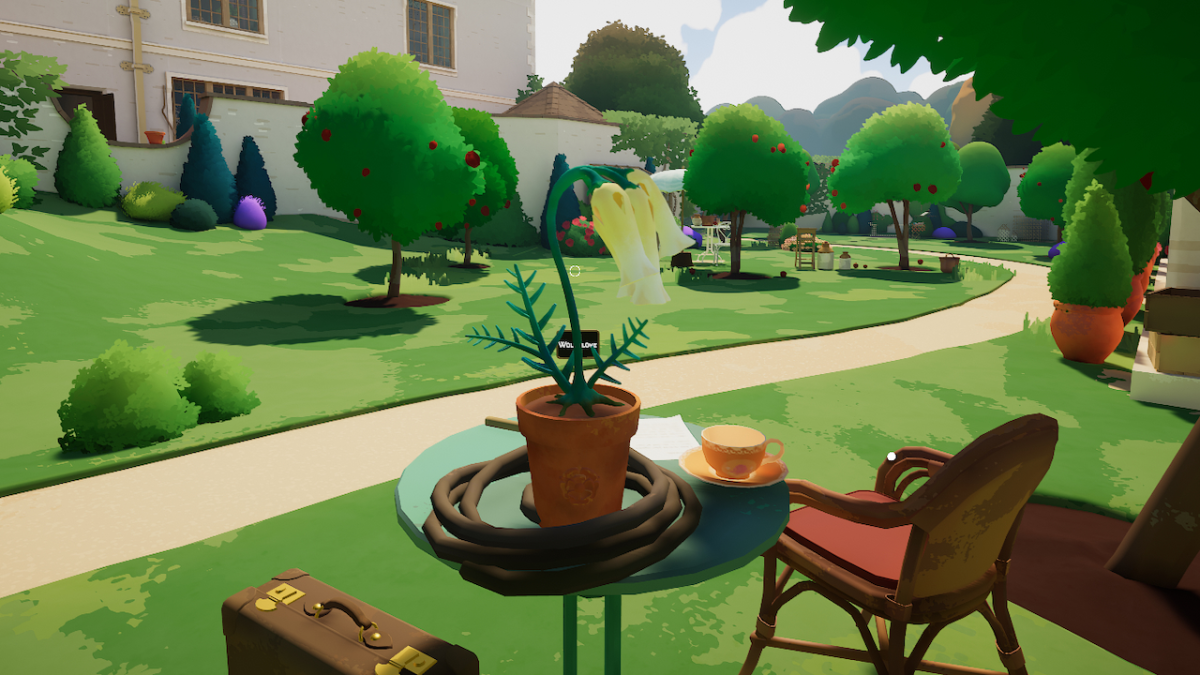
Arabella decides she doesn’t want to be helpful and only notes down an “interesting” feature of the Wolfglove.
Looks like we won’t be having any extra help from Arabella for this one.
Wolfglove seed packet location
The Wolfglove seed packet is on the first floor of the Orangery, which should be obvious considering what we’ve just gone through.

Whilst you’re collecting the seeds, you’ll also want to repair the stairs in the Orangery.
Besides the broken staircase are three planks of wood. Interact with them and Arabella will use them to rebuild the stairs to allow for much easier access.
All Wolfglove clues locations
The Wolfglove has seven clues associated with it, and to find them you’ll find them in the Orangery, the Orchard, and the Old Tower.
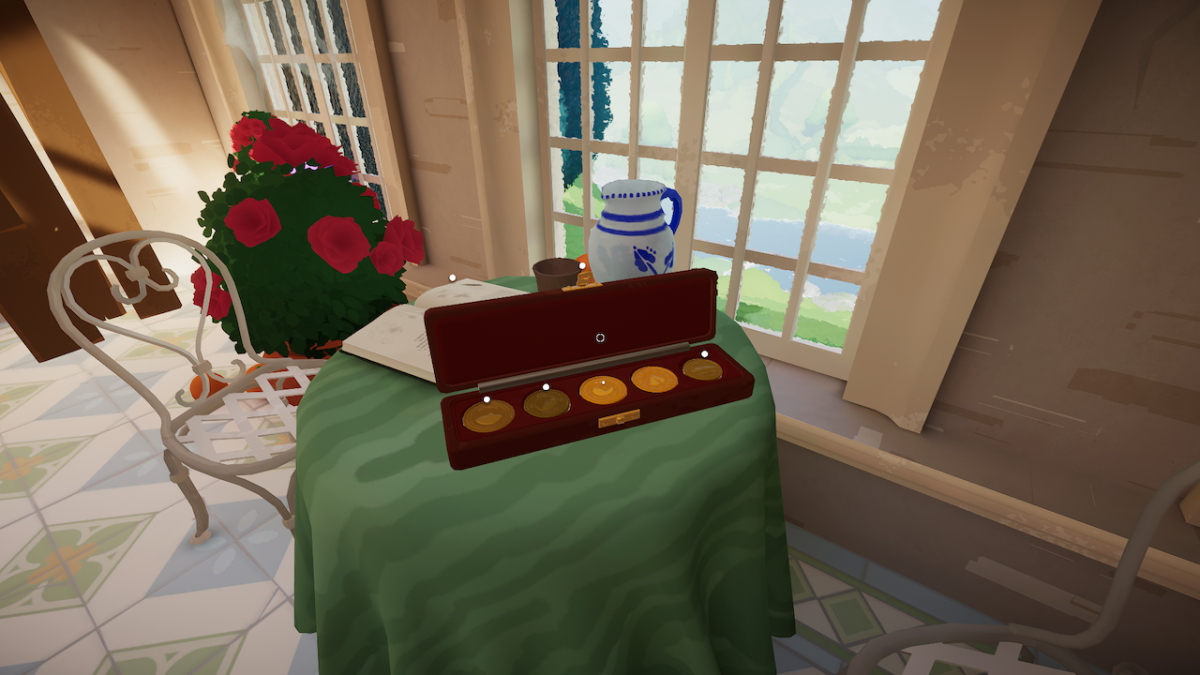
Here are all the clue locations for the Wolfglove in Botany Manor:
1. Letter from the Builder.
The Letter from the builder can be found on a small table by the path from the Orchard to the Old Tower.
2. Alpine Weather.
The leaflet about weather in the Alps can be found just outside the Orangery, on a table facing the Old Tower.
3. Envelope Stamp.
The Envelope with the Stamp can be found on a table on the top floor of the Orangery.
4. Letter About Alps.
The Envelope with the Stamp can be found on a table on the top floor of the Orangery.
5. Coin Collection.
The Coin Collections can be found on the bottom floor of the Orangery. One set can be found on the table by the window and the other can be found on the opposite side.
6. Wind Research.
The Tower Wind Research can be found just outside the Orangery, on a table facing the Old Tower.
7. Nursery Rhyme.
The Nursery Rhyme can be found on a small table to the left by a bench as you enter the Orchard.
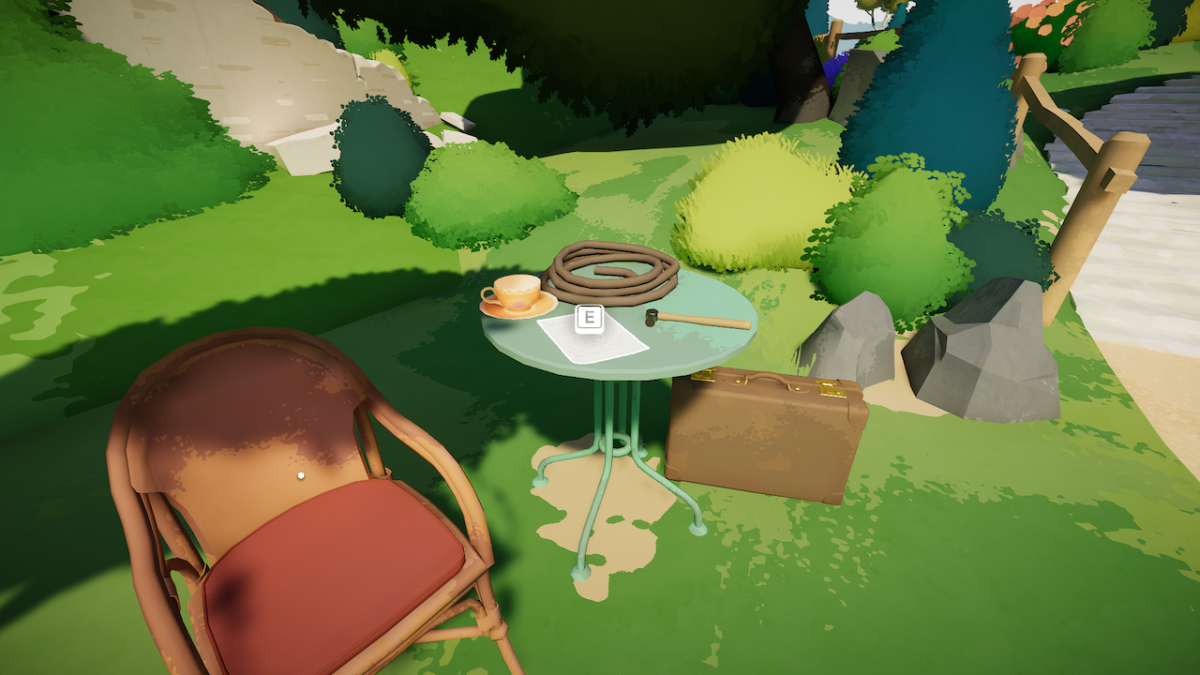
Throw all of these clues into the Wolfglove entry and you’ll be able to start trying to grow the plant.
How to sprout the Wolfglove
There’s no funny business here. Prepare the Wolfglove like normal and water it.
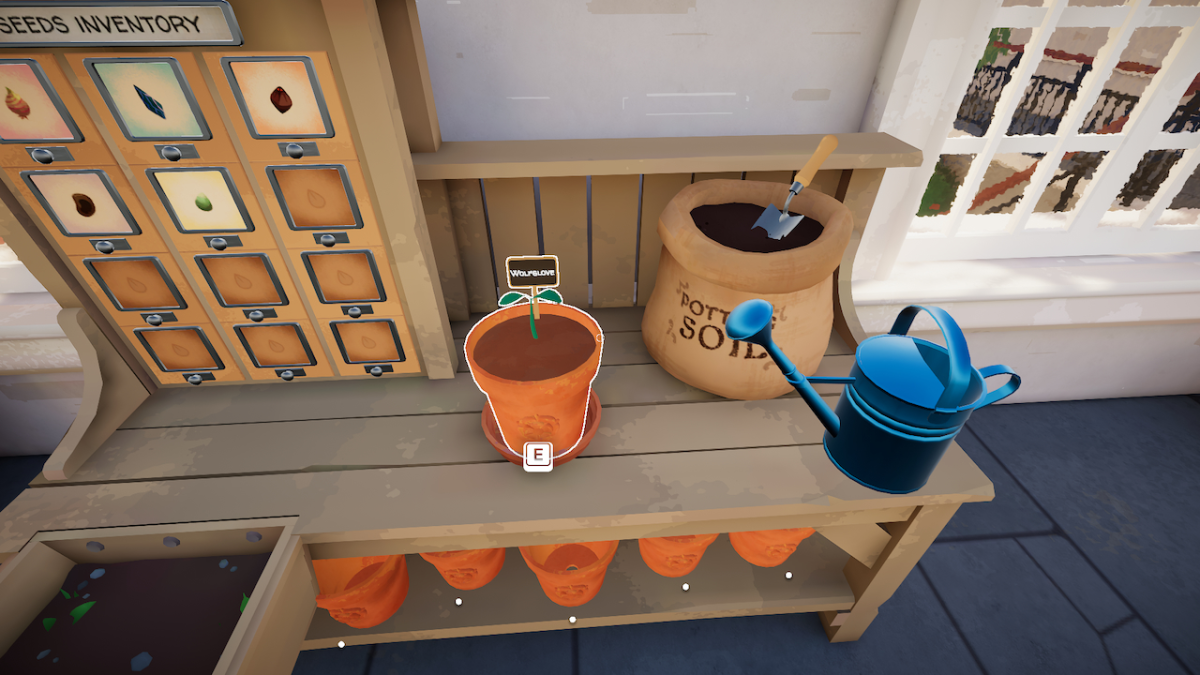
You’ll have a lovely Wolfglove seedling on your hands!
How to bloom the Wolfglove
Blooming the Wolfglove in Botany Manor will require some attention to detail!
Figuring out how to bloom the Wolfglove
The Wolfglove Nursery Rhyme tells us that this plant grows in high altitudes and harsh winds upon mountaintops.
The Letter from the Builder tells us that the Old Tower is known for the turbulent winds that are strangely native to it.
This is all we have to go off for the Wolfglove. We’ll have to find out how to recreate the height and wind speeds in the Old Tower for the Wolfglove to bloom.
Identifying the right wind speed
More important than height is the speed of the wind for the Wolfglove, for that’s what produces the whistling sounds it’s known for.
The Alpine Exploration leaflet has stats on the Windspeed of numerous mountains in the alps. Thankfully, a friend has written to Arabella describing a flower they found on their own alp explorations.
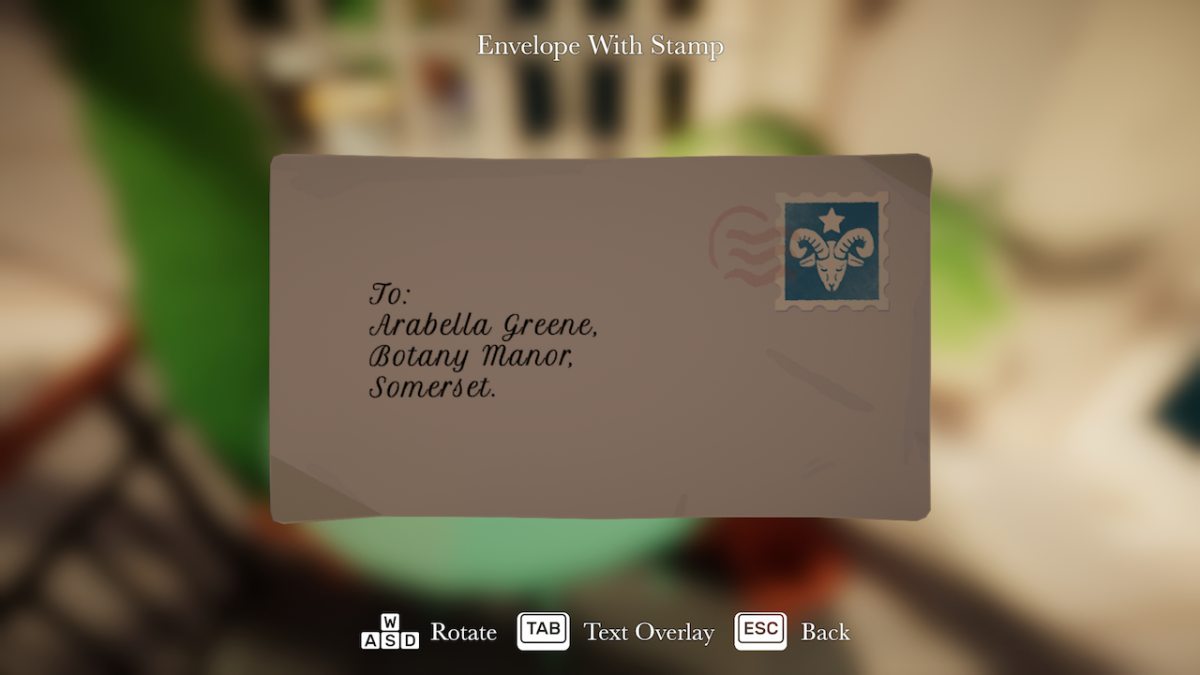
The Letter About Alps mentions a flower that could be heard whistling in the mountains on their trip, which must be the Wolfglove thanks to the descriptions in the Nursery Rhyme. The envelope adjacent to the letter (both sent by Natty Golding) has a special stamp on it.
When looking at the Coin Collections downstairs, we’ll see a coin that shares the same symbol. When turning it around, we’ll see the name of a mountain: Weisshorn in Switzerland.

So it seems that Natty Golding had found Wolfglove plants on Mount Weisshorn.
Heading back to the Alpine Weather leaflet will show us that Mount Weisshorn has a Windspeed of 40f/s.
Using the Old Tower
Now that we know the right Windspeed for the Wolfglove, all we need to do is recreate the same wind in the Old Tower.

The Tower Wind Research book tells us of different tests done on the Old Tower. With different combinations of closed and opened windows, different floors of the Old Tower recorded different speeds of wind.
Test 5/6 resulted in a Windspeed of 40f/s on the fourth floor after the following combination of windows:
| Old Tower Level | Left Window Hatch | Right Window Hatch |
|---|---|---|
| 5 | Closed | Closed |
| 4 | Open | Open |
| 3 | Open | Open |
| 2 | Closed | Closed |
| 1 | Open | Closed |
By default, all the window hatches in the Old Tower are closed.
Take the Wolfglove seedling and walk into the Old Tower. Place the pot on the dish next to the apparatus. Interact with the switch to move the elevator up to the first level.
You’ll be able now to open the different window hatches on each level. Remember that you’re looking at the windows in the reflected order to the illustrations, so keep that in mind when opening them!
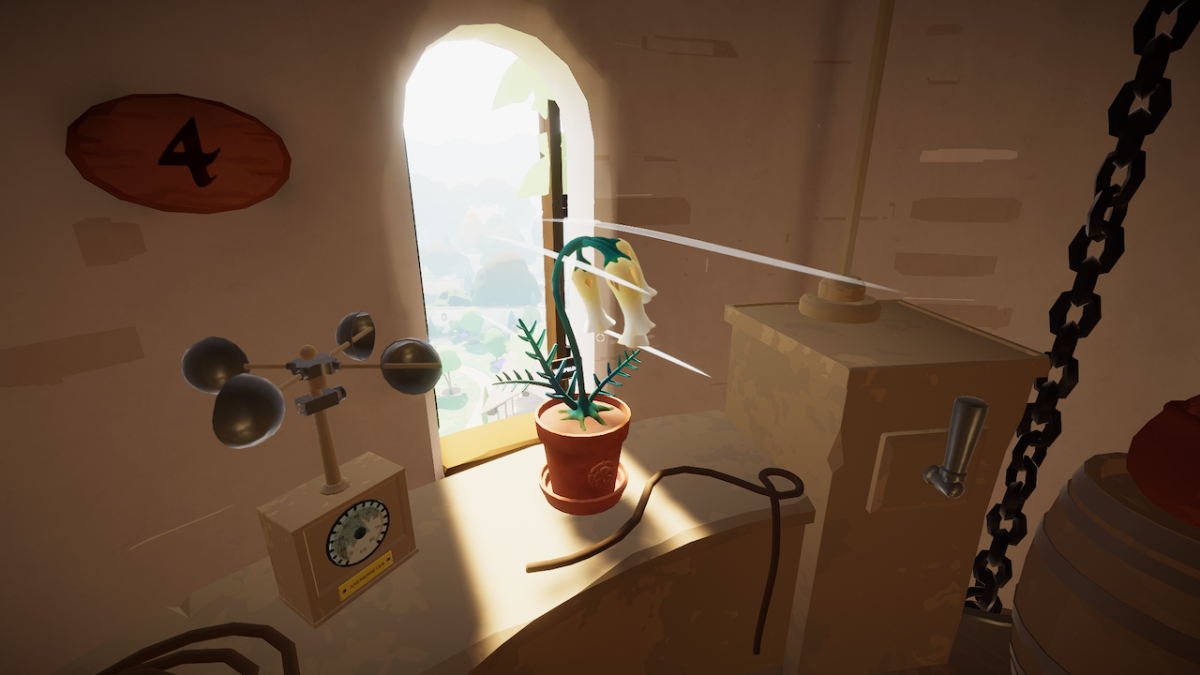
Once you’ve reached the fourth floor and opened both the window hatches, the Wolfglove will bloom!
Finishing Chapter Three
With the Wolfglove fully grown, you’ll receive another Gatehouse delivery. Descend the Old Tower and make your way back to the Gatehouse.
Instead of a key this time, you’ll find a letter from Arabella’s sister.
She wrote to inform you that she changed the code combination on the Library’s lock to keep your grandmothers’ valuables safe. The new code is Elizabeth’s three initials.
Finding out the Library Code
Thankfully, there is an easy way to identify Elizabeth’s initials.
In the Main Hall is the Greene family tree, and we can see that Arabella’s sister’s full name is Elizabeth Ann Greene.
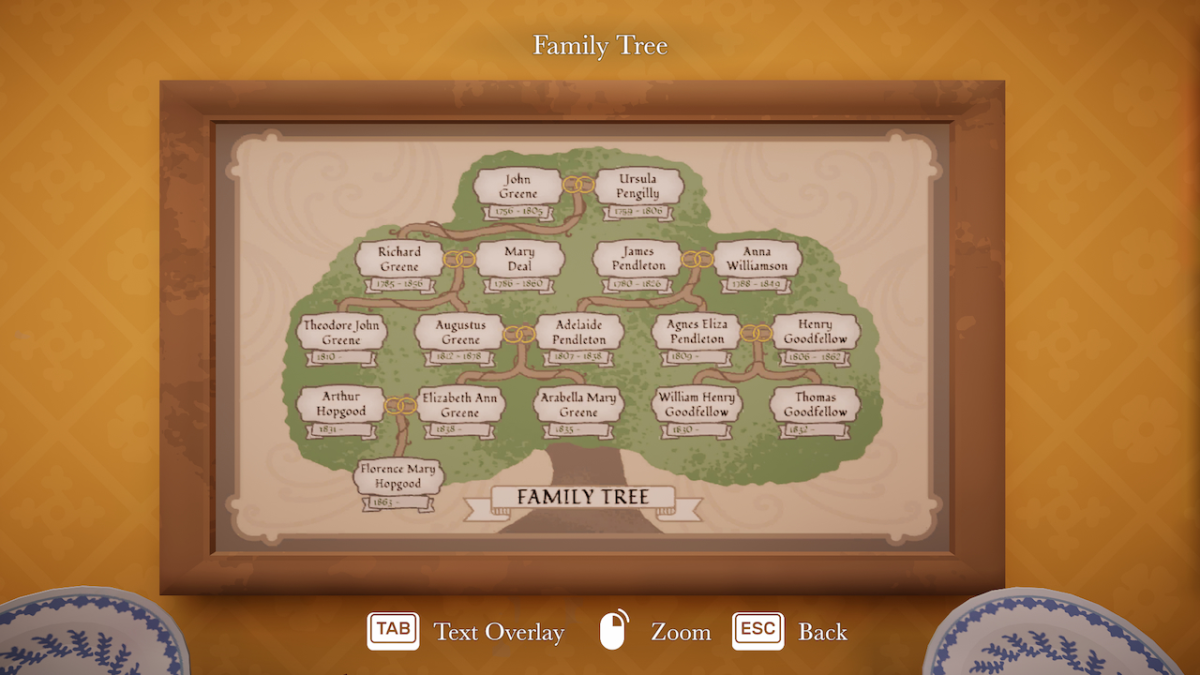
In the letter below the family tree, however, is a note that tells us Arabella requested the names of the woman be their maiden names, and not the names acquired through marriage. This means that Elizabeth’s current full name is Elizabeth Ann Hopgood.
This makes the code for the library lock “EAH”.

Head upstairs through the Grand Staircase to the Library Hall door.
To start Chapter Four, you’ll need to walk through the door on the right.
Chapter Four – Botanical Allies

- How to open the secret room in the Library in Botany Manor
- How to grow the Sapphire Gloom in Botany Manor
- How to grow the Cradle Fern in Botany Manor
- How to grow the Brook Chalice in Botany Manor
- How to grow the Nightfall in Botany Manor
- Finishing Chapter Four
There are a whopping four new plants for us to grow in Chapter Four of Botany Manor. 26 clues are spread out between them, so you’ll have a lot on your plate.
There are five clues here that aren’t associated with any plants directly, and actually contribute to solving a puzzle that you’ll want to get out of the way before you dedicate yourself to growing any plants.
Also, instead of completing the plants in the order they appear in the herbarium, we’ll be mixing it up. This is because the Sapphire Gloom must be finished first to allow the other plants to be completed.
How to open the secret room in the Library in Botany Manor
Opening this secret room is paramount to solving the rest of the puzzles in Chapter 4 of Botany Manor, so I’ll quickly take you through the solution now.

In the Library, you’ll find five buttons on a bookshelf to the right – and five other story books throughout the library.
All of these books are clues:
1. Sunrise Book.
The Sunrise book is in the top left corner of the bottom floor.
2. Crow Fable.
The Crow Fable is on the first table in the Library.
3. Fish Fable.
The Fish Fable is on the top floor of the Library on the right.
4. Hare Fable.
The Hare Fable is on the top floor of the Library in the first wing on the left.
5. Night Sky Book.
The Night Sky Book is on the top floor of the Library in the second wing on the left.
The buttons on the bottom floor have icons that can be associated with these five books. You will have to press the buttons in time order.
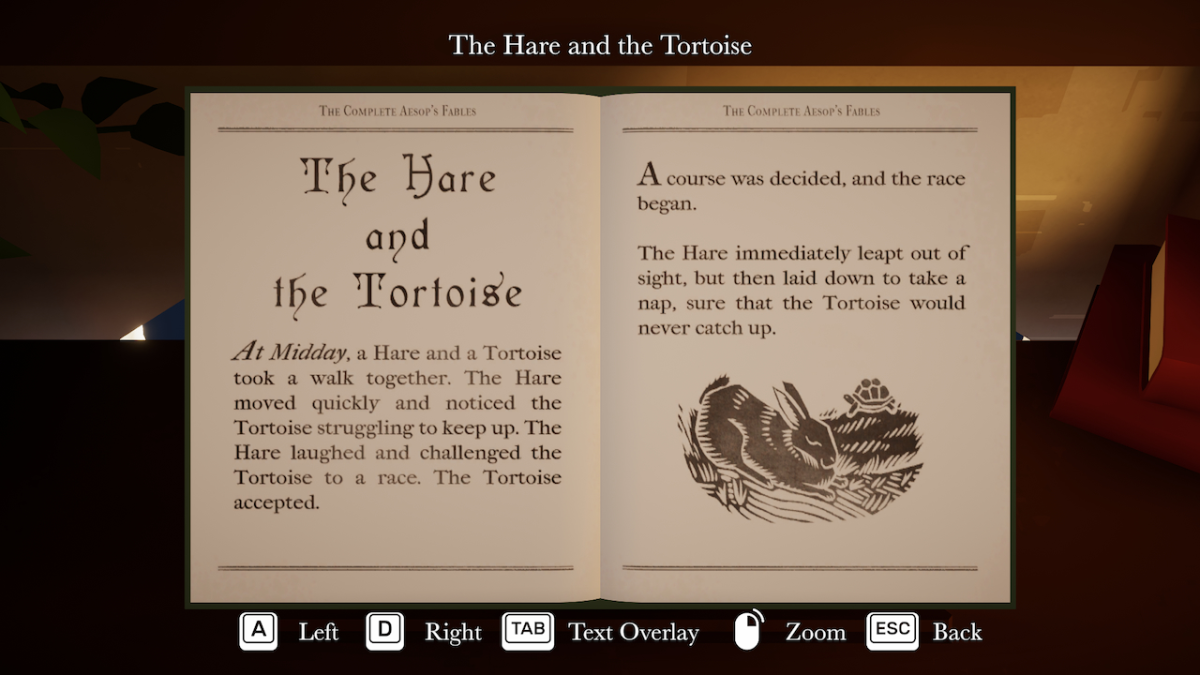
This means that the Sunrise Book is first, as it marks the beginning of a day, and the Night Sky Book is last, as it marks the end.
Every fable book is open, and each one starts with the time of day. The rest of the story is irrelevant. The Fish Fable starts in the morning, the Hare Fable starts at midday, and the Fox Fable starts in the evening.
This presents the following order:
Sunrise Book > Fish Fable > Hare Fable > Fox Fable > Night Sky Book.
Go back to the buttons and press them in this order. Note that the Fox Fable is represented by a Crow, as one features in that fable.
Once done correctly, you should notice the secret door in the library swinging open!
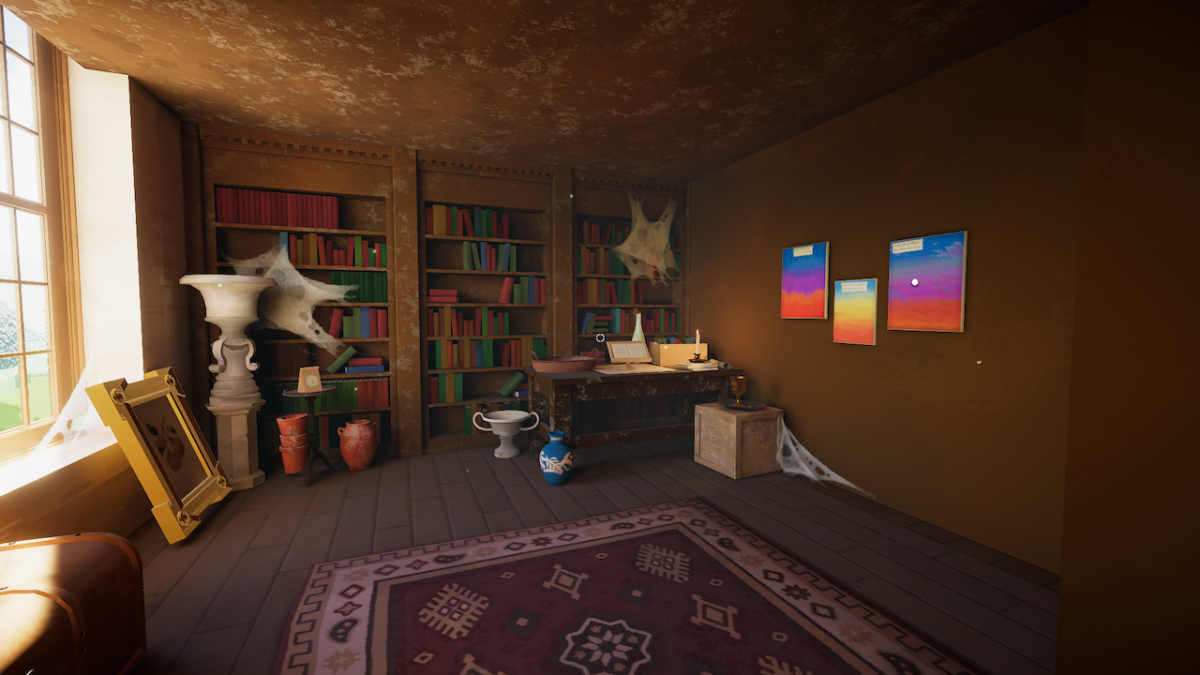
In here, you’ll find the Study Key and the Nightfall seed packet.
You can now properly continue with the puzzle solving.
How to grow the Sapphire Gloom in Botany Manor
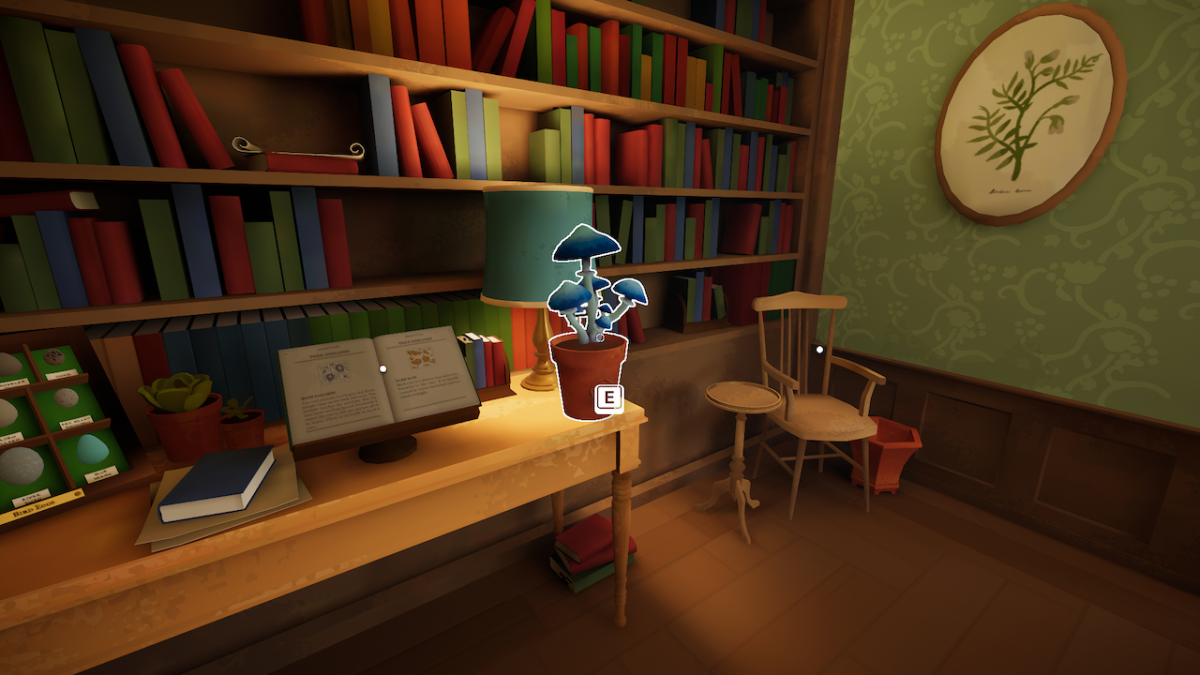
Strangely, the Sapphire Gloom only has two clues, although that doesn’t make it a simple case to solve. It’s also the most important, as you’ll have to grow this plant first to grow the others.
Let’s find out how to grow the Sapphire Gloom in Botany Manor.
Sapphire Gloom seed packet location
The Sapphire Gloom seeds are in the locked Study room on a stand at the other end.
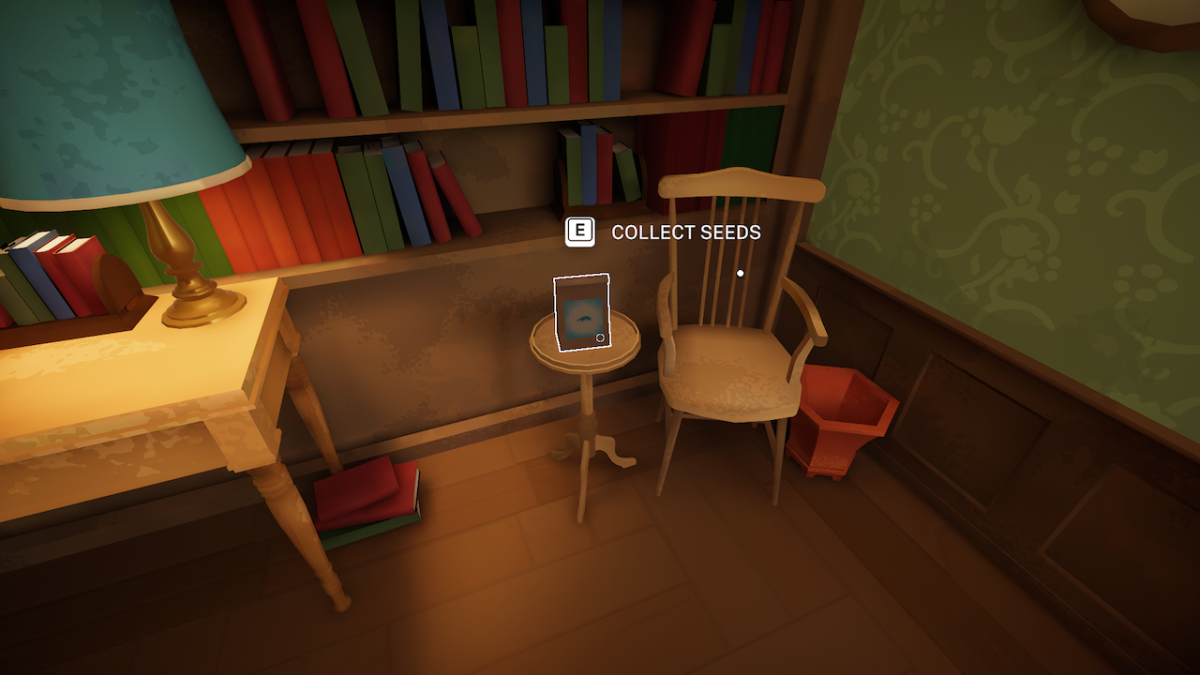
Thankfully, you’ve already got the Study Key from the secret Library room.
All Sapphire Gloom clues locations
The only two clues for the Sapphire Gloom can be found in the Study, alongside the seed packet.
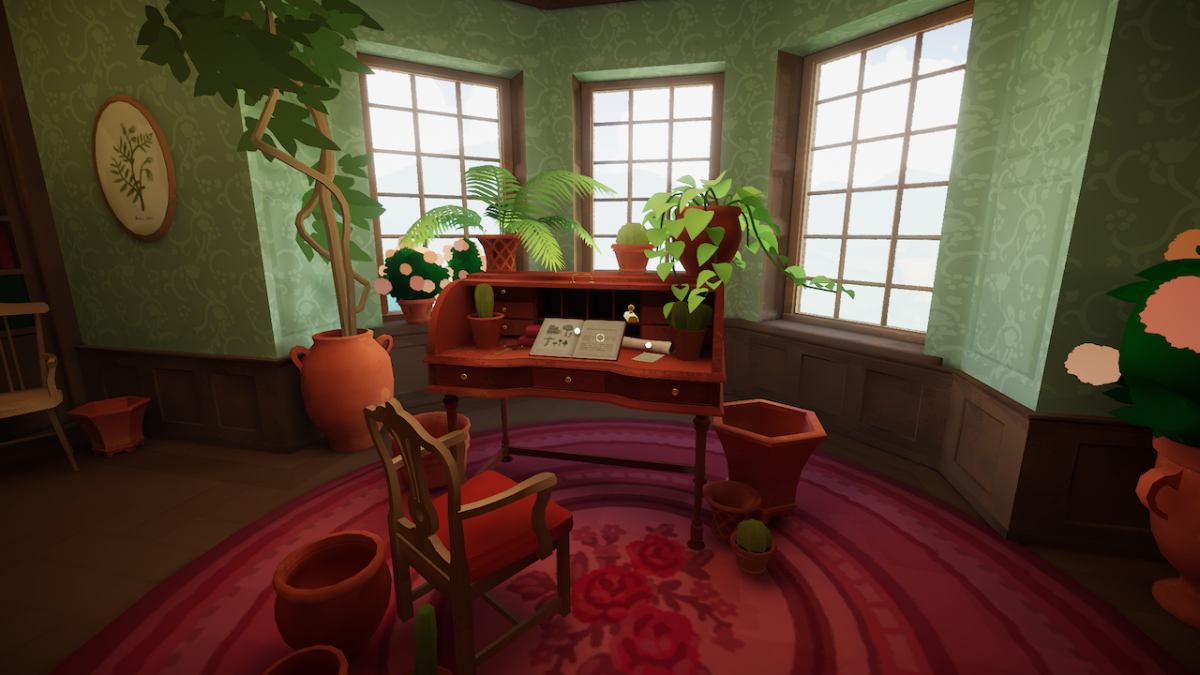
Here are all the Sapphire Gloom clues in Botany Manor:
1. Mushroom Book.
The Mushroom Book can be found on the table by the window.
2. Tree Diseases.
The Tree Diseases book can be found on the table with the eggs.
You’ll be able to grab them easily and throw them into the Sapphire Gloom herbarium entry.
With these clues, let’s go over how we can grow the Sapphire Gloom.
How to sprout Sapphire Gloom
Despite being mushrooms, you can sprout the Sapphire Gloom like normal.
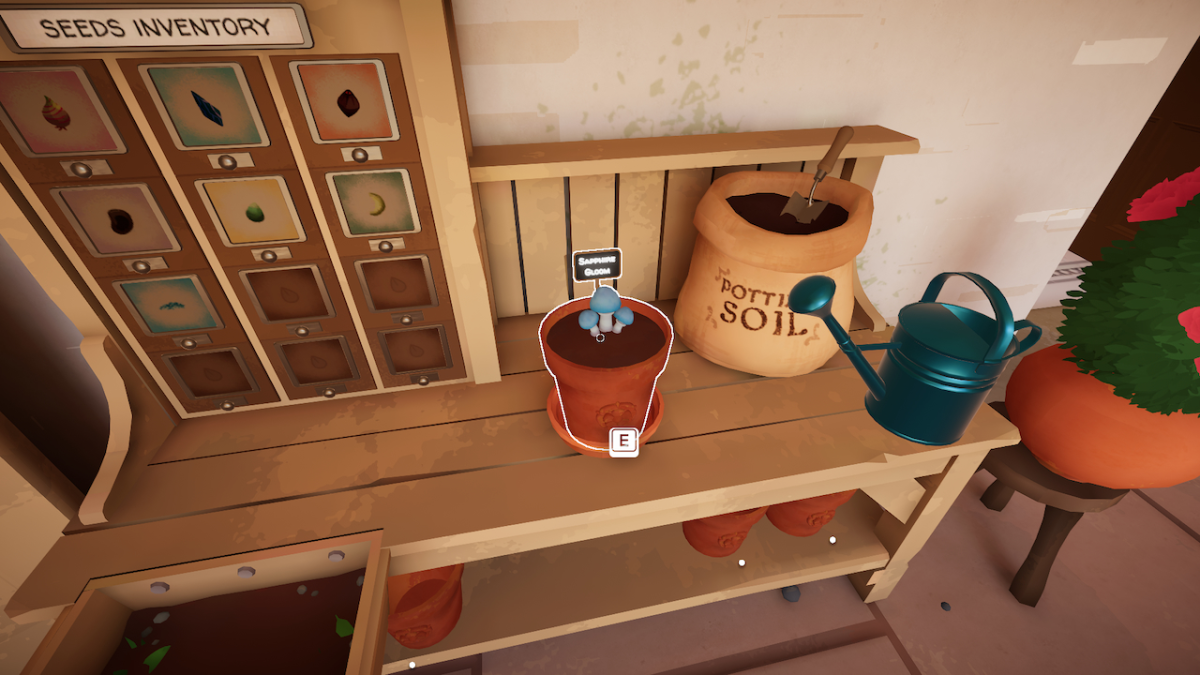
Head back downstairs to the potting station by the Main Entrance and prepare and water the Sapphire Gloom.
How to bloom Sapphire Gloom
The blooming process for the Sapphire Gloom is rather unique in Botany Manor, yet is incredibly simple.
When reading the clues, all we learn is a few tree diseases and that some mushrooms live off other living organisms.
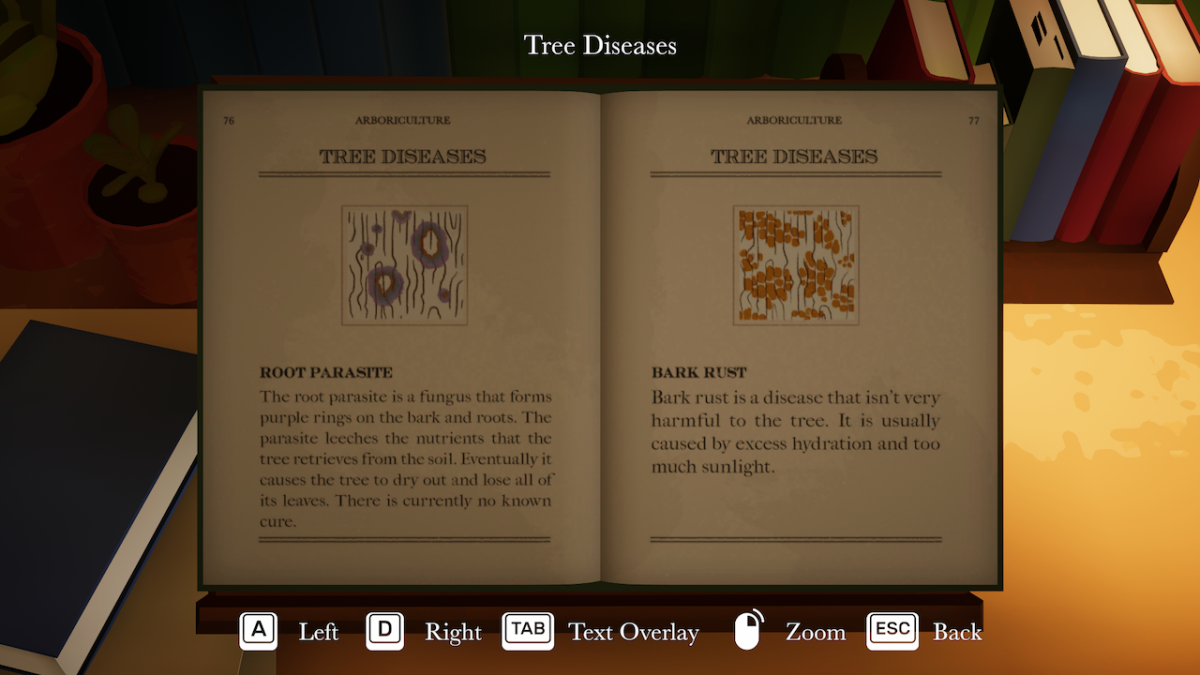
One of the tree diseases, Root Parasite, may have looked familiar. This is because the tree in the Main Hall is afflicted with it. There is no known cure.
The Mushroom Book, however, tells us that some fungi can feed off of parasites.
If you place the Sapphire Gloom seedling on the dish by the tree, not only will it bloom, but it will grow all along the tree. It will consume the parasite plaguing the tree, allowing it to grow.
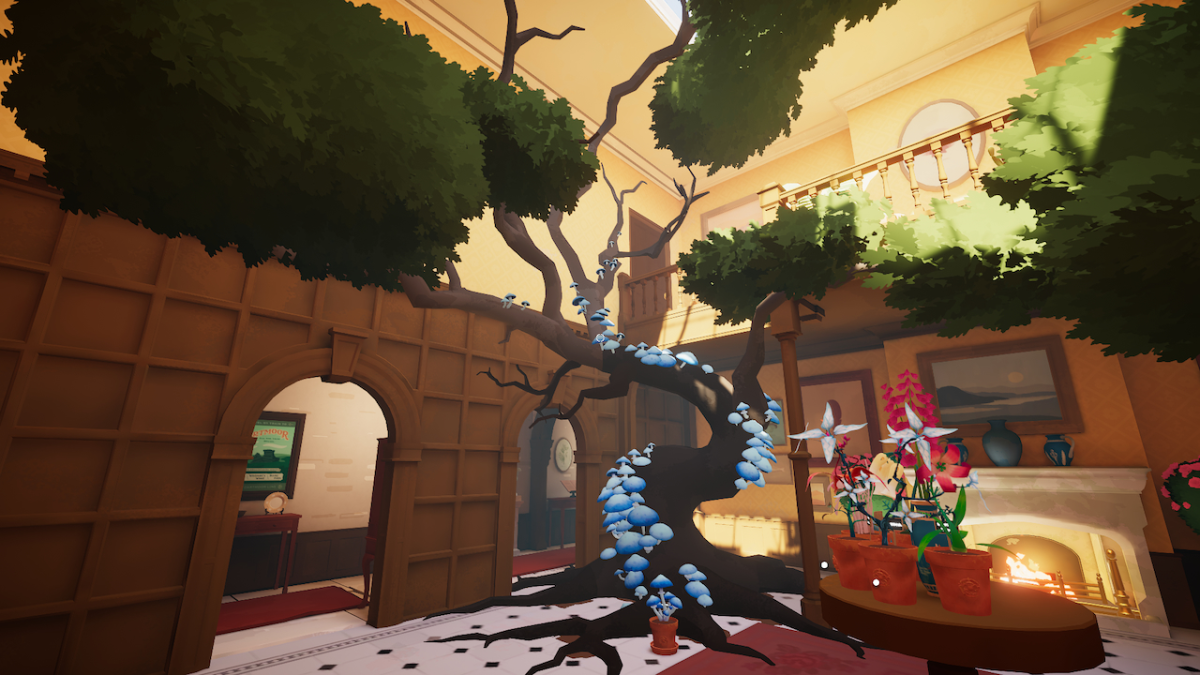
This will move the branch that was blocking the second half of the First Floor and the Second Floor of the manor. This will allow us to complete the rest of the chapter.
How to grow the Cradle Fern in Botany Manor
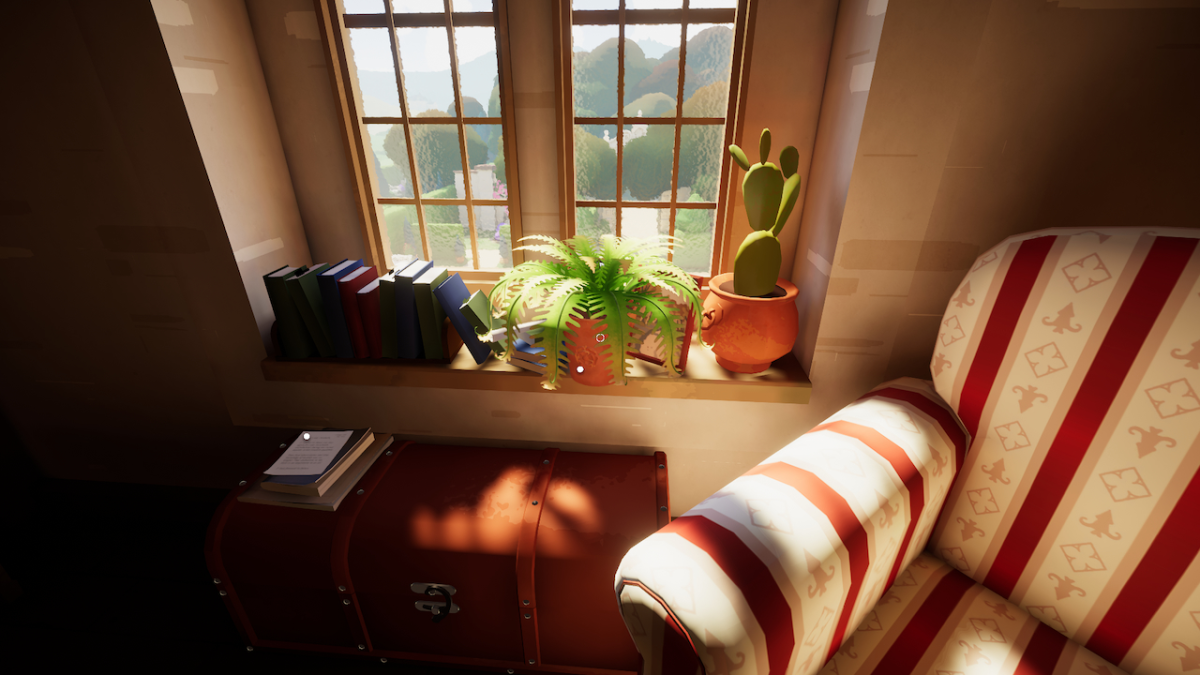
Out of the next three plants, the Cradle Fern is the easiest to bloom, and it only has five clues.
Arabella interestingly notes that their population has declined, and pins it on a change in their environment, which are banks of bodies of water.
Let’s go over how to grow the Cradle Fern in Botany Manor.
Cradle Fern seed packet location
The Cradle Fern seed packet is in the Master Bedroom on the first desk.
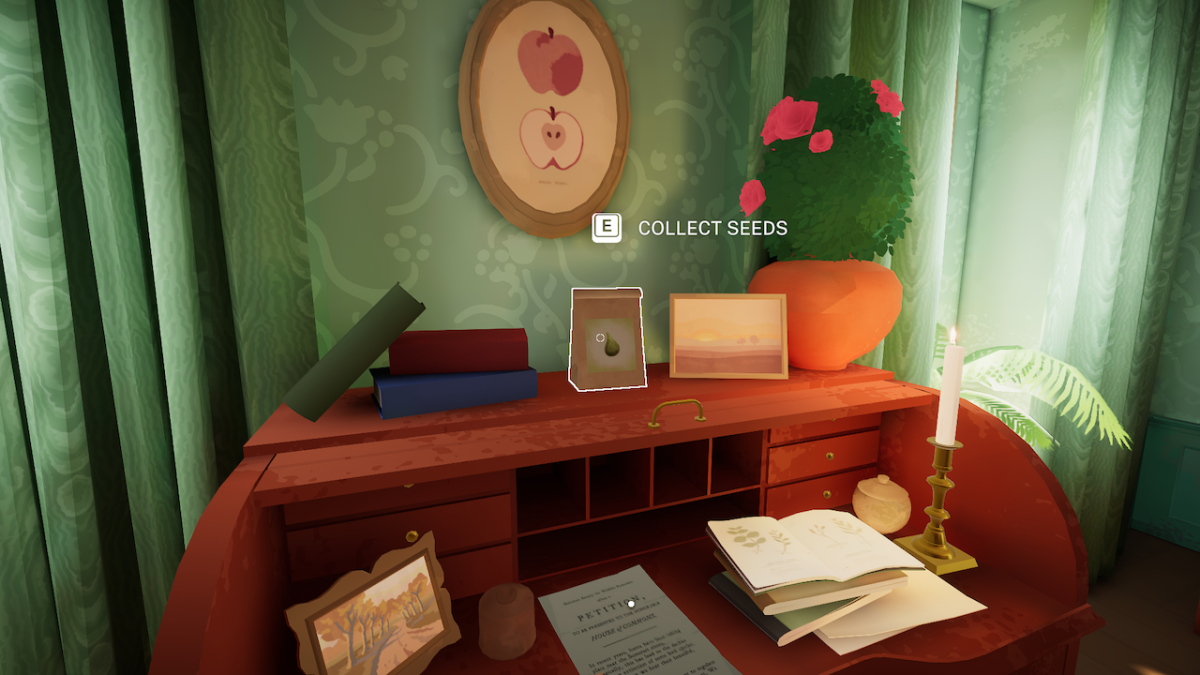
You’ll gain access to this half of the First Floor after moving the tree branch after growing the Sapphire Gloom.
All Cradle Fern clue locations
Finding the clues for the Cradle Fern will take you from the Study, to the Corridor, to the Master Bedroom, and then the Bell Tower. So pretty much everywhere aside from the locked Attic this side of the First Floor.
Here are all the Cradle Fern clue locations in Botany Manor:
1. Bird Calls.
The book of Bird Calls can be found in the Bell Tower, on the table in the top floor of the Bell Tower.
2. Letter About Melodies.
The Letter About Melodies can be found on the desk in the Bell Tower, in the second room.
3. Fern Painting.
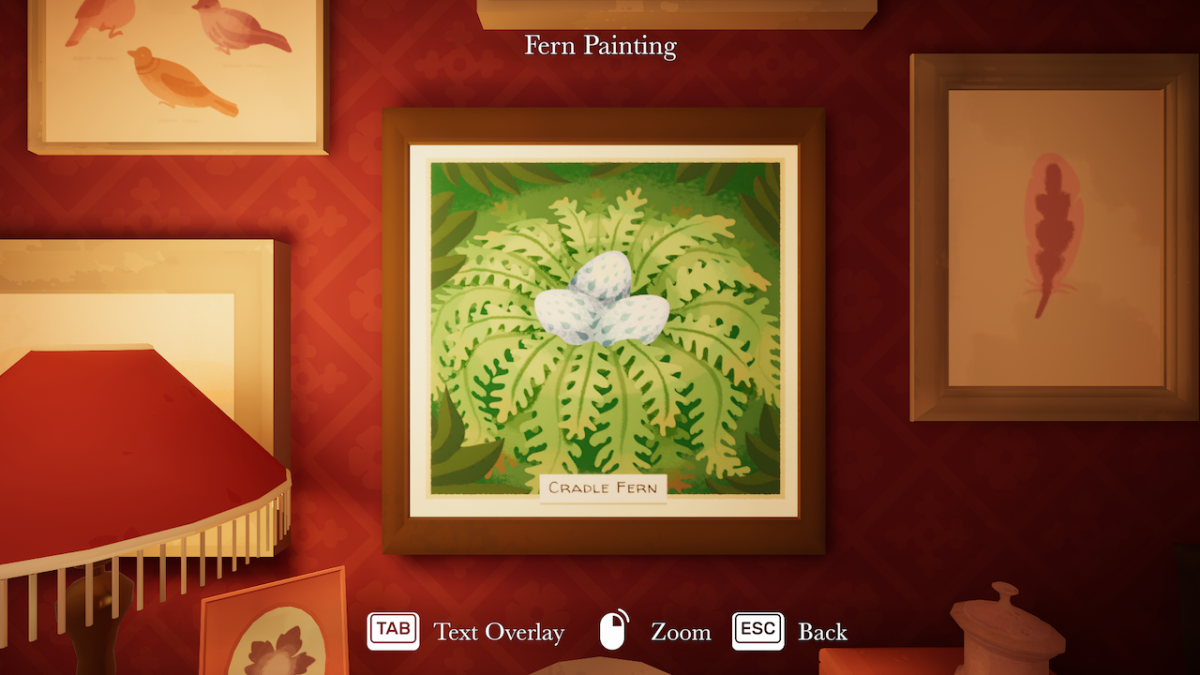
The Fern Painting can be found in the Corridor hanging on the wall.
4. Petition.
The Petition can be found on the first table in the Master Bedroom.
5. Bird Eggs.
The Bird Eggs can be found in the box on the far table in the Study.
Insert these clues into the Cradle Fern entry in the herbarium and we can get to work.
How to sprout Cradle Fern
The Cradle Fern is yet another easy plant to sprout.
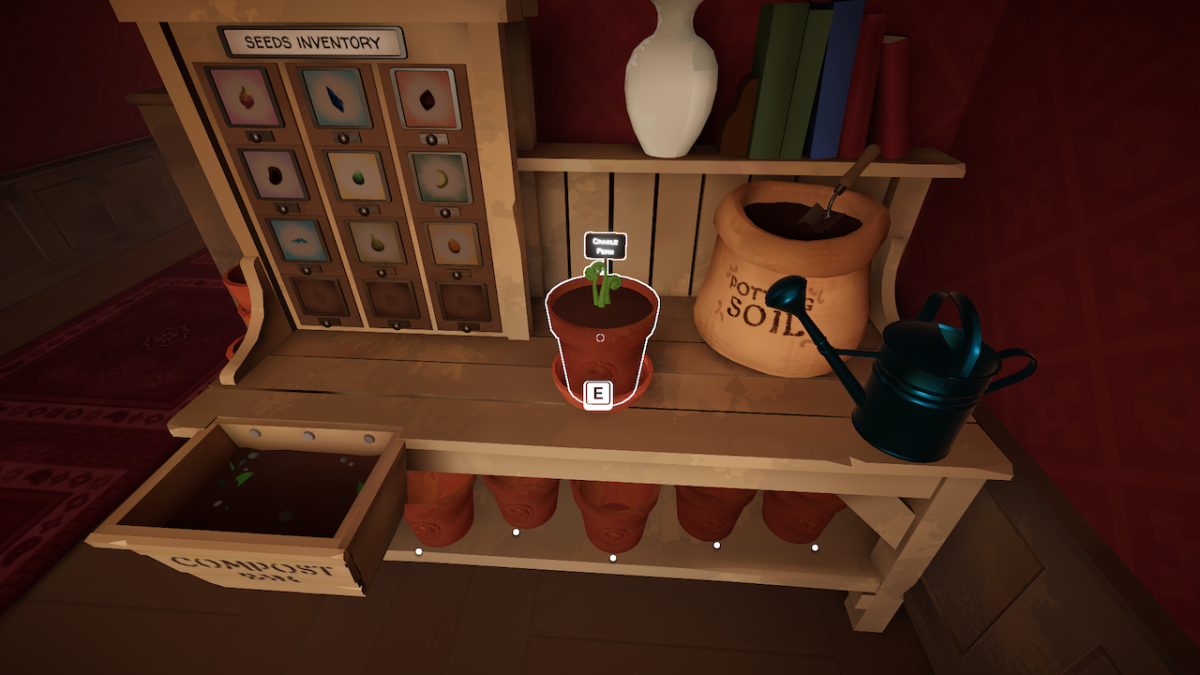
All it requires is water. There’s a potting station outside the Master Bedroom and Bell Tower for easy access.
How to bloom Cradle Fern
I enjoyed blooming the Cradle Fern in Botany Manor, although I am rather partial to bird song.
Figuring out how to bloom the Cradle Fern
It takes a little critical thinking to wrap our heads around the connections here, but all the pieces are laid out.
In the Corridor is a painting of the Cradle Fern with bird eggs laying inside. This connects the plant to birds.
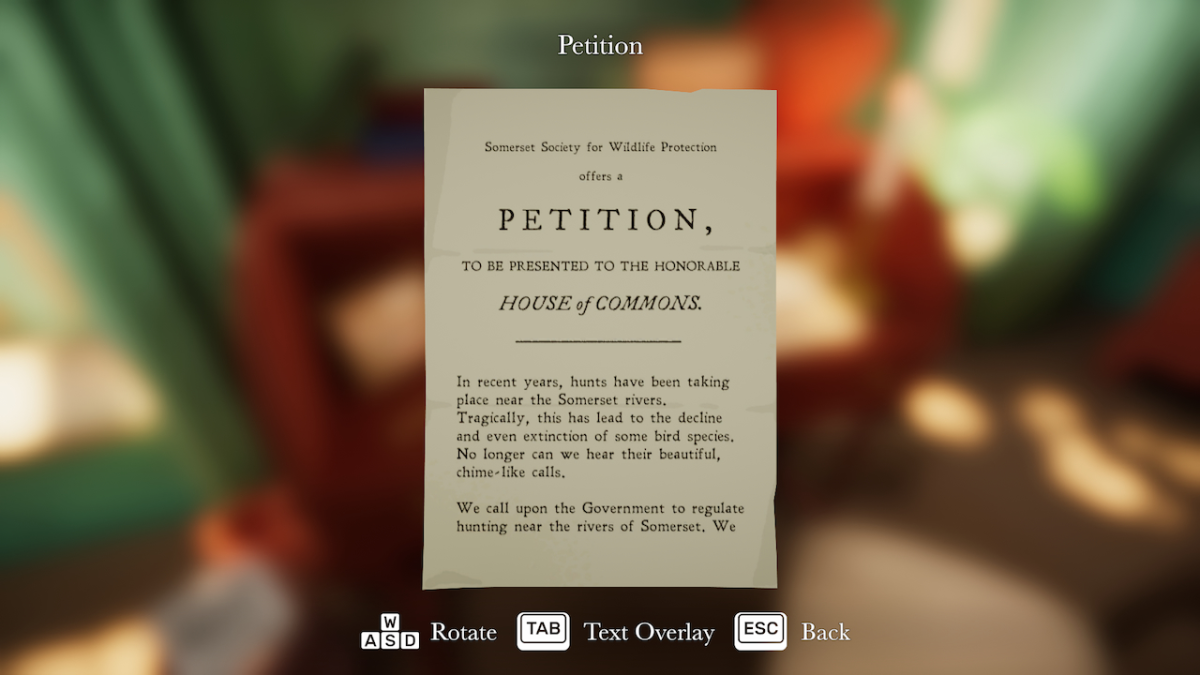
Arabella mentioned that there’s a decline of Cradle Fern thanks to changes in their environment. The Petition in the Master Bedroom (signed by Arabella) brings up the over-hunting of bird species in Somerset. Naturally, this would have an impact on the local environment, and we know the Cradle Fern and birds share an ecosystem. Yet again connecting the two.
With the connection between Cradle Ferns and birds established, we can figure out how the Cradle Fern grows when reading the Letter About Melodies.
This letter tells us that some plant species thrive when exposed to musical melodies of their natural habitat. In the case of the Cradle Fern, then, bird song would be a particularly potent melody occuring in their natural habitat.
With this information, we can figure out how to recreate the right bird song to bloom the Cradle Fern.
Identifying the right bird song
Thankfully, the Cradle Fern painting shows us a specific type of bird egg.
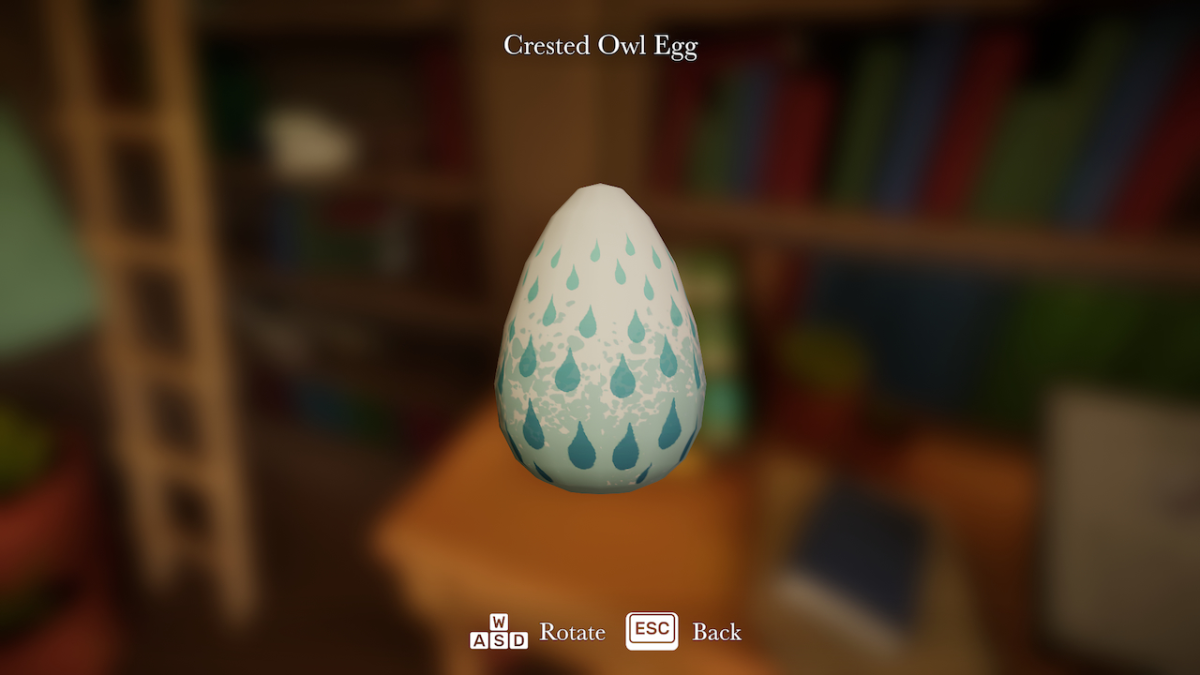
When going into the Study, we can cross reference the Bird Eggs to identify one species of bird that shares a habitat with the Cradle Fern. The Crested Owl.
Playing the right melody
Take the Cradle Fern seedling up the stairs of the Bell Tower. Place it on the dish by the bells.
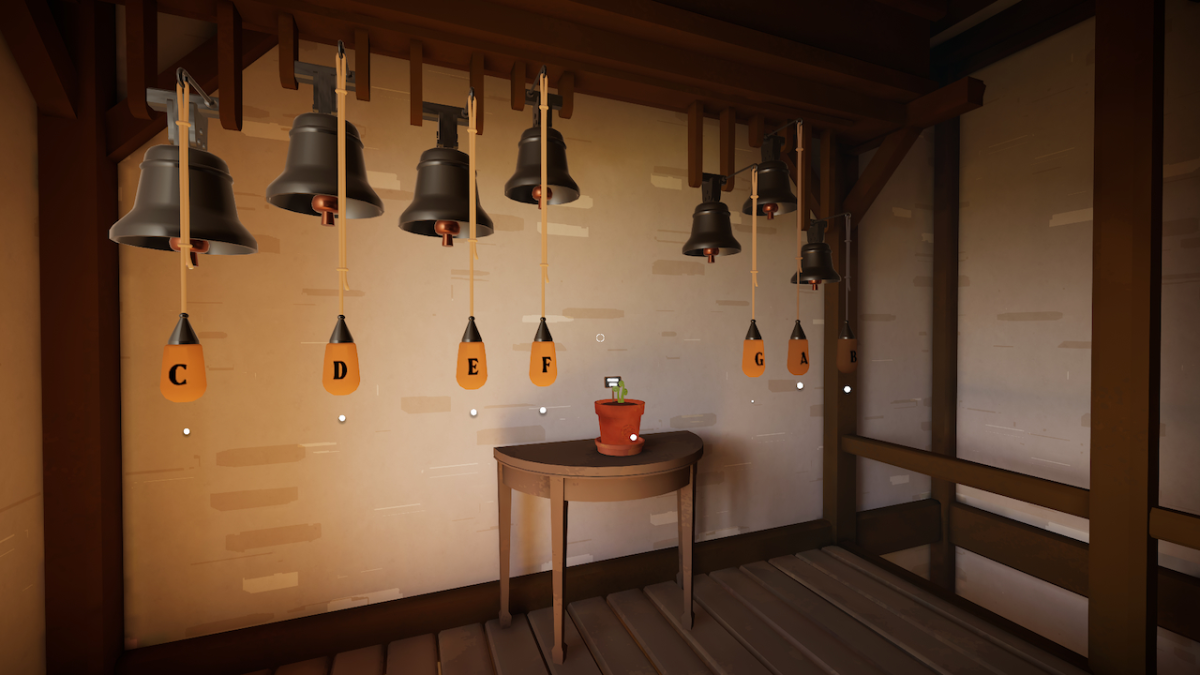
The book of Bird Calls contains the song of the Crested Owl on the second page, with the following melody:
E C D E G F
Ring the bells of the right notes in this order. If you make a mistake, don’t worry. Just try it again.
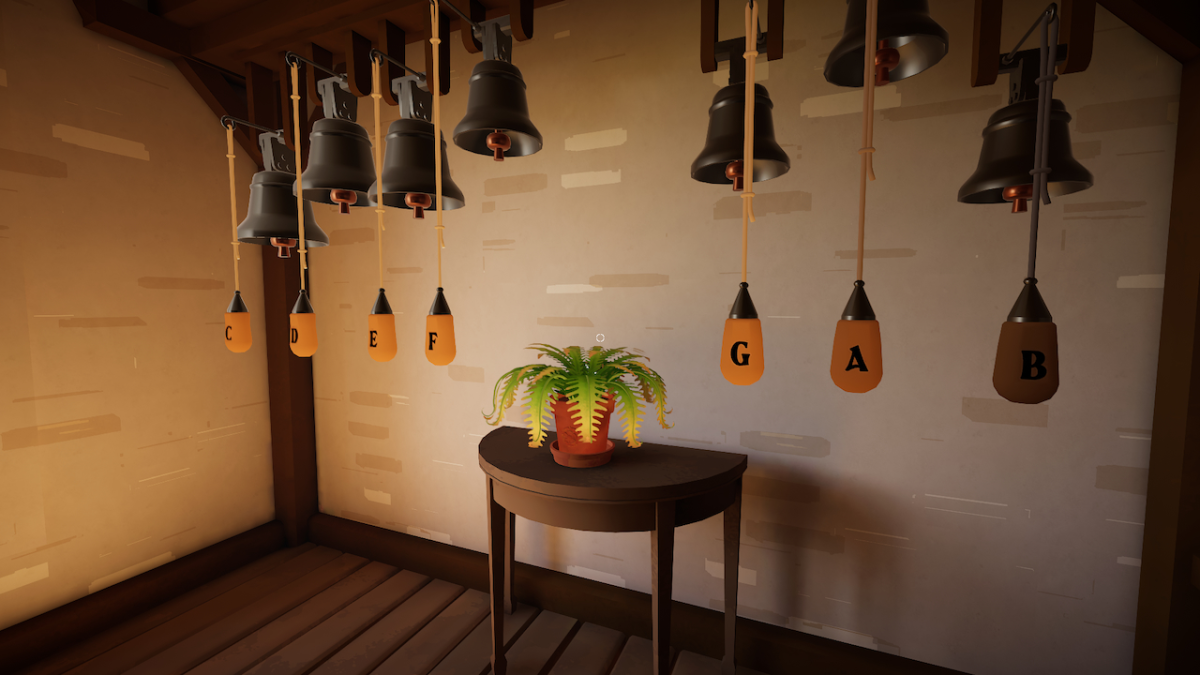
With the right melody performed, the Cradle Fern will bloom and unfurl.
How to grow the Brook Chalice in Botany Manor
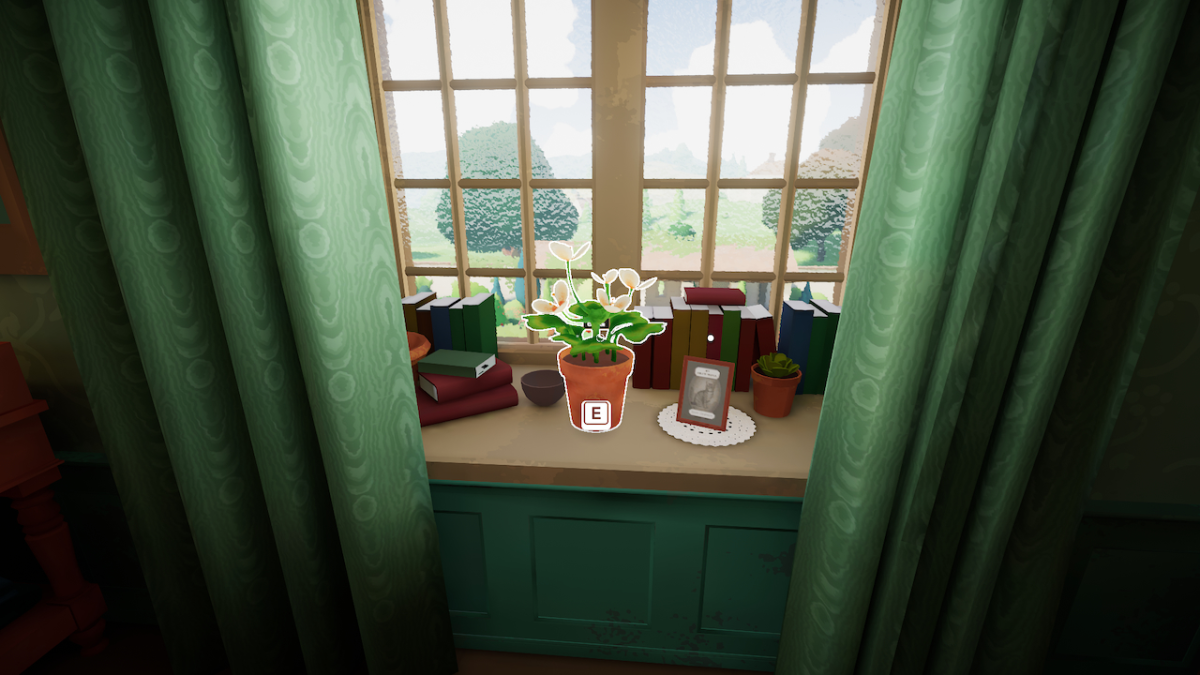
I’d recommend you grow the Brook Chalice third, as it’s only slightly harder than the Cradle Fern.
There are six clues for the Brook Chalice in Botany Manor. It turns out that Arabella’s friend tipped her off on them.
Let’s find out how to grow the Cradle Fern.
Brook Chalice seed packet location
The Brook Chalice seed packet is in the Attic on the table at the very end in Botany Manor.
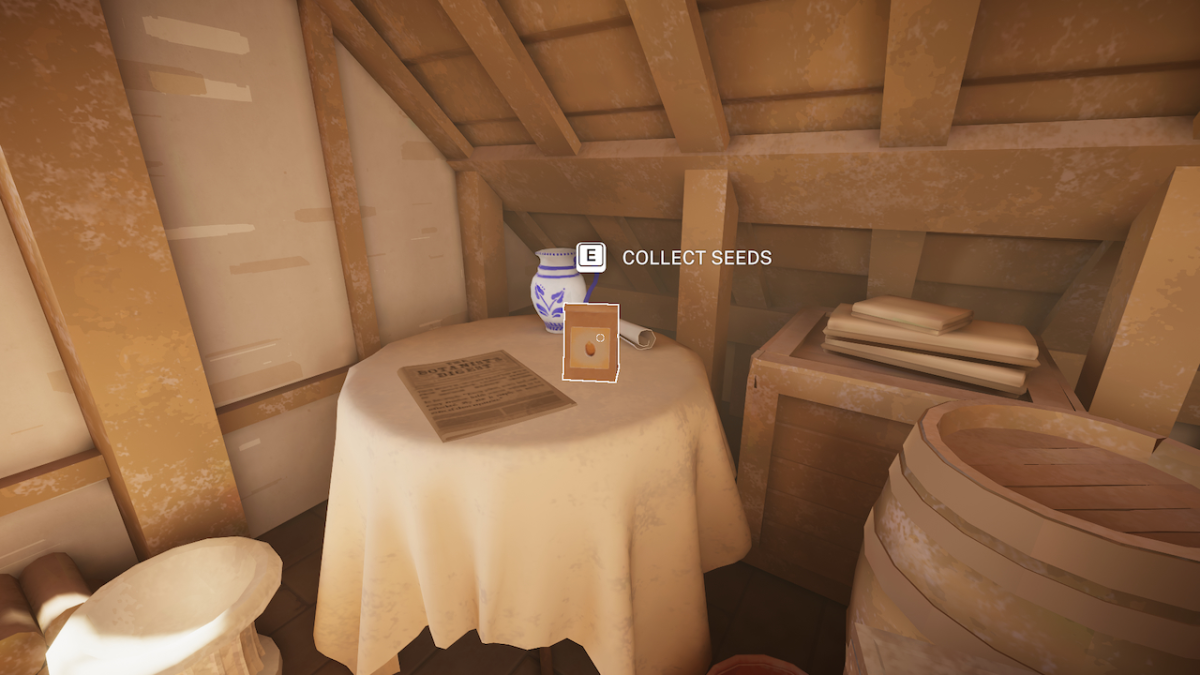
You’ll need to have the Attic Key to get into the Attic, which is in the bottom floor Bell Tower if you haven’t already grabbed it in passing. Although the seeds are in the Attic, there are no clues for them in there.
All Brook Chalice clue locations
Finding the clues for the Brook Chalice will take you from the Corridor to the Bell Tower, then to the Master Bedroom and the connected Bathroom. Make the Bathroom your final destination as that’s where you’ll be growing it, too.
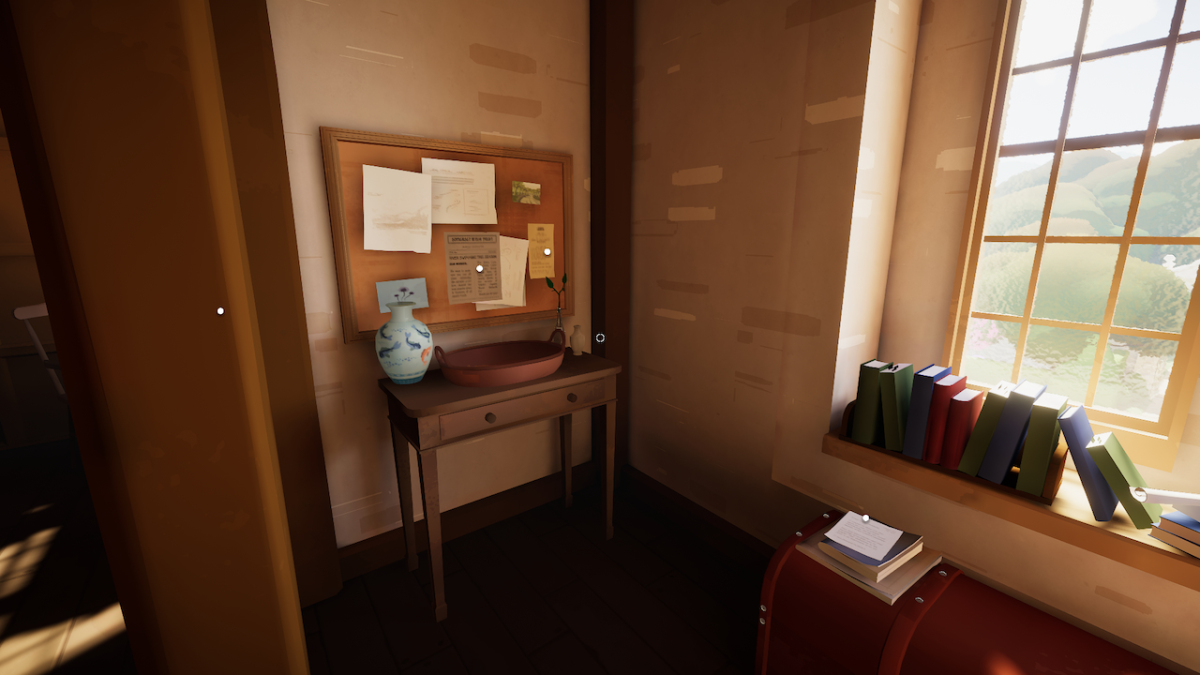
Here are all the Brook Chalice clue locations in Botany Manor:
1. Bath Geyser.
The Bath Geyser Manual can be found in the Bathroom on the desk to the left.
2. River Poster.
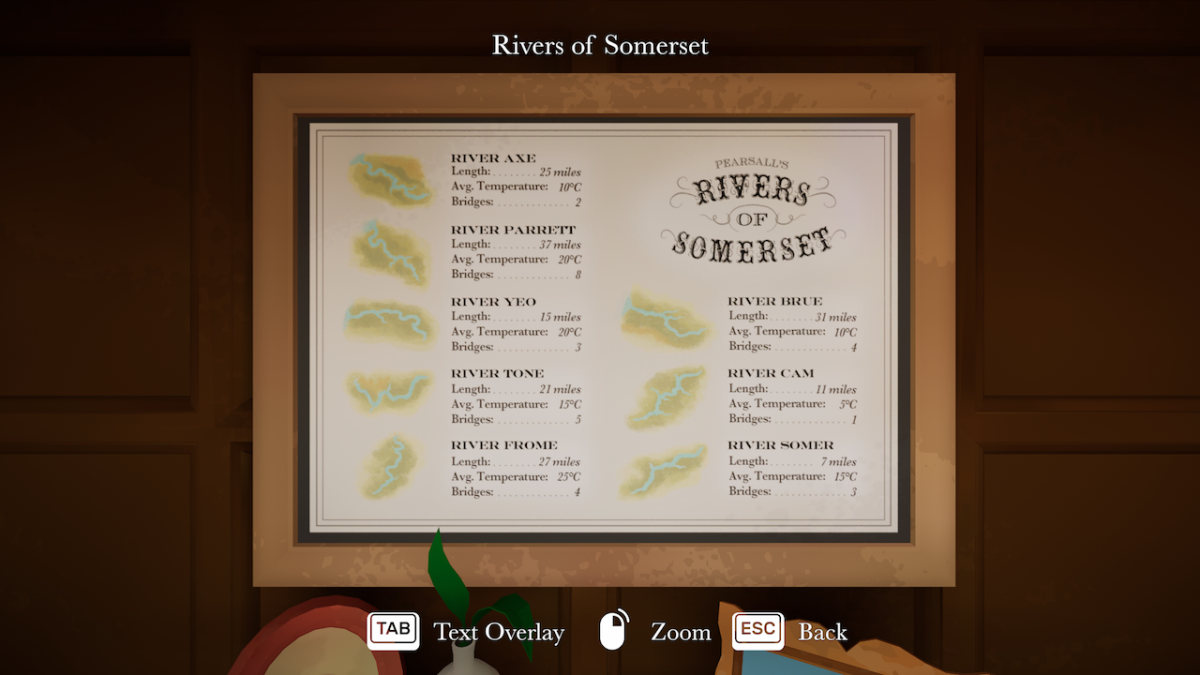
The Rivers of Somerset poster is hanging on the wall in the Bell Tower.
3. Government Notice.
The Government Notice is pinned on the tac board in the Bell Tower.
4. Letter About Weeds.
The Letter About Weeds is found in the Corridor, on a small table next to the Attic’s door.
5. Weed Removal.
The Weed Removal Ad can be found in the trash can next to the first table in the Master Bedroom.
6. River Trust.
The River Trust can be found in the Bell Tower, even though the game says it’s found in the Master Bedroom. It’s pinned to the tac board.
With all these clues about the Brook Chalice in its herbarium entry, we can start connecting some dots.
How to sprout Brook Chalice
The Brook Chalice sprouts like most other plants in Botany Manor.
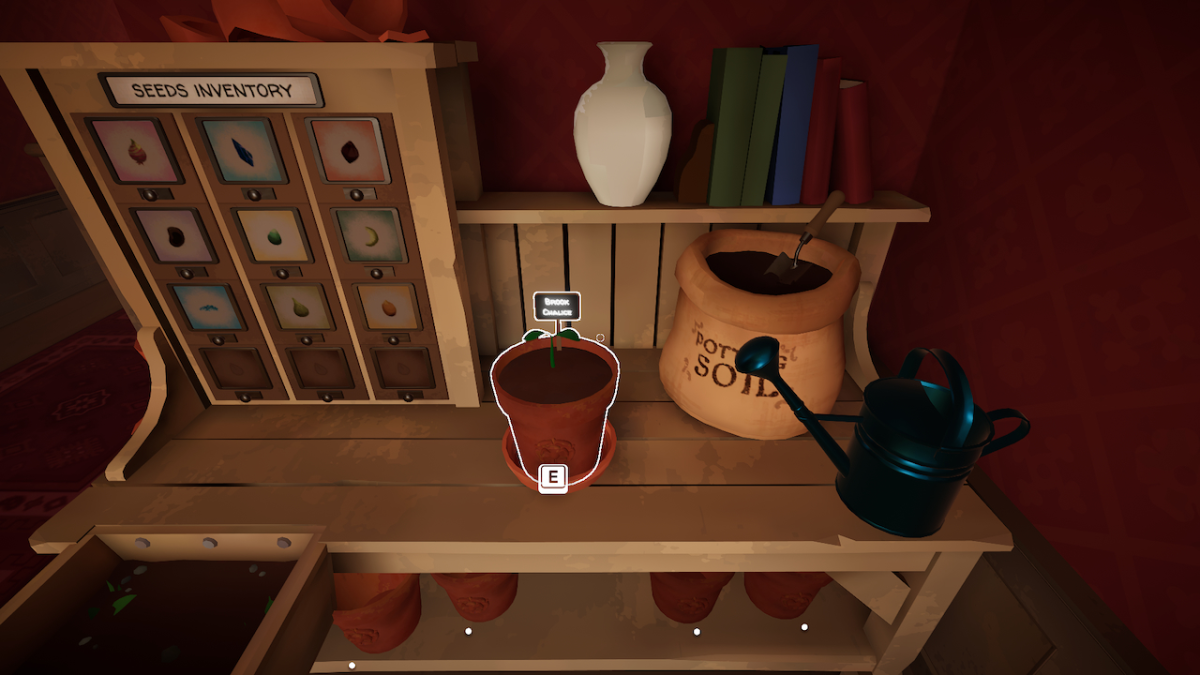
Prepare it and water it like you’ve done a few times now.
How to bloom Brook Chalice
The Brook Chalice is quite the brain-teaser to solve in Botany Manor, but like all things is simple when broken down.
Figuring out how to bloom the Brook Chalice
The Brook Chalice itself is a weed, which is confirmed by the Weed Removal Ad.
Thanks to the Letter About Weeds, we know that not only can be grow in the Somerset Rivers, but that they were spotted flowering and blooming in one — something unheard of.
The month of the letter about the Brook Chalice blooming is the same month of a Government Notice. This notice describes rust pollution in four Somerset rivers. However, one of the rivers was inexplicably unaffected by the pollution.
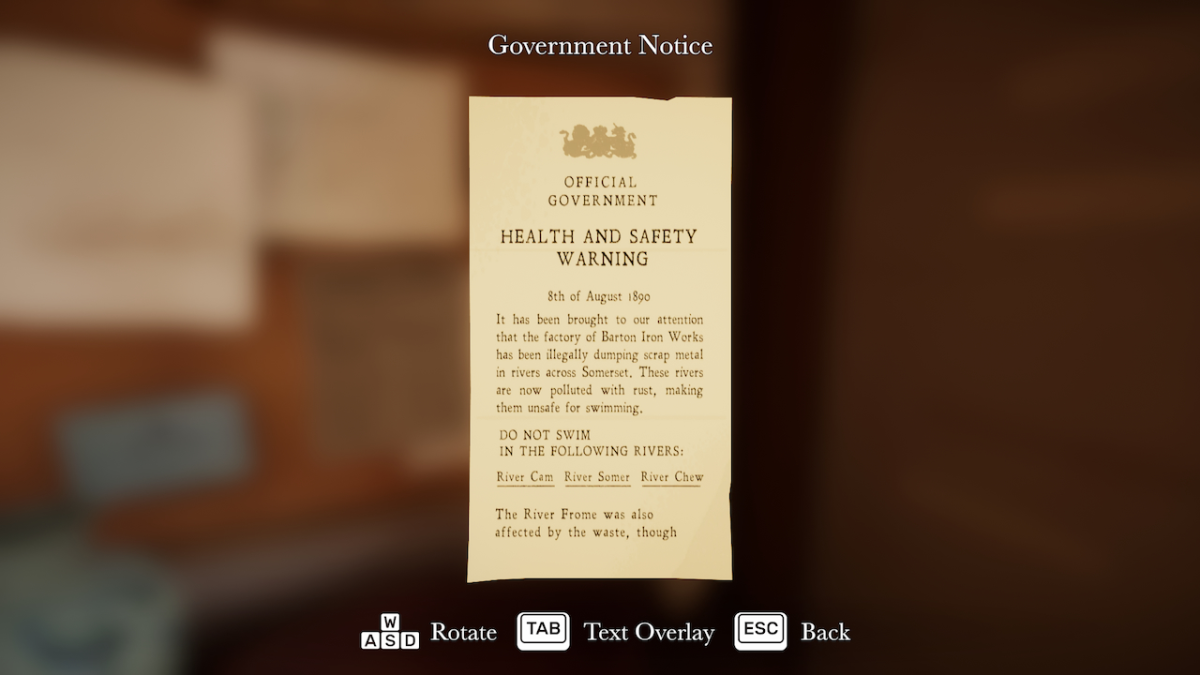
Interestingly, to keep the rivers free of weeds for swimming, the River Trust newsletter tells us that out of four of the rivers affected by pollution, three of them happened to be cleared of weeds.
The Rivers of Somerset poster shows us key information of all the rivers in Somerset, including the ones mentioned in the River Trust newsletter and the Government Notice.
The River Frome wasn’t unweeded (so Brook Chalice may be present) and didn’t suffer the effects of rust pollution. Additionally, it was likely this river that hosted the blooming Brook Chalice plants as rust pollution is an atypical event, and so is the weed blooming in the first place.
This all means that we must recreate the River Frome and rust pollution to bloom the Brook Chalice.
Finding a rusty object
As rust pollution is a key component here, we need to find something rusty.
In the Attic is a Rusty Pig on the table up the stairs. Bring this with you to the bathtub in the Bathroom, as this is the only place we’ll be able to submerge the Brook Chalice in water.
Fixing the bathtub
Once the Rusty Pig is placed inside the bathtub, grab the Brook Chalice seedling and place it on the dish in the bathtub.
Unfortunately, the pipes connecting the bathtub to the water supply are broken.
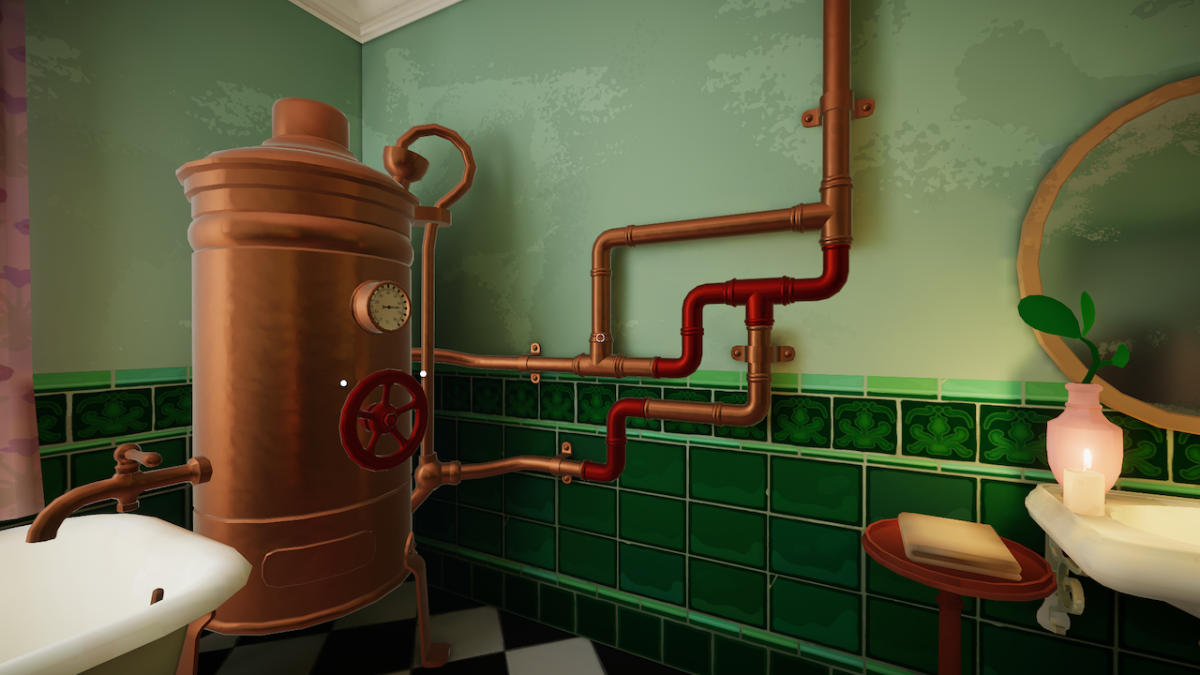
You’ll find numerous red pipes scattered around the Bathroom, and a network of pipes that are missing sections. We’ll need to find the right pipes to reconnect the pipes.
Fortunately, every piece of red piping can fit in the network perfectly.
Finding the right temperature
Now that the pipes are fixed, we can fill the bathtub with water. However, we’ll need to set the boiler to the right temperature, something that the Bath Geyser Manual makes us aware of.
The temperature of the River Frome is 25°. Head to the valve of the boiler and turn it down to 25°.
Filling the bathtub
Finally, we can turn on the tap to fill the bath.
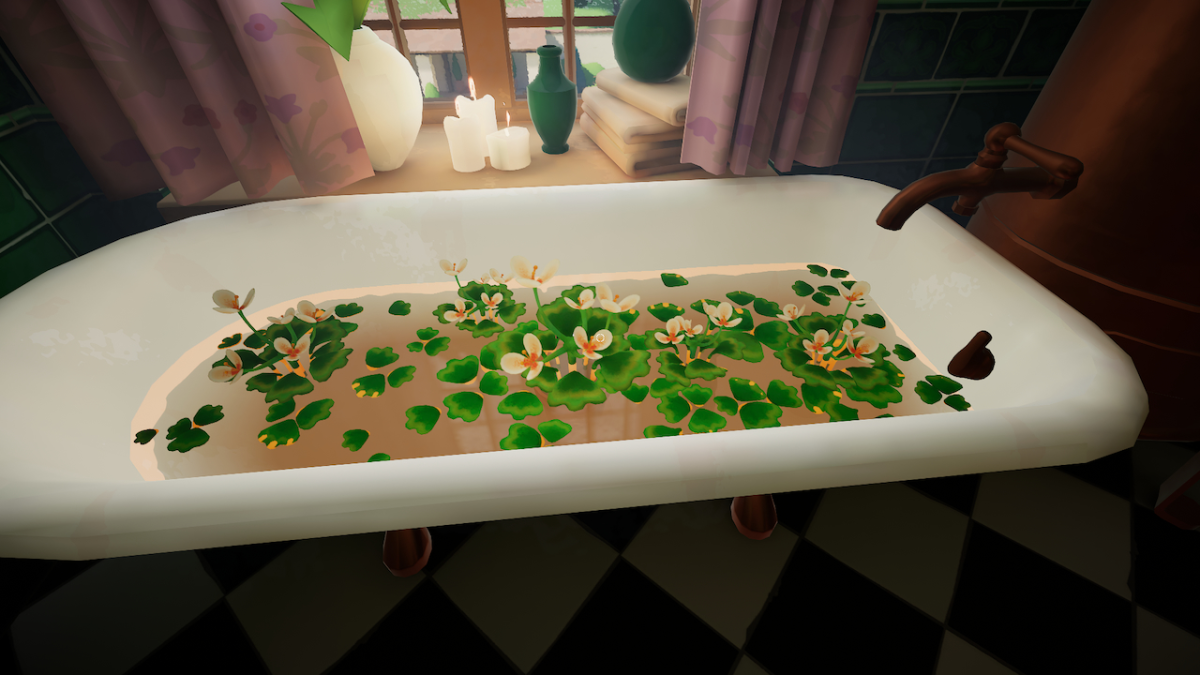
The rust from the pig will pollute the bathtub, but the Brook Chalice will bloom all across the surface of the water!
How to grow the Nightfall in Botany Manor
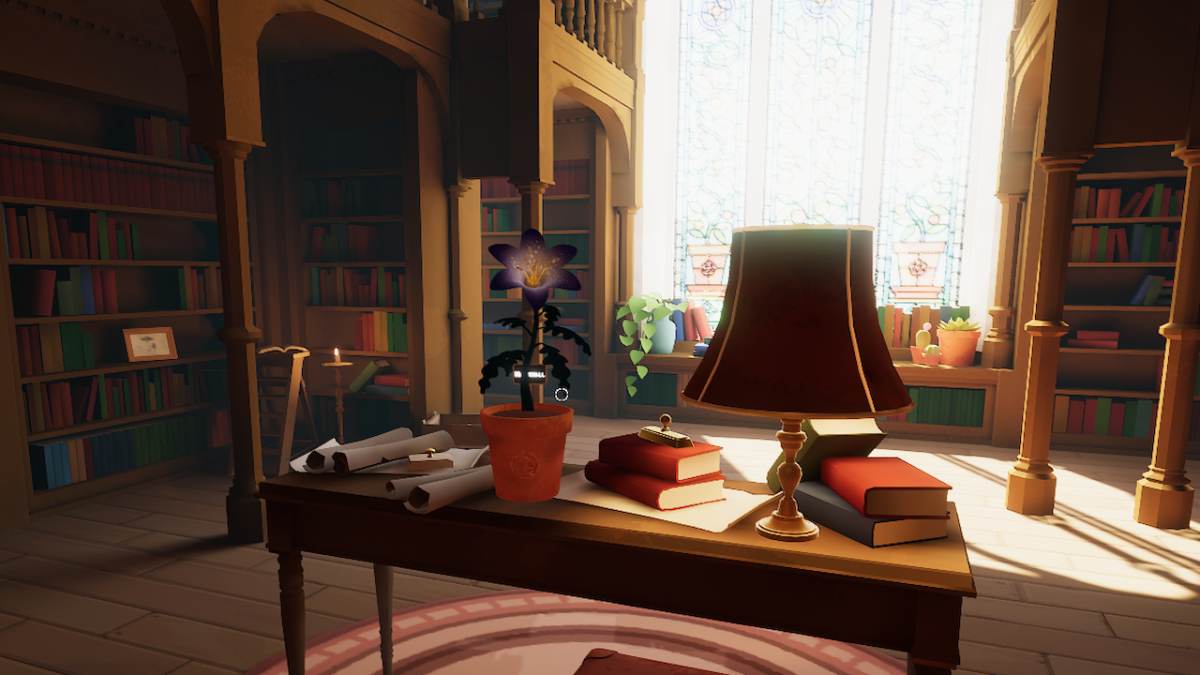
The Nightfall has eight clues tied to it, and Arabella doesn’t add anything of value aside from connecting it to her Grandmother.
I would recommend tackling this one last, as it’s a little harder to solve.
Let’s figure out how to grow the Nightfall in Botany Manor.
Nightfall seed packet location
The Nightfall Seeds are on the small table in the secret Library Room. If you didn’t grab them when we initially solved it, head back there now.
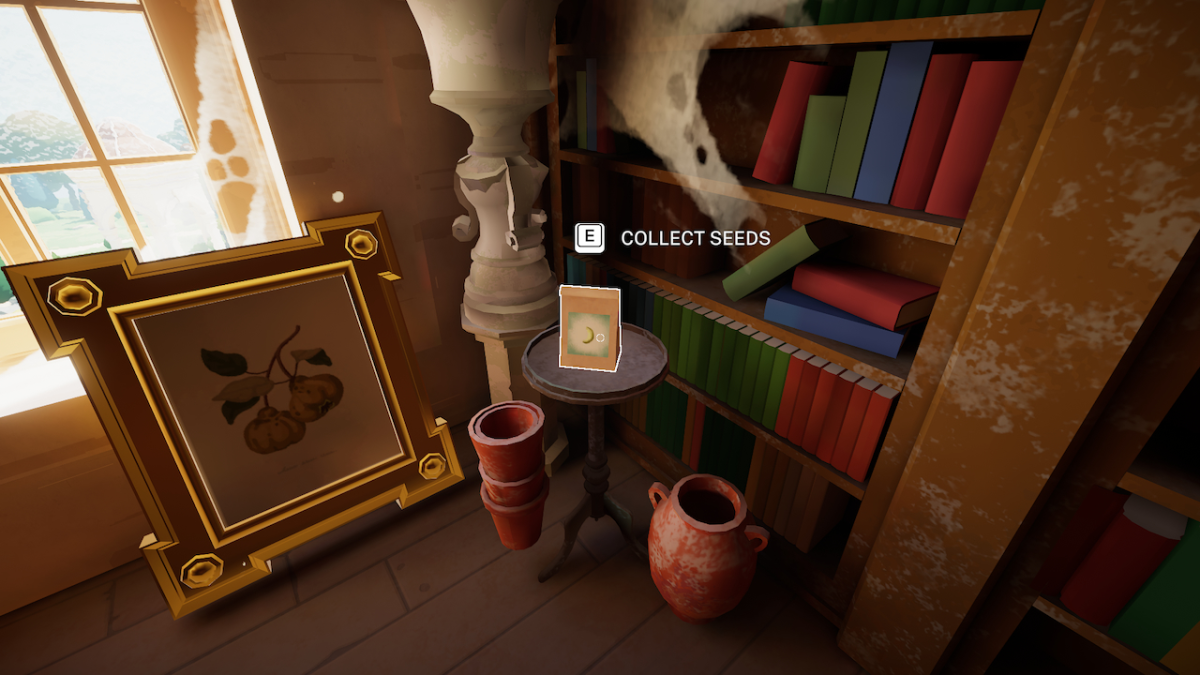
In here are some Nightfall clues, so make sure you’ve grabbed them all, too.
All Nightfall clues locations
Searching for all the Nightfall clues will take you across secret Library Room, the Corridor, the Master Bedroom, and the Attic, so quite the distances.

Here are all the Nightfall clues in Botany Manor:
1. Moth Calendar.
The Moth Calendar is a circular dial on the table under the Moths Poster in the Bell Tower.
2. Moths Poster.
The Moths Poster is hanging on the wall in the Bell Tower when you enter it.
3. Sight of Plants.
The Sight of Plants book is in the Attic on the table up the stairs to the left.
4. Trapped Moths.
The Trapped Moths leaflet is on the crate to the left the moment you enter the Attic.
5. Fairy Painting.
The Fairy Painting is hanging on the wall in the Corridor.
6. Grandma’s Research.
Grandma’s Research is in the secret Library room on the table at the other end.
7. Sunset Paintings.
The Sunset Paintings can be found hanging on the walls all across the secret Library room.
8. Fairy Story.
The Fairy Story can be found in the Master Bedroom on the small table.
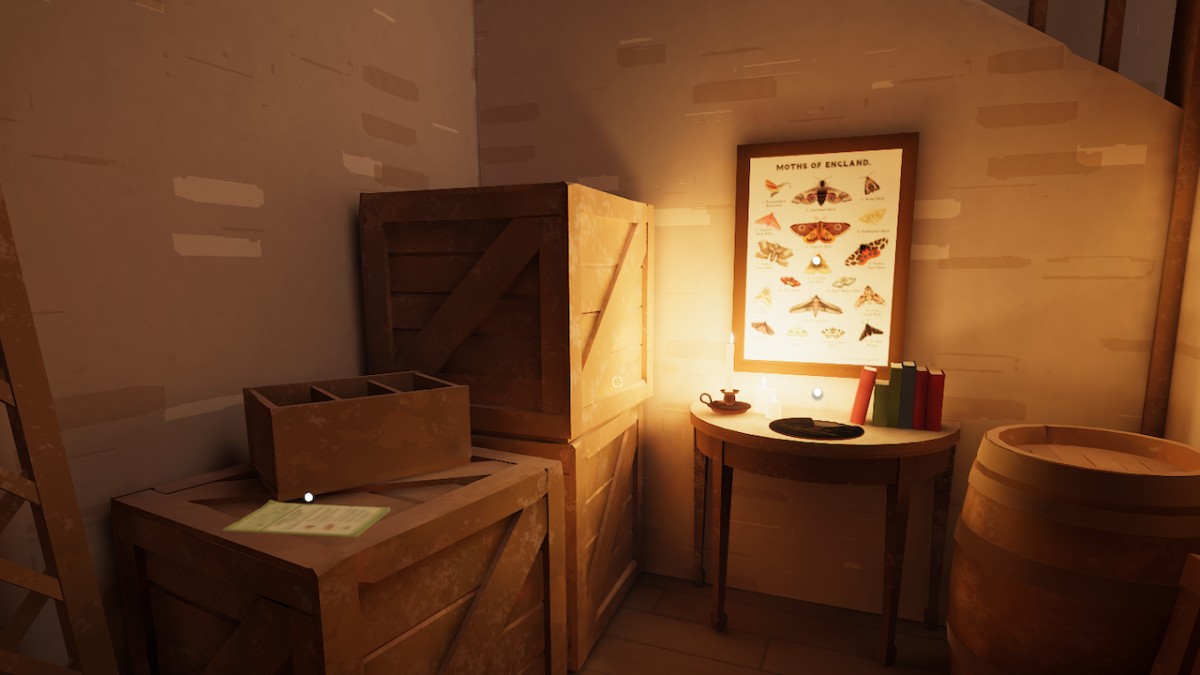
Upon entering all of these clues into the Nightfall’s herbarium entry, we’ll be ready to finish off Chapter Four.
How to sprout the Nightfall
The Nightfall isn’t picky about sprouting.
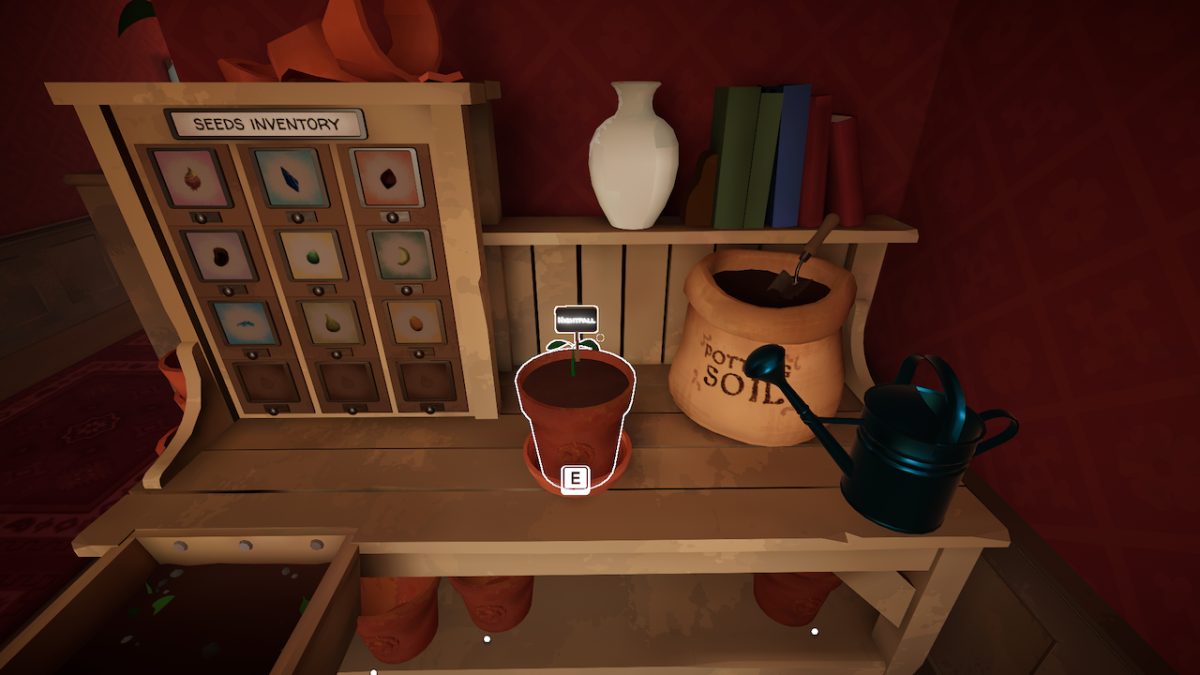
Pot it and water it and it’ll grow.
How to bloom the Nightfall
Trying to bloom the Nightfall in Botany Manor is a rather satisfying process.
Figuring out how to bloom the Nightfall
Upon reading Grandma’s Research, we know that she greatly suspects the Nightfall to only open at sunset and at a particular time of year.
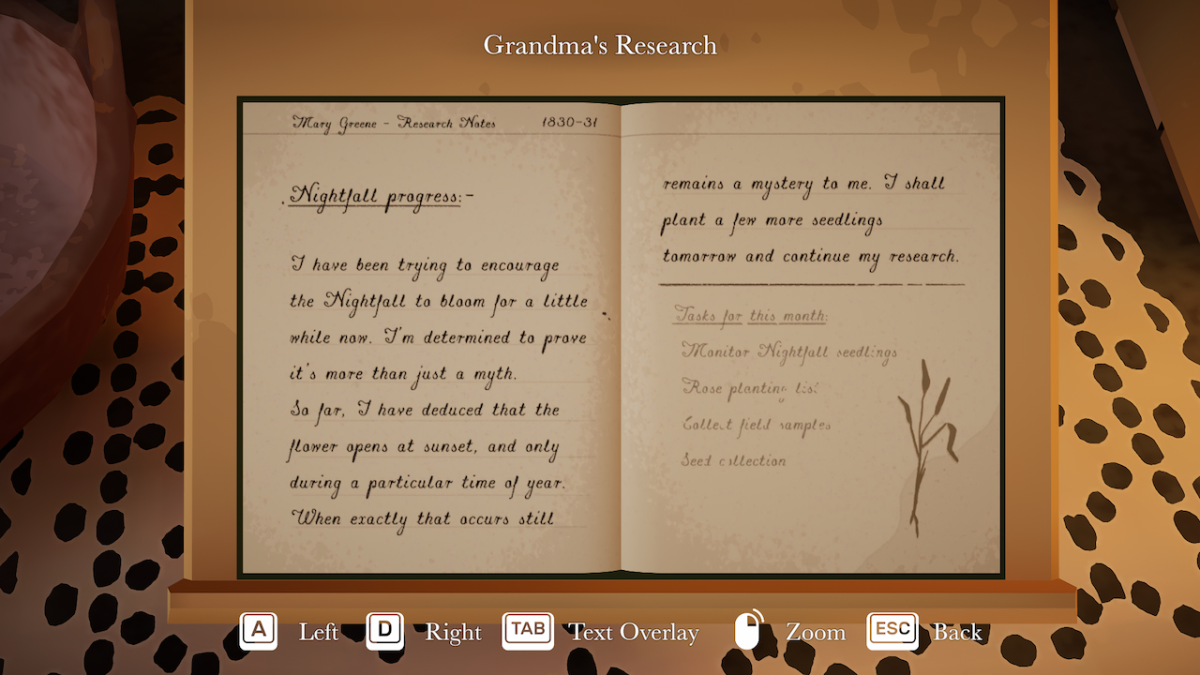
This is entirely possible thanks to the Sight of Plants book, which tells us that some plants can detect the time of day through colors. Botanists and horticulturists have tricked flowers into blooming when exposed to certain lights and colors, which is what we will have to do for the Nightfall.
The Trapped Fairy story further confirms that the Nightfall only opens during the night, and closes when exposed to the sun.
This means that we will have to uncover the time of year that the Nightfall blooms so we can recreate the color of the sunset to trick it into blooming.
Identifying the right moth
Thanks to the Trapped Moths leaflet, we know that moths have a connection to plants like the Nightfall. They are attracted to the bud of such flowers when they are open.
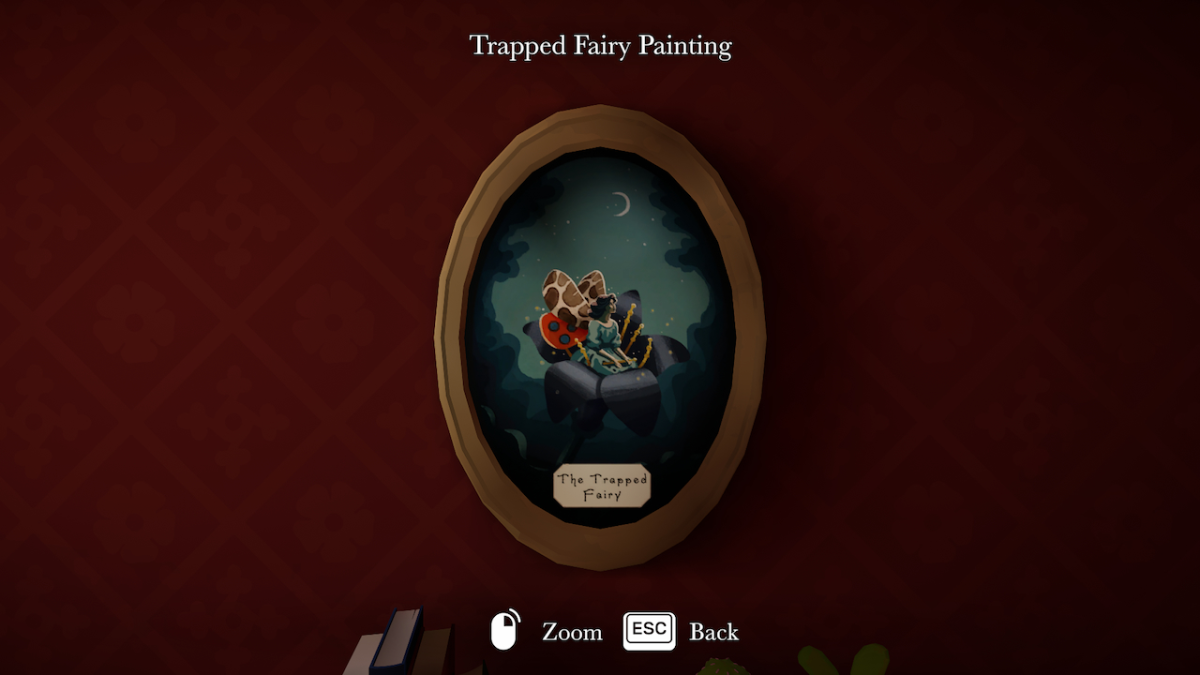
The Trapped Fairy Painting provides an illustration of the Trapped Fairy fairytale. The fairy that is resting on the Nightfall has the wings of a moth — so it’s likely that the fairytale was inspired by a moth getting caught in a Nightfall, as the Trapped Moths leaflet mentioned said could happen.
By cross-referencing the wings on the illustration to the Moths Poster, we can identify the moth that is known to rest on Nightfall flowers when they’re open.
The Garden Tiger Moth perfectly matches the Trapped Fairy’s wings.
Finding out the right time of year
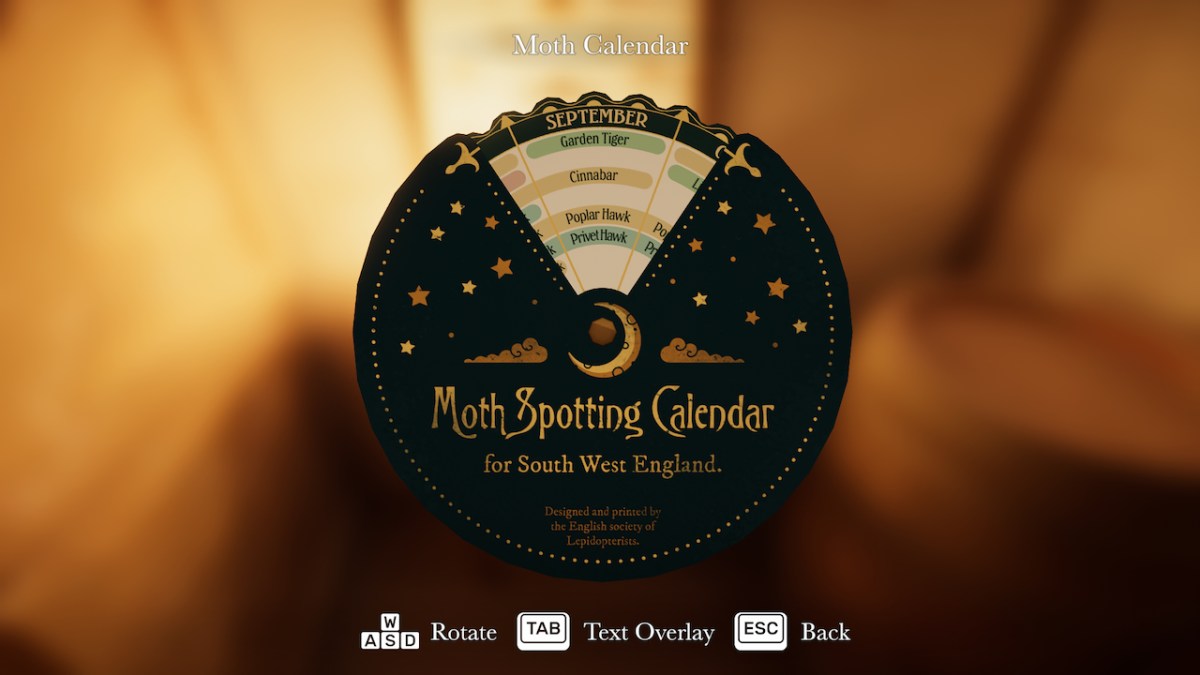
Now that we have our moth, we can use the Moth Calendar to find out when the Garden Tiger Moths are known to be out and about.
September seems to be the only time of year that these moths come out, which means it is the only time of year that the Nightfall is blooming.
Heading back to the Sunset Paintings in the secret Library room, and we can find the painting for September, which has the colors Blue, Yellow, Orange, and Red, in that order.
Now that we know what the sunset looks like at the time of year the Nightfall blooms, we can trick it into blooming when recreating the conditions.
Recreating the September Sunset
Bring your Nightfall seedling to the Attic and place it on the dish in front of the projector.
That projector, called the Magic Lantern, comes with colored slides in a small box next to it on the table. Attached to the projector is a frame with four slots.
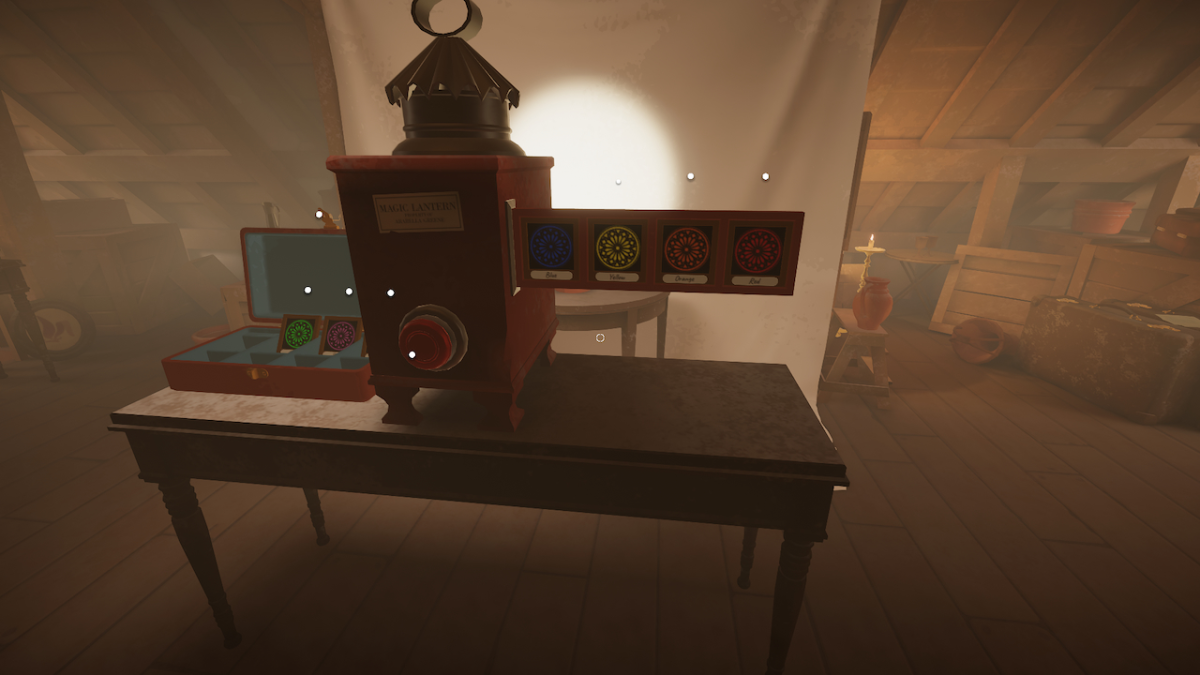
You’ll need to find the right colors and insert them in the frame in the right order.
From left to right, insert the Blue slide, then the Yellow slide, then the Orange slide, and finally the Red slide.
When you’re ready, hit the red button behind the projector to begin the colorful slideshow.
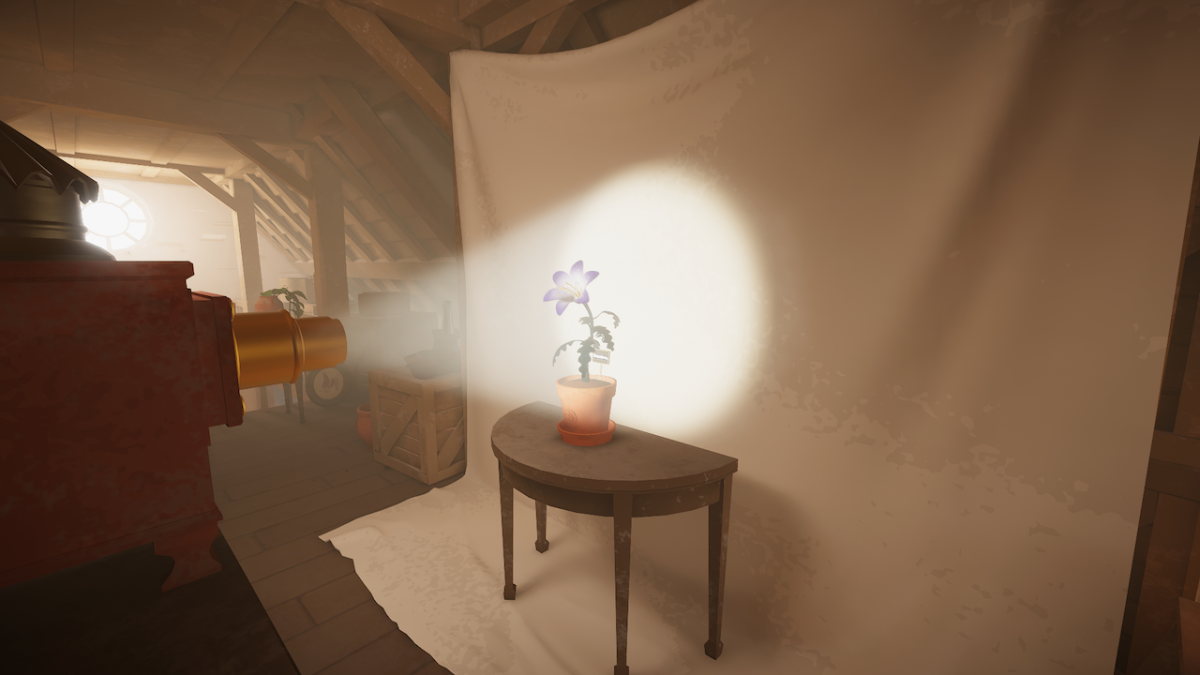
The colors will trick the Nightfall into blooming!
Now we can finish off Chapter Four and enter the final chapter!
Finishing Chapter Four
Yet again, you’ll receive a Gatehouse delivery, so you’ll have to make the trek through the manor again.
In the bowl, this time will be the Formal Garden Key.

You’ll find the Formal Garden entrance all the way back at the end of the Rose Garden, where you needed to go during Chapter 2.
Unlock the Formal Garden and walk through to begin Chapter Five!
Chapter Five – Climbing Up

- How to grow the Oscilette in Botany Manor
- How to grow the Springdance Shrub in Botany Manor
- How to grow the Fool’s Emerald in Botany Manor
- Finishing Chapter Five
Chapter Five will bring you the final three plants in Botany Manor, with only 18 clues to help you grow them all.
This final chapter can prove pretty challenging, but don’t worry. I’ll walk you through it.
How to grow the Oscilette in Botany Manor
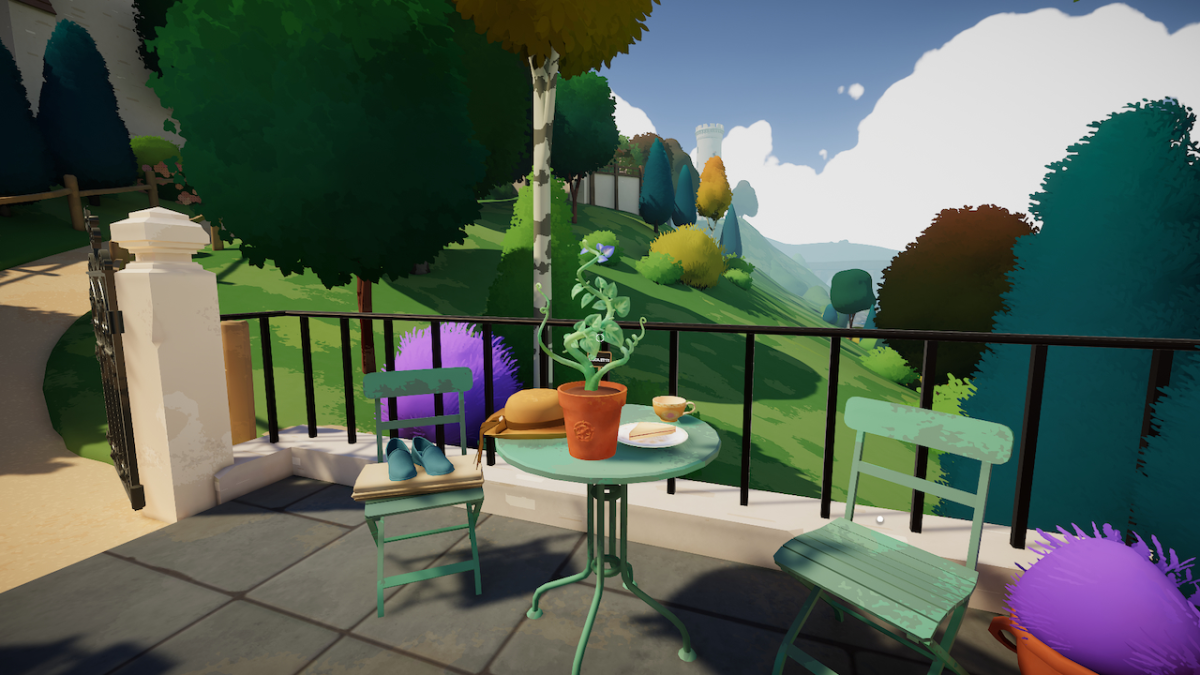
I’d recommend starting off with the Oscilette as not only is it the easiest, but all four clues and the solution are all contained in the Boathouse.
To get into the Boathouse, however, you’ll need to find the Boathouse Key.
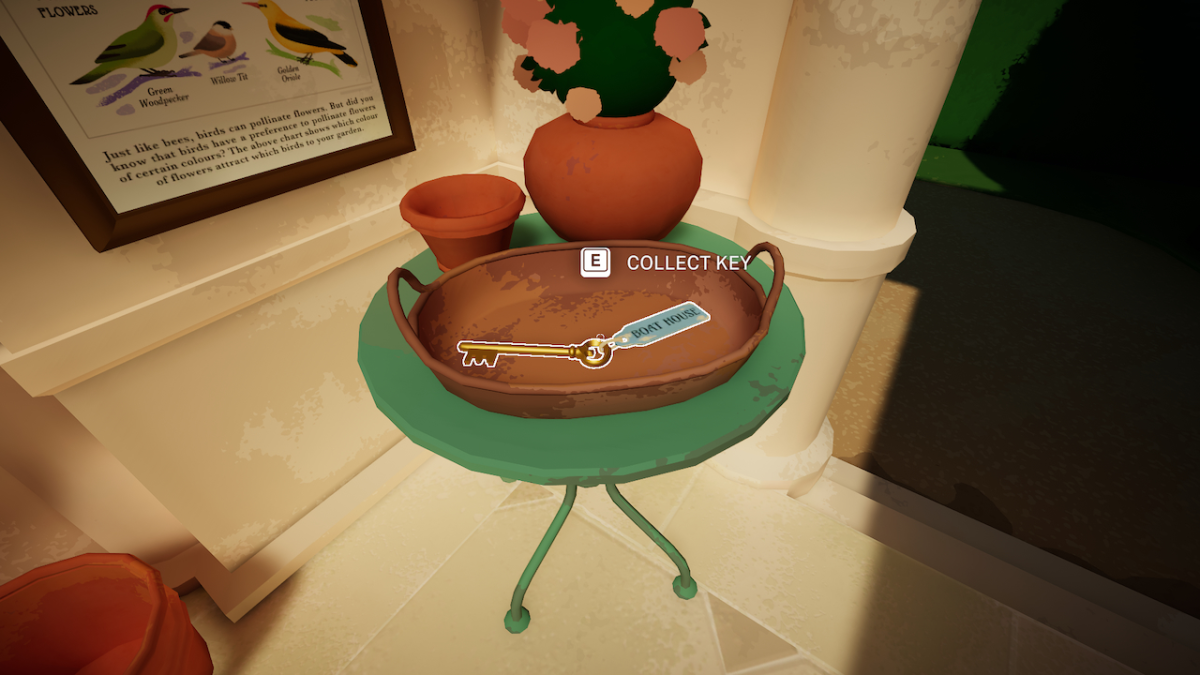
You can grab this from the bowl at the end of the Bird Garden, inside the stone structure.
Open the gate to the Boathouse and walk down the path till you see the Boathouse. Open the door to get inside, and we can start growing the Oscilette.
Oscilette seed packet location
The Oscilette seed packet can be found on a windowsill in the Boathouse.
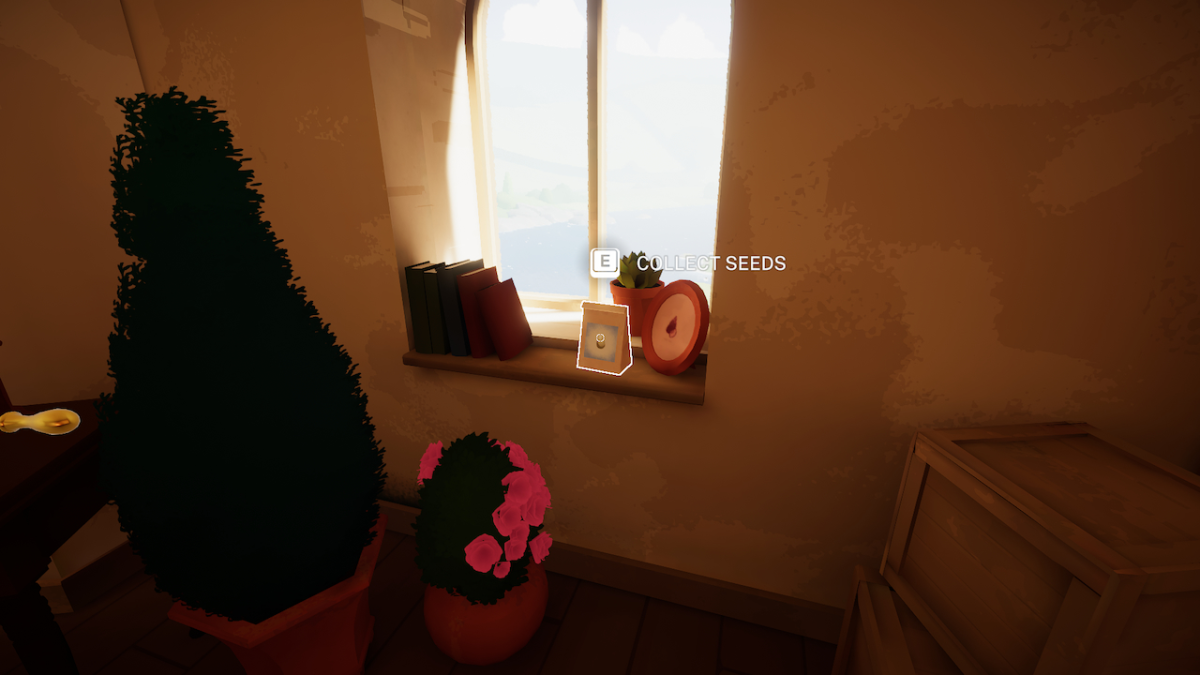
You’ll find the right windowsill next to the Phonograph at the other end.
All Oscilette clues locations
All the clues you’ll need for the Oscilette are right inside the Boathouse in Botany Manor.

Here are all four Oscilette clue locations:
1. Animal Heartbeats.
The book on Animal Heartbeats are in the Boathouse on the table opposite the Phonograph.
2. Boardgame Rules.
The Boardgame Rules can be found in the Boathouse on table next to the game.
3. Playing Cards.
The Playing Cards can be found in the Boathouse scattered on the table.
4. Weeds and Seeds.
The book on Weeds and Seeds can be found in Boathouse on table to the left of the entrance.
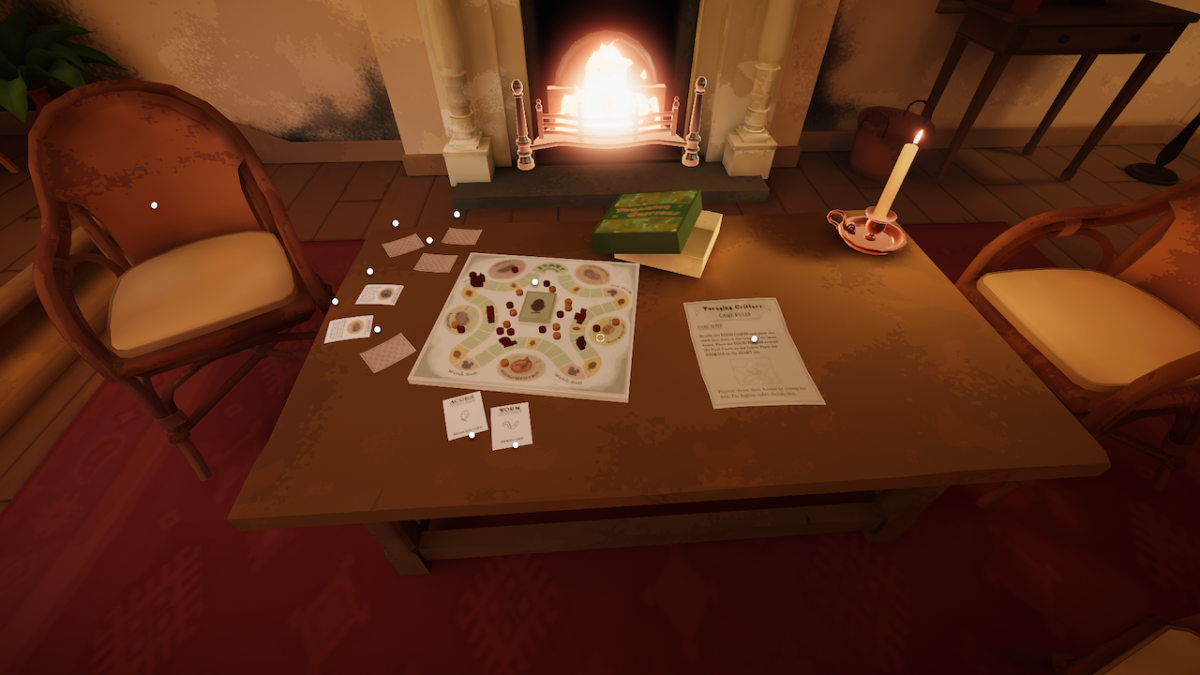
With all the clues in the Oscilette’s herbarium entry, we can start to grow it.
How to sprout the Oscilette
Interestingly, the Oscilette won’t simply sprout from water.
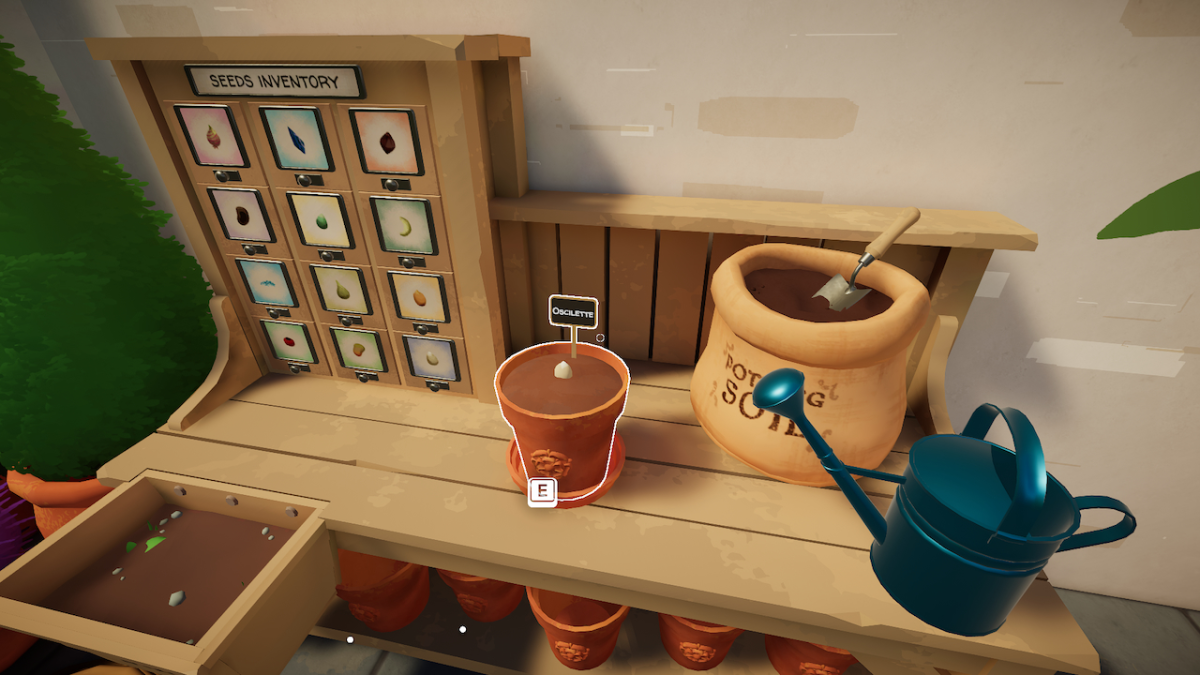
But we won’t need to sprout it. The Oscilette will bloom straight from being a seed – no sprouting required.
How to bloom the Oscilette
With the Oscilette in its seed form, head back inside the Boathouse and we can figure out how to crack it open.
Figuring out how to bloom the Oscilette
The How Weeds Spread book tells us explicitly that the Oscilette is known to be picked up by critters who then return it to their nests. Then, upon the animal going to sleep, it blooms.
Pretty simple stuff, so let’s try to recreate the sensation of the right sleeping animal.
Identifying the right woodland creature
We’ll need to know which creature to mimic if we are to trick the Oscilette into blooming in Botany Manor.
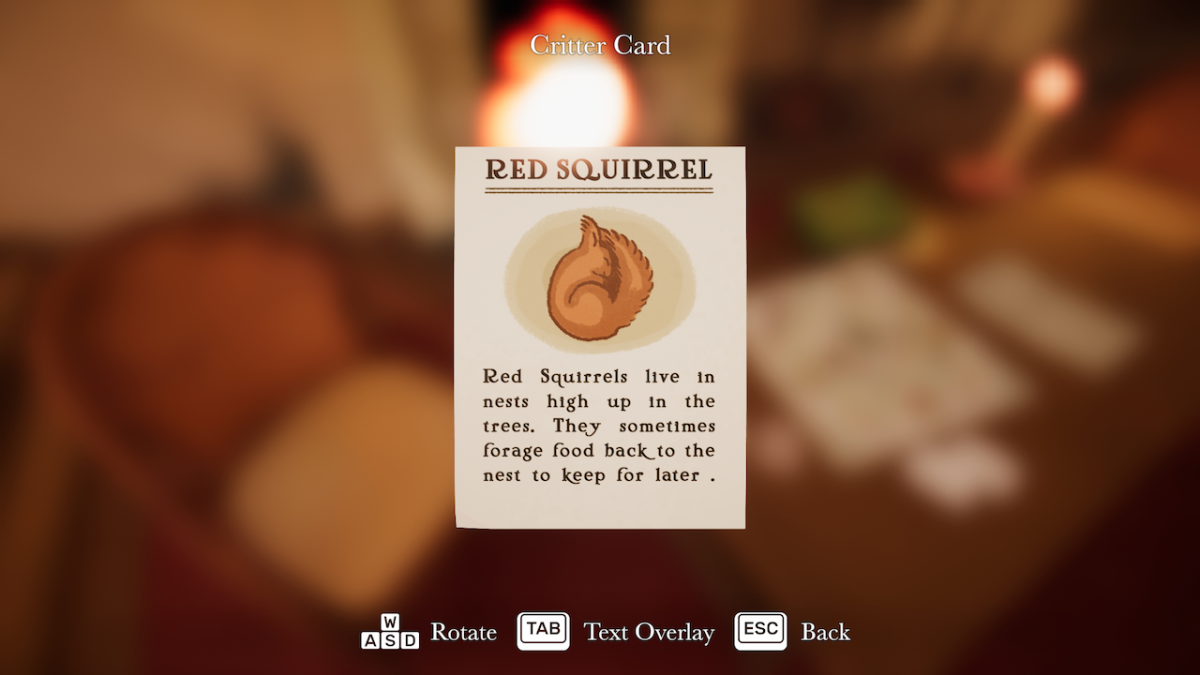
Thankfully, the Playing Cards on the table provide plenty of insight into various woodland critters. The Red Squirrel Card’s description tells us that they take seeds back to their nest for later consumption. This means that the Oscilette could instinctively know the Red Squirrel’s sleeping patterns.
Tricking the Oscilette into blooming
All we need to do now is simulate the environment of a sleeping Red Squirrel.
The Animal Heartbeats book provides statistics on the heartbeat rates of various animals whilst awake and asleep – this bpm could be how the Oscilette can tell the difference between awake and sleeping creatures.
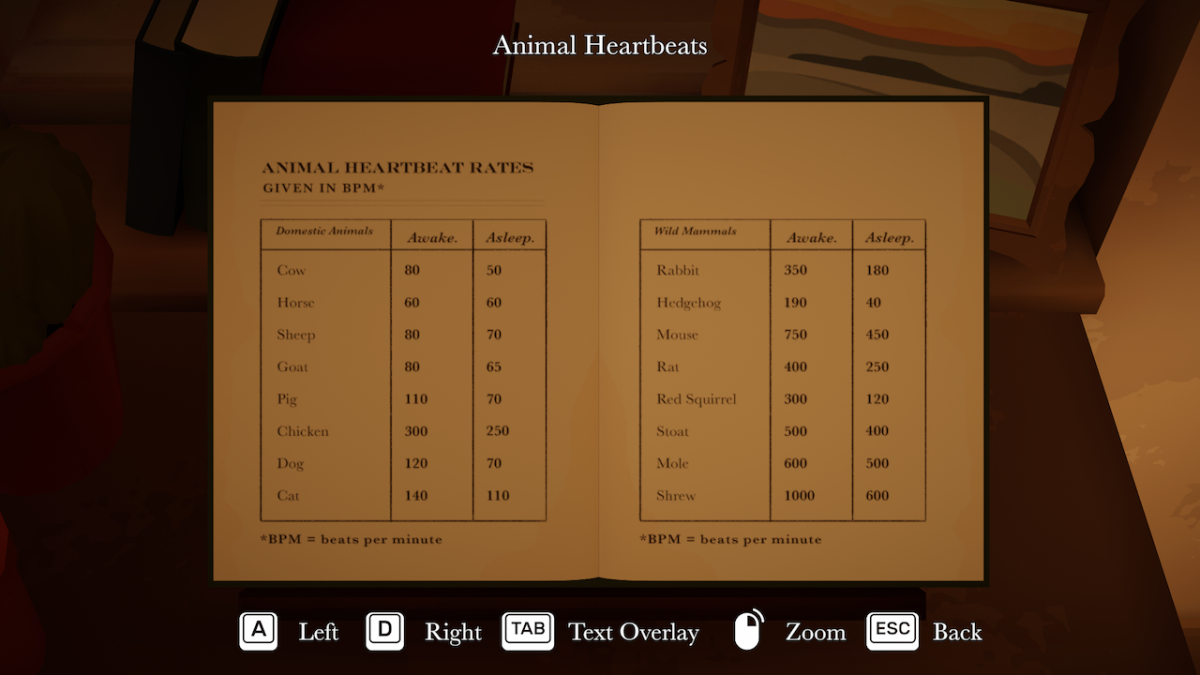
The sleeping bpm of the Red Squirrel is 120.
To produce a 120 bpm beat, we can look to the Phonograph on the other side of the room. Next to this instrument are various Phonograph Records. When inspecting these records, we can identify the bpm of the different tunes.
The blue one, named Meadow’s Bliss, has a bpm of 120. Pick it up and place it into the Phonograph. Pick up the Oscilette seed and place it on the dish next to the Phonograph. Finally, interact with the handle to produce the music.
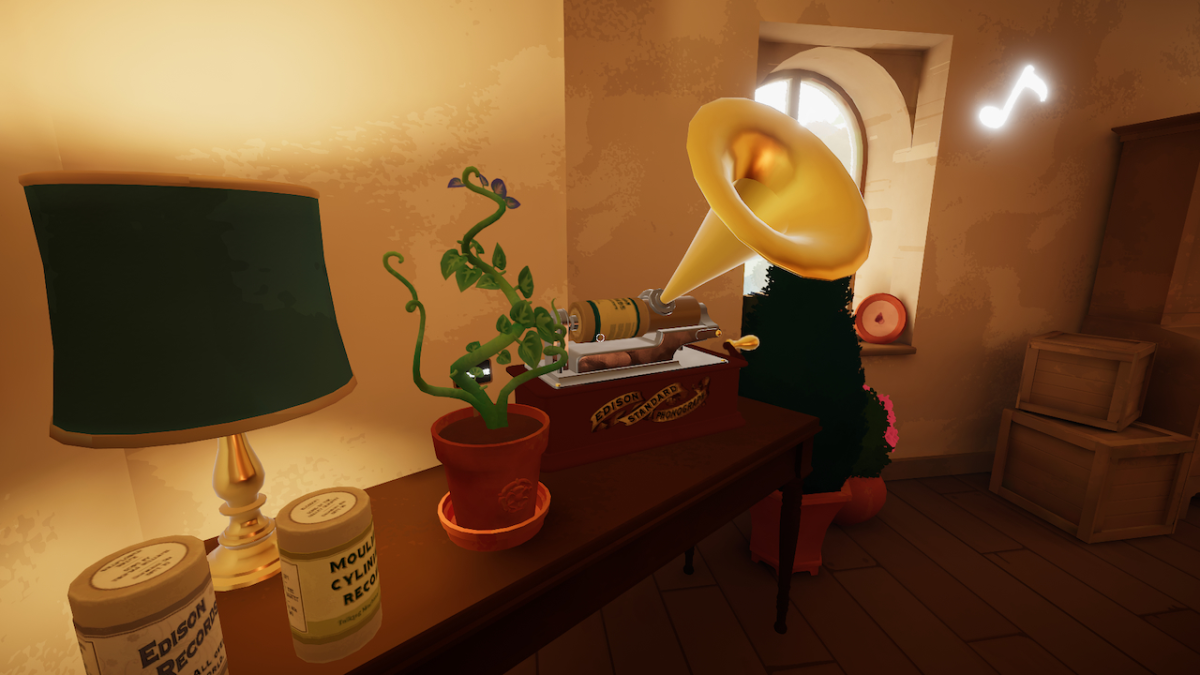
The Oscilette will bloom to the beat.
How to grow the Springdance Shrub in Botany Manor
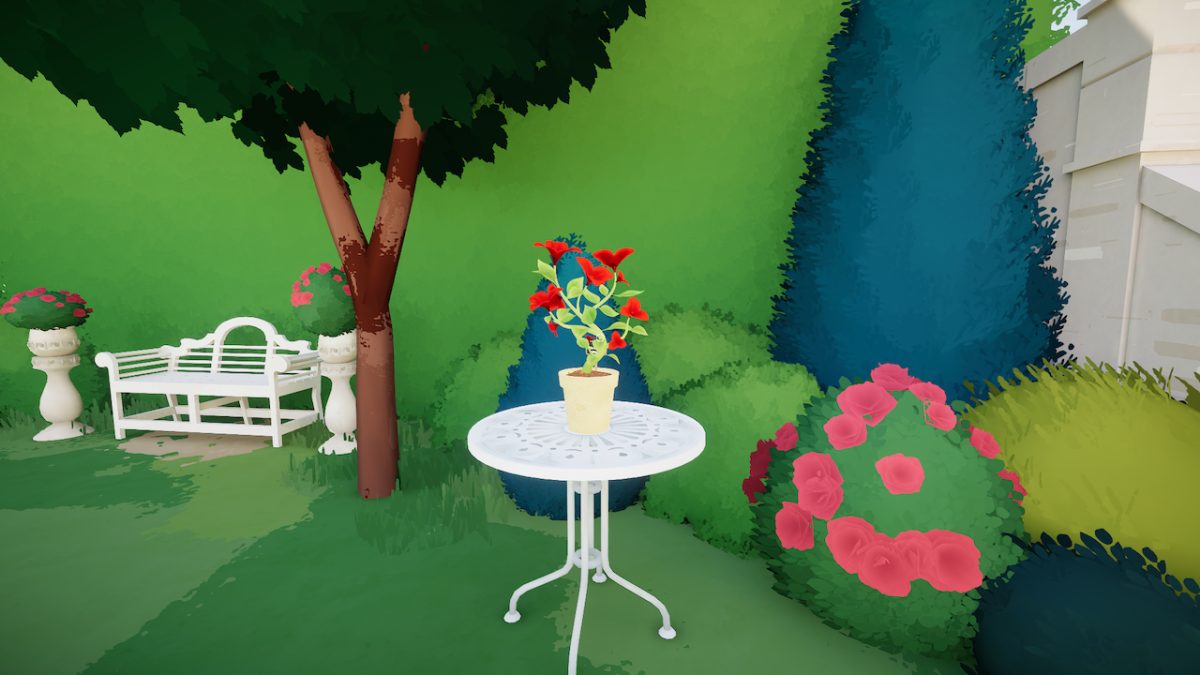
There are seven clues to unlocking the Springdance Shrub in Botany Manor, and although it’s quite a long process, this is one of the more memorable plants to grow.
Let’s find out how to grow the Springdance Shrub in Botany Manor.
Springdance Shrub seed packet location
The Springdance Shrub seed packet can be found in the Folly.
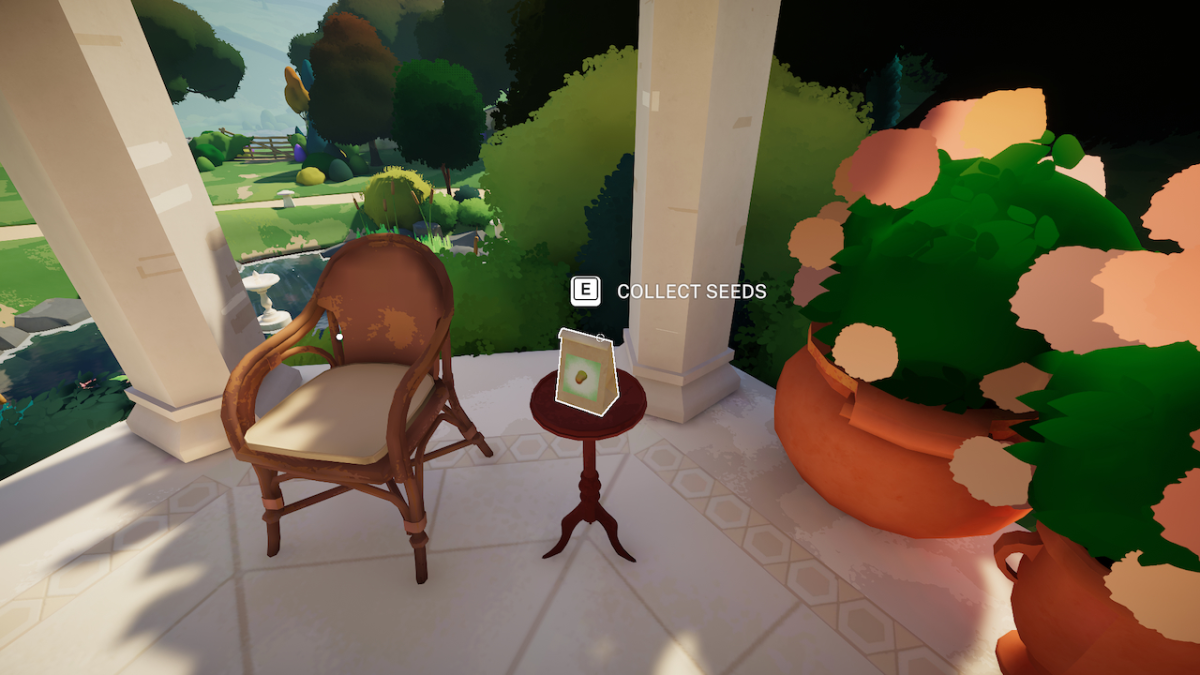
The Folly is a stone structure found bordering the Formal Garden and the Pond Garden.
All Springdance Shrub clues locations
Finding the clues for the Springdance Shrub will take you from the Side Terrace, to the Gardening Workspace, to the Garden Paths, and finally to the Bird Garden, in one linear path.
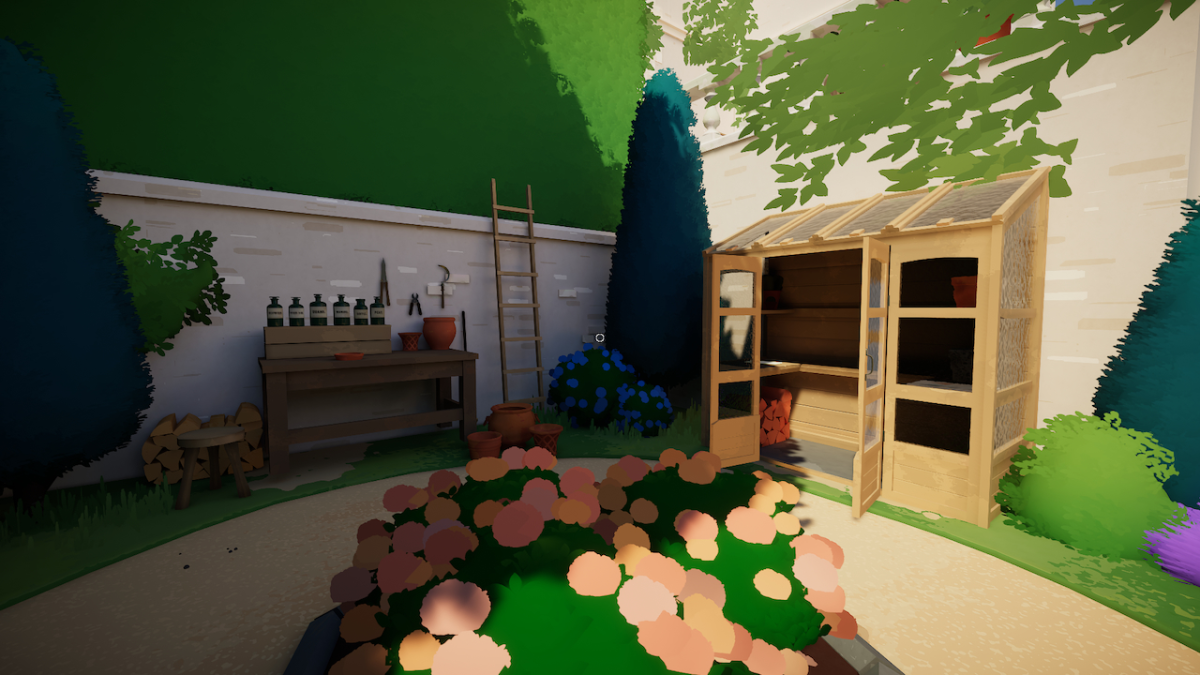
Here are all the Springdance Shrub clue locations in Botany Manor:
1. Bird Seeds.
The can of Bird Seeds can be found on the table in the Bird Garden by the wooden arch frames.
2. Bird Poster.
The Bird Poster can be found on the wall in the Bird Garden inside the stone structure at the end.
3. Pigment Research.
The Pigment Research can be found in the Garden Paths on the table next to the second white gate.
4. Soil pH Research.
The Soil pH Research can be found in the Garden Paths on the table next to the second white gate.
5. Hydrangeas.
The Hydrangeas leaflet can be found in the shed in the Gardening Workspace.
6. Pot Catalogue.
The Pot Catalogue can be found in the Shed in the Gardening Workspace.
7. Greeting Card.
The Greeting Card can be found on the table in the Side Terrace.
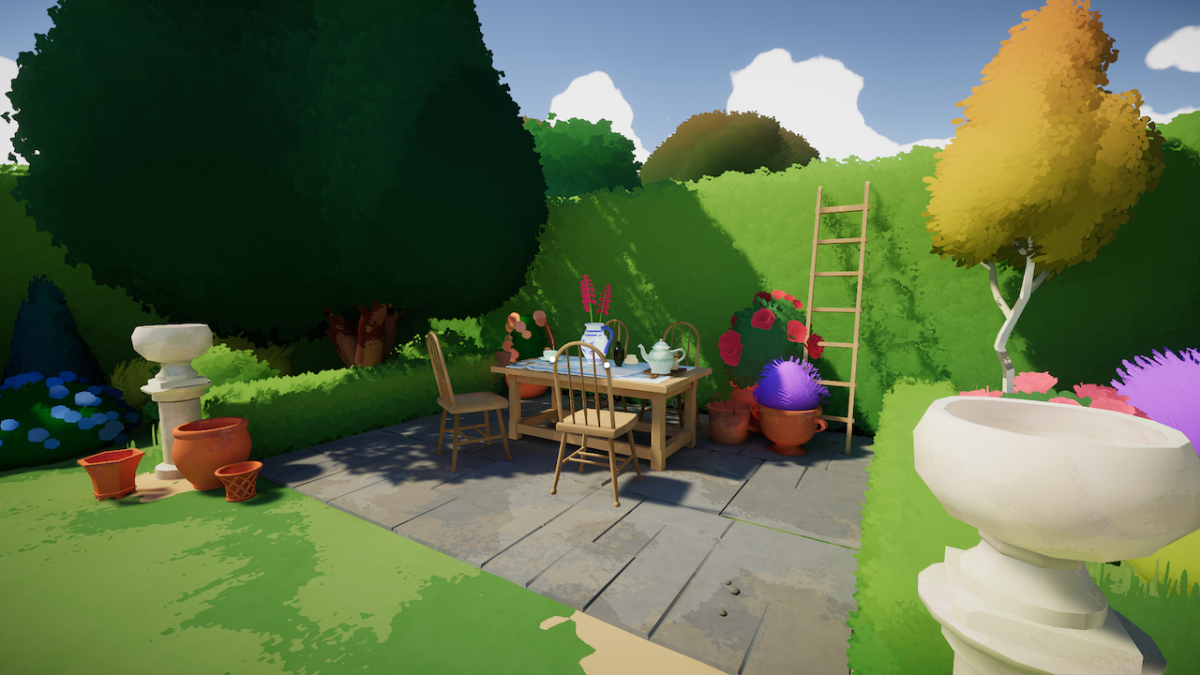
With all these clues indexed with the Springdance Shrub, we can get to work.
How to sprout and bloom the Springdance Shrub
For the Springdance Shrub, I’m combining these sections as they’re interlinked.
Potting and sprouting the Springdance Shrub is a puzzle in itself. And in learning how to pot the Springdance Shrub, we’ll learn how to bloom it.
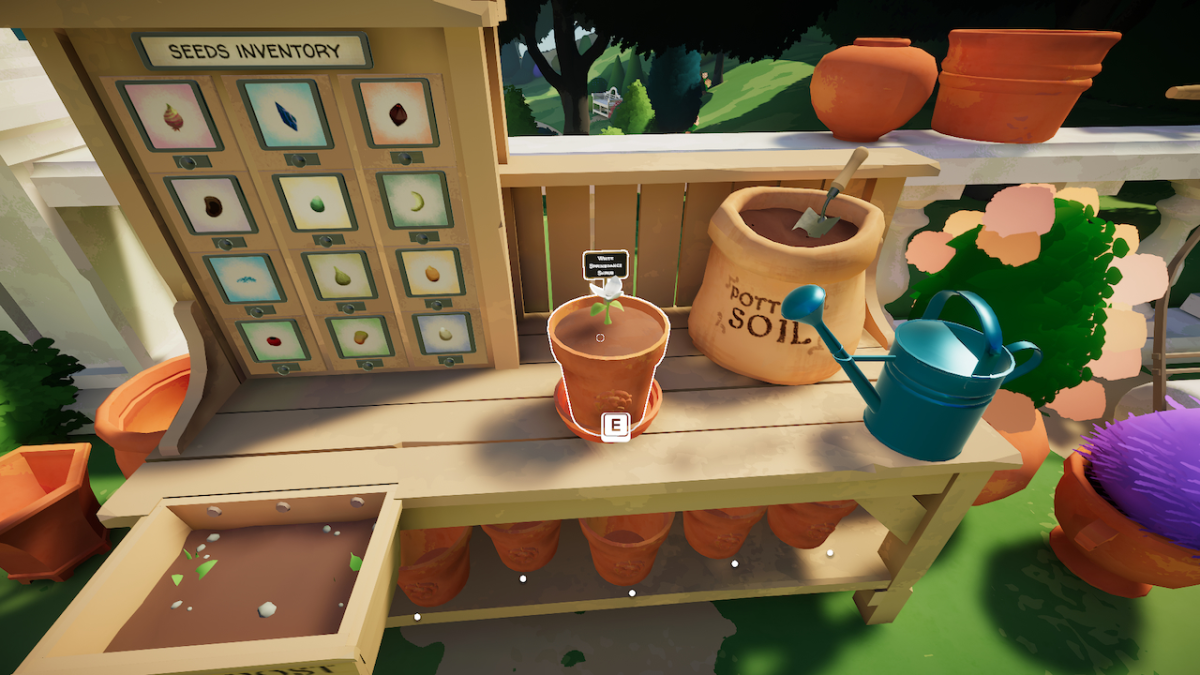
Upon attempting to pot the Springdance Shrub, you’ll notice that it does indeed sprout into a white flower. Technically, this is the Springdance Shrub. However, blooming the plant requires a pollinator, and the local pollinator doesn’t enjoy white flowers.
Let’s go over the process.
Figuring out how to bloom the Springdance Shrub
Before we pot the plant, we’ll need to fully understand the process.
The Greeting Card mentions that the garden used to be full of Springdance Shrubs. The concerned friend proposes that this plant may rely on pollination to grow.
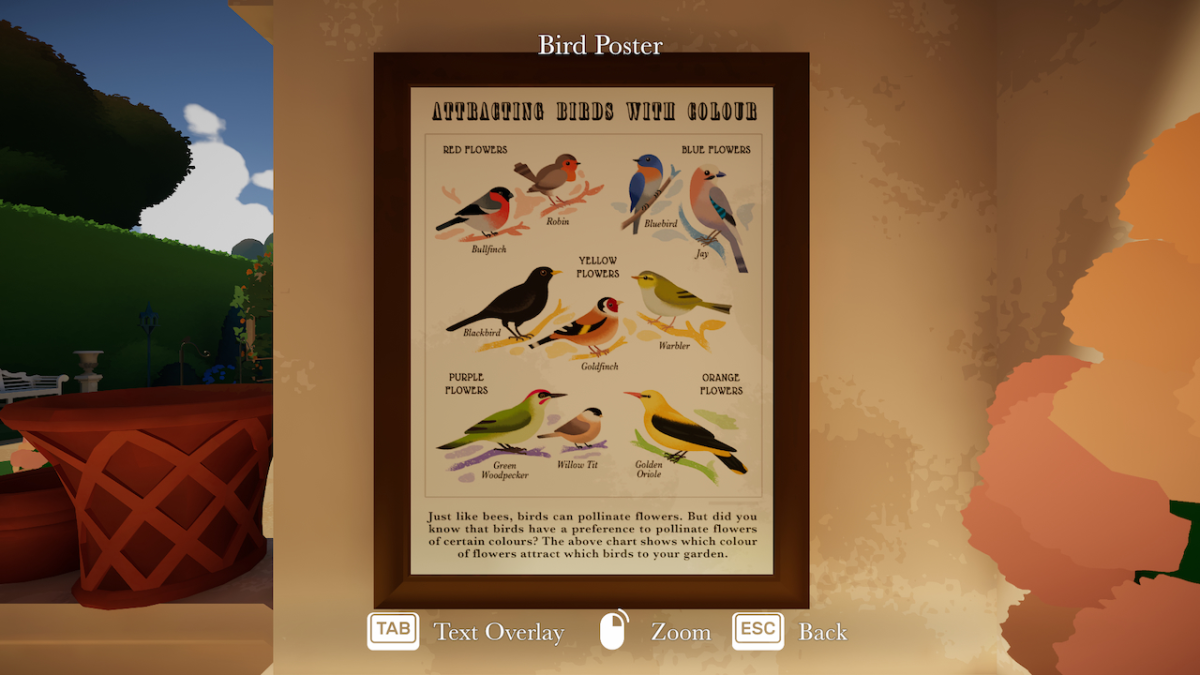
The Bird Poster tells us that birds can also pollinate flowers, but different birds favor different colors.
The Soil pH Research shows us that different pH levels can affect the petal colors of the Springdance Shrub thanks to the anthocyanin chemical. The Hydrangea leaflet corroborates the color-changing aspect of this chemical.
Also, the Pigment Research tells us how different soil types and pot types can produce different pH levels.
With everything considered, we must find the right pH level to produce the right color flower for our local bird friend. Once we’ve attracted the bird, we’ll be able to pollinate and bloom the plant.
Finding the right color and pH level
When walking into the Garden Paths, you may have noticed a little Robin flying away when you get close. The Bird Poster shows us that the Robin prefers red flowers.
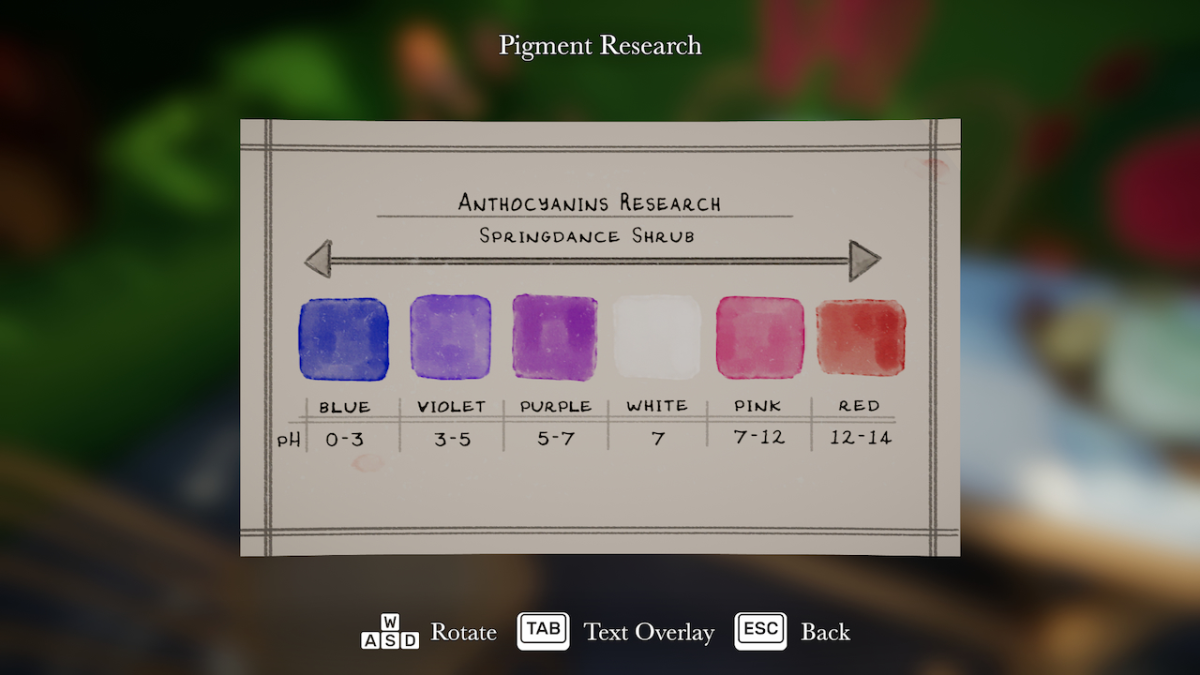
When looking at the Pigment Research, the red color petals require a pH level of 12 to 14.
Finally, we can consult the Soil pH Research to know that we need a Sandstone Pot and Seaweed to get a pH level of 13.2, right where we want it.
Potting the Springdance Shrub
With all that out the way, let’s get to potting the thing.
In the shed in the Gardening Workspace, you’ll find a shelving unit full of different pots. Looking at the Pot Catalogue will show us that the Sandstone Pot, funnily enough, looks like it’s made of sand.
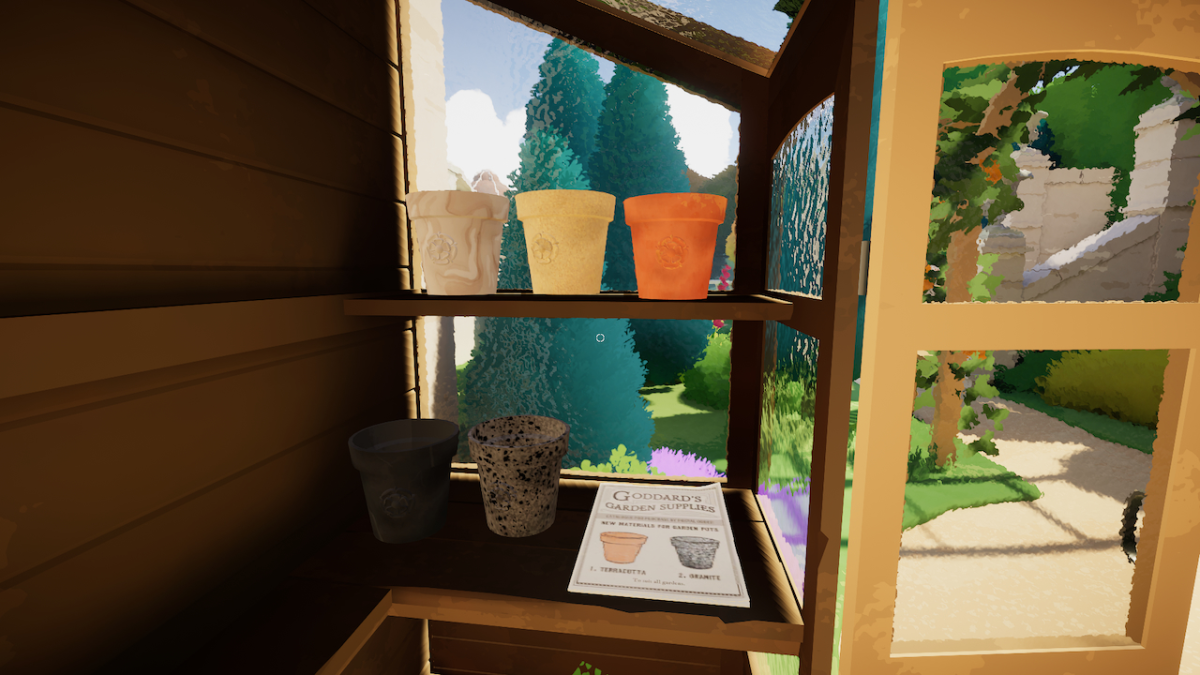
Grab this pot and bring it to the potting station to fill it with soil and plant the Springdance Shrub seed. Before watering it, bring it back to the Gardening Workspace and place it on the dish on the table before the soil additives.
Interact with the Seaweed bottle to add it. Finally, bring it back to the potting station and water it.
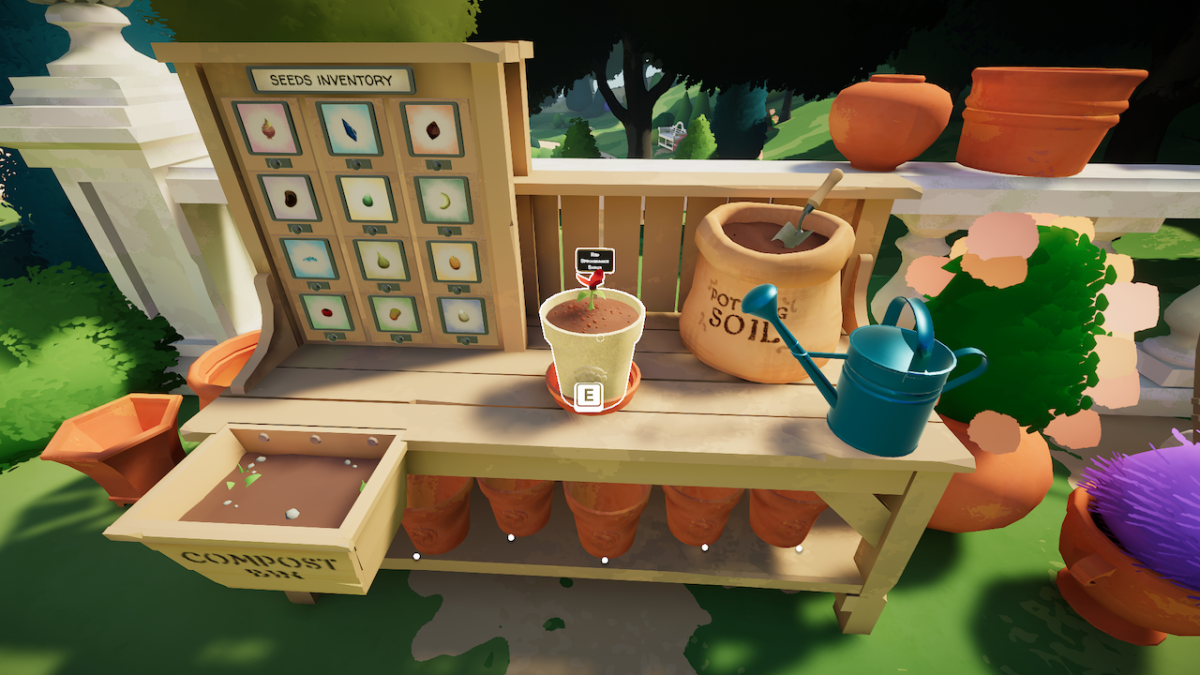
You’ll find a delightful red flower looking at you. Time to pollinate it.
Pollinating the Springdance Shrub
Now for the hard part. Trying to get the Robin to pollinate the Springdance Shrub.
Unfortunately, you will have to bring your Springdance Shrub seedling to the end of the Bird Garden to place it on the dish on the table under the stone structure.
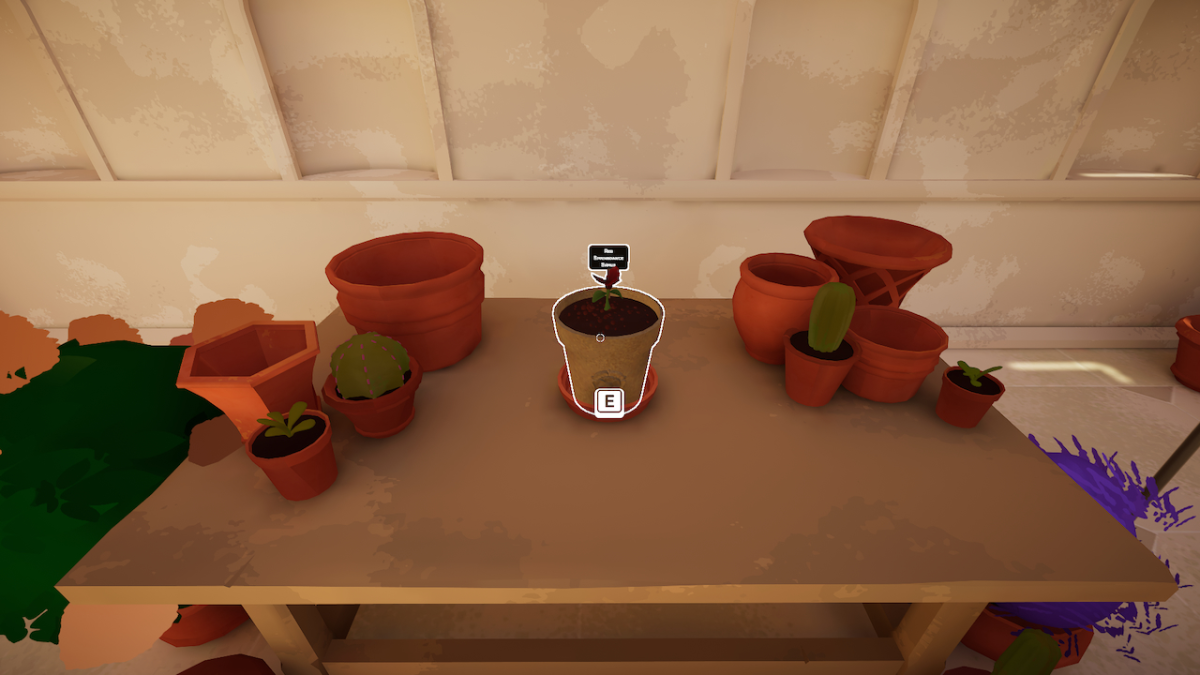
As that’s the only place to put the Springdance Shrub, we’ll have to bring the Robin all the way over. The Bird Seeds you’ll find on the table in the Bird Garden mention how good they are at attracting birds, and there is conveniently a Bird Feeder right next to it.
Pick up the Bird Feeder and bring it up to the Robin at the top of the Garden Paths. Up there, you’ll find the Robin in the birdhouse and another Bird Feeder on a stand. Using these two Bird Feeders, you’ll have to steadily lure the Robin all the way down.
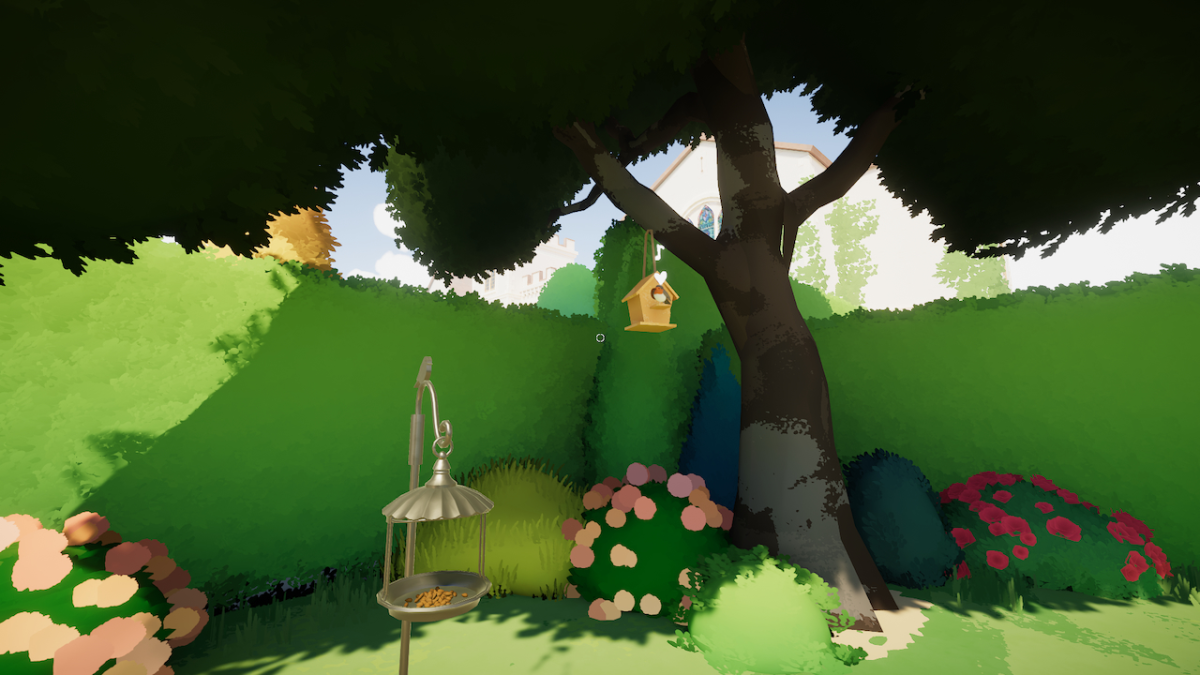
Firstly, place the Bird Feeder in your hands on the stand closest to the birdhouse. It’ll catch the bird’s attention, but it won’t fly down because you’re close. You’ll have to back off.
Pick up the other Bird Feeder. There is another stand next to the hedgerow. Back off again, and the bird will fly on over. Once again, pick up the previous Bird Feeder and place it on another stand closer to the Springdance Shrub.
Keep repeating this process until the Robin reaches the Springdance Shrub.

Be very careful, as if you spook the Robin by getting too close, it will fly all the way back to the birdhouse and you’ll have to repeat the whole process.
When the Robin is at the stand outside the stone structure, take the other Bird Feeder and place it on the stand next to the table with the Springdance Shrub on it.
Upon walking away, the Robin will fly over but will get attracted by the red flower and will land on it.
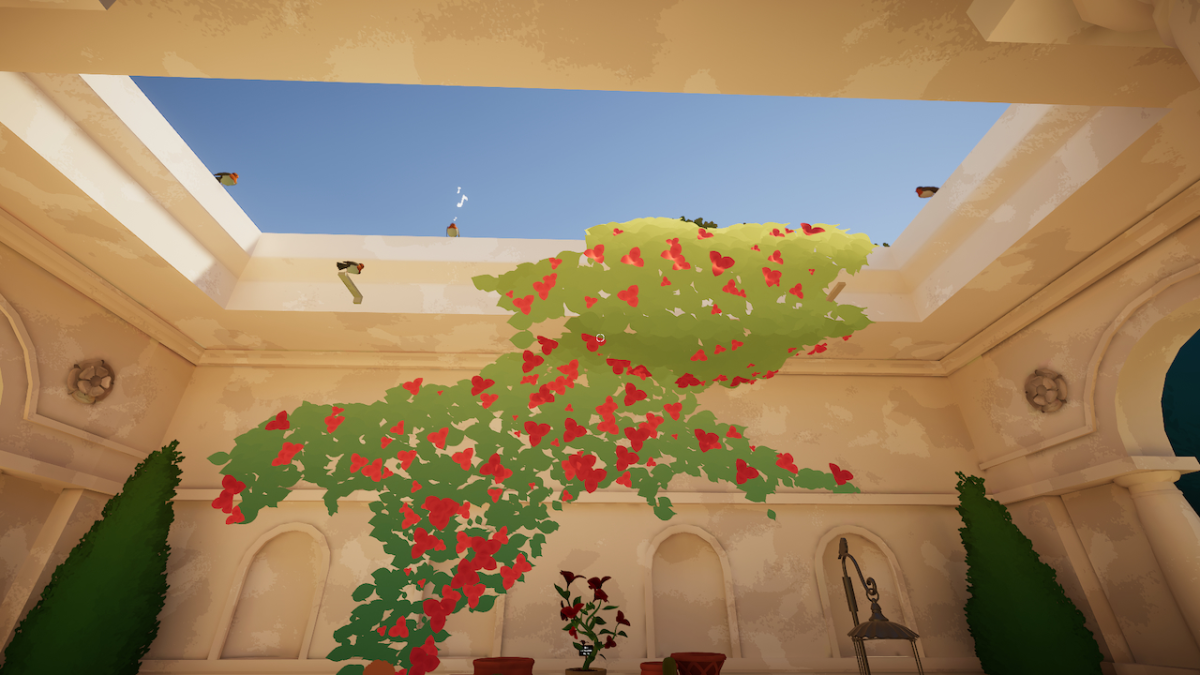
Once the Robin has pollinated the Springdance Shrub seedling, it will fly away, and the flower will bloom. Not only that, but vines will grow up the stone structure and more Robins will come to visit.
With this plant grown, we can work on the final plant in Botany Manor.
How to grow the Fool’s Emerald in Botany Manor
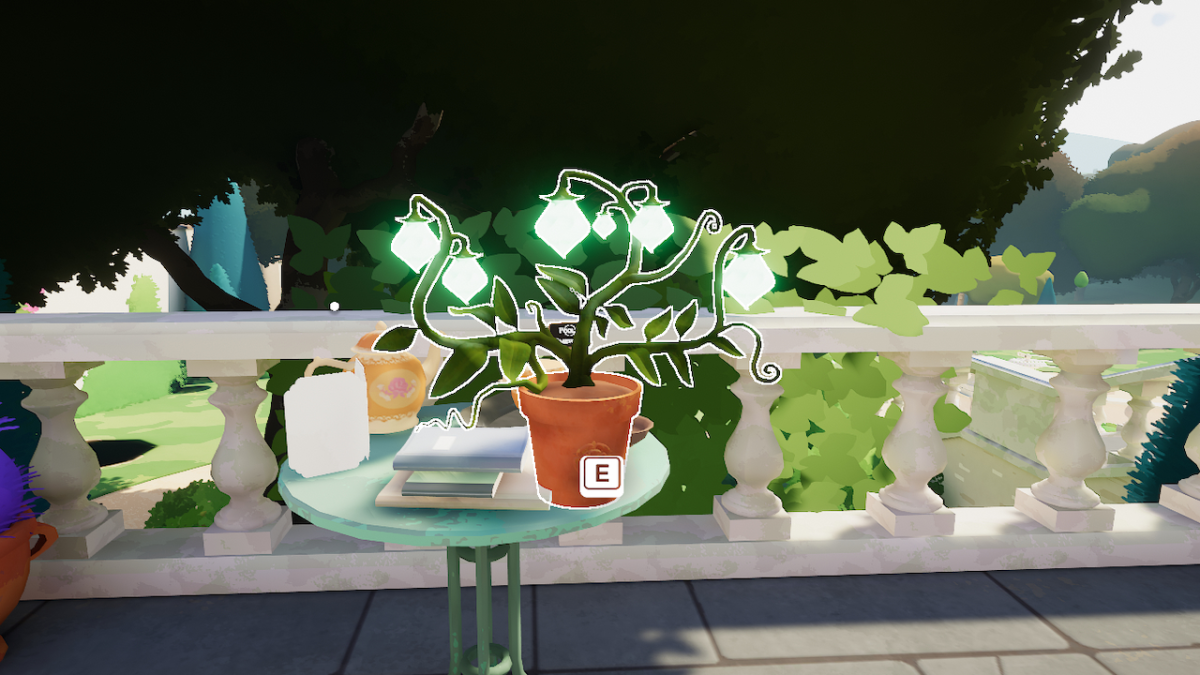
Six clues is what we get to solve the tricky case of the Fool’s Emerald. This one stumped me the most out of all the plants.
Fool’s Emerald seed packet location
The Fool’s Emerald can be found in the Side Terrace, on the table next to the blackboard.
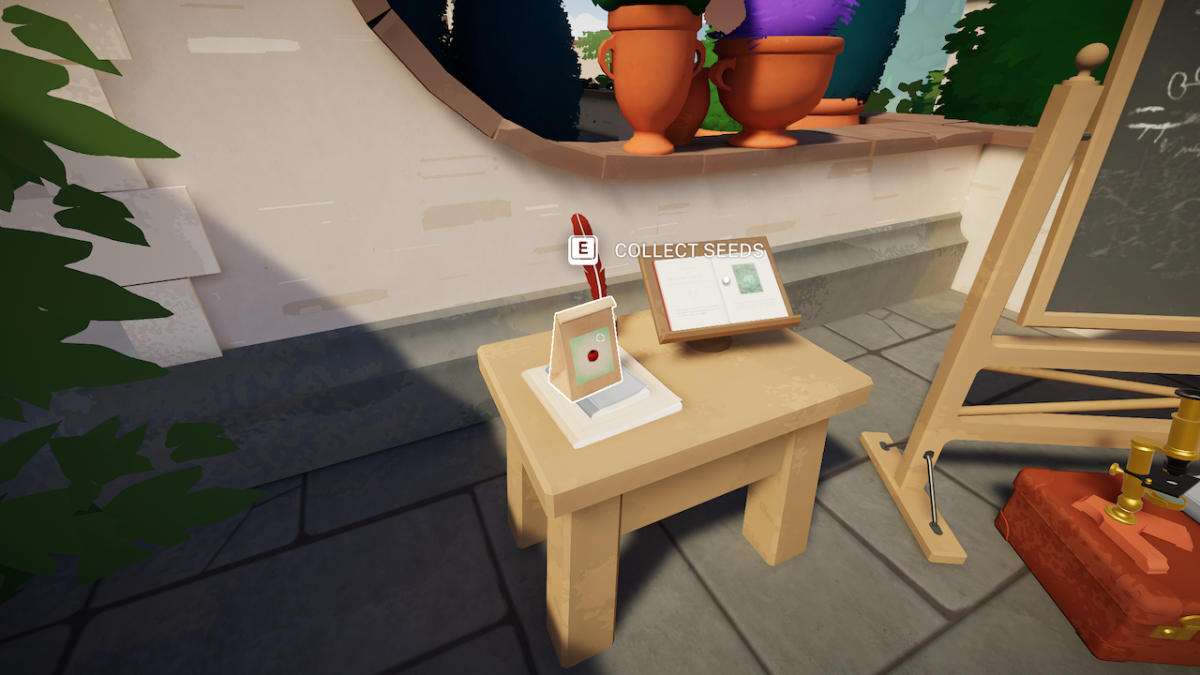
When entering the Formal Gardens, take a right up the steps to the Side Terrace and look to your right.
All Fool’s Emerald clues locations
Obtaining these final clues will lead you from the Side Terrace to the Formal Garden, to the Gardening Workspace, and then finally to the Boathouse.
If you haven’t unlocked the Boathouse already, then you’ll find the key at the end of the Bird Garden in a bowl.
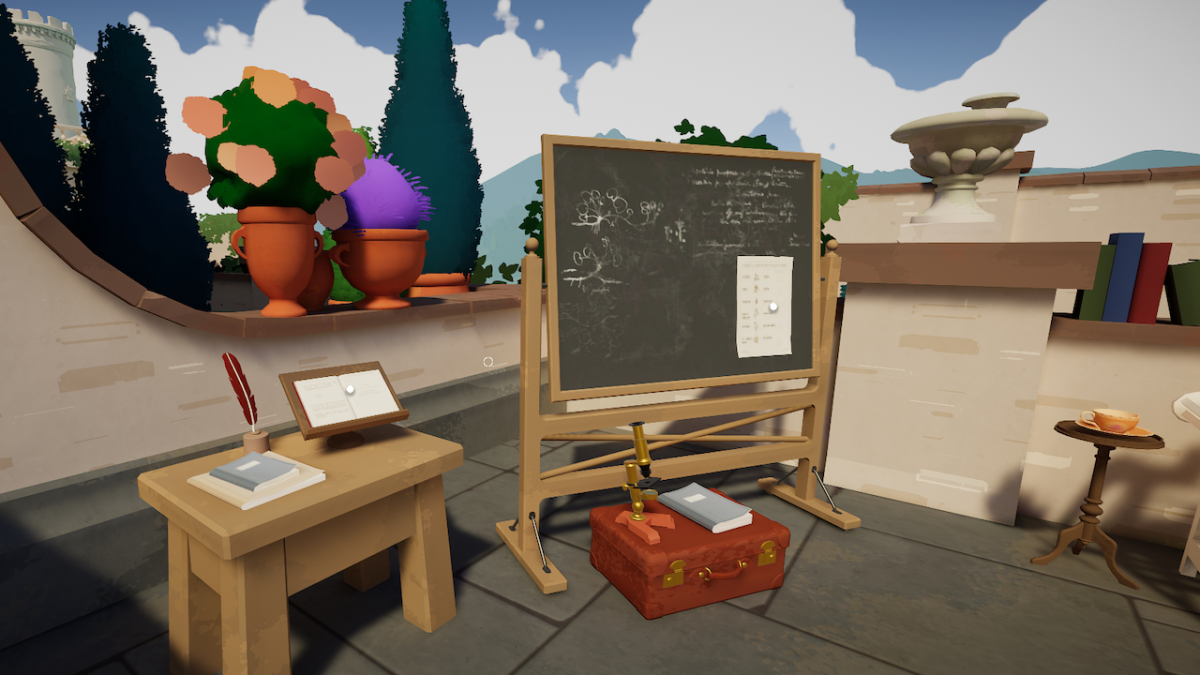
Here are all the Fool’s Emerald clue locations in Botany Manor:
1. News Article.
The News Article can be found in the Formal Garden on the small bench next to the picnic.
2. Military Codes.
The book of Military Codes can be found on the table in Gardening Workspace.
3. Note About Telegraph.
The Note About the Telegraph can be found on the step ladder outside Gardening Workspace.
4. Note About Lawn.
The Note About the Lawn can be found on the table in the Gardening Workspace.
5. Bioluminescence.
The book about Bioluminescence can be found in the Side Terrace on the table next to the blackboard.
6. Plant Chemicals.
The note on Plant Chemicals can be found in the Side Terrace on the blackboard.
7. Morse Code.
You’ll find the Morse Code sheet in the Telegraph case in the Boathouse, under the bridge.

For the last time, make sure to enter these clues into the Fool’s Emerald herbarium entry.
How to sprout the Fool’s Emerald
At least the Fool’s Emerald sprouts normally in Botany Manor.
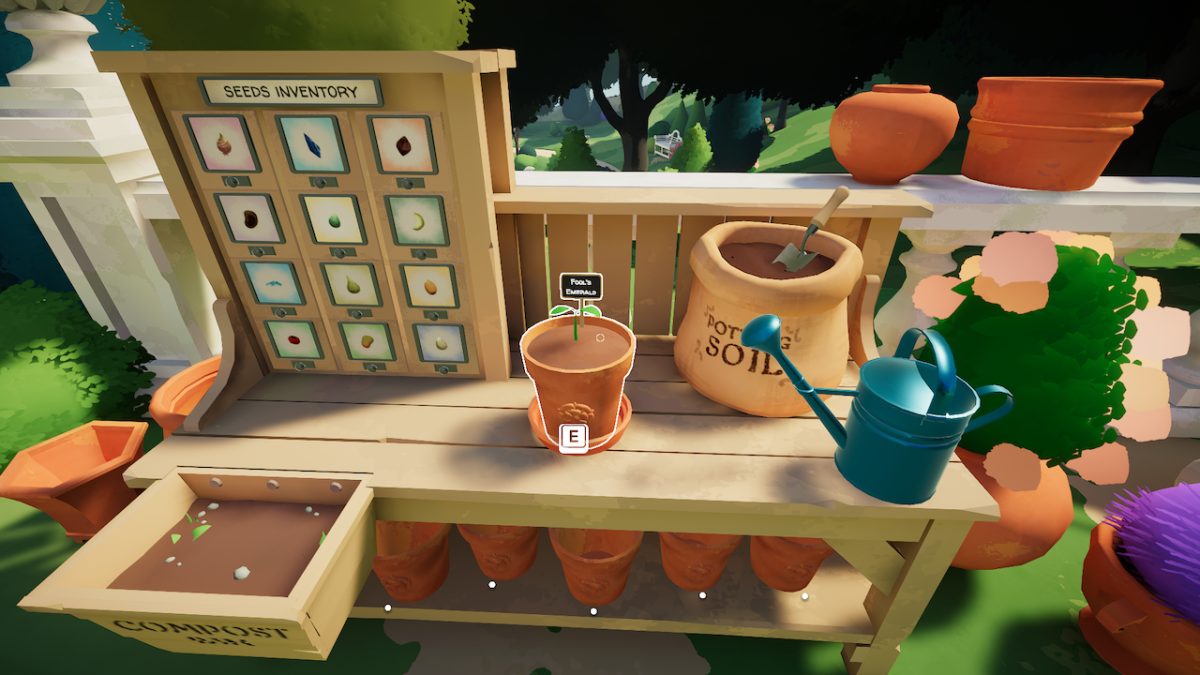
Throw the seed into a pot and water it, and it’ll sprout.
How to bloom the Fool’s Emerald
Blooming the Fool’s Emerald can be difficult if you’re not up to scratch with your Morse Code.
Figuring out how to bloom the Fool’s Emerald
Upon reading the book on Bioluminescence, we will learn that bioluminescence is a trait that allows plants to glow in the dark, which could be used to communicate with each other. The chemical Luciferin is what allows this to be possible.
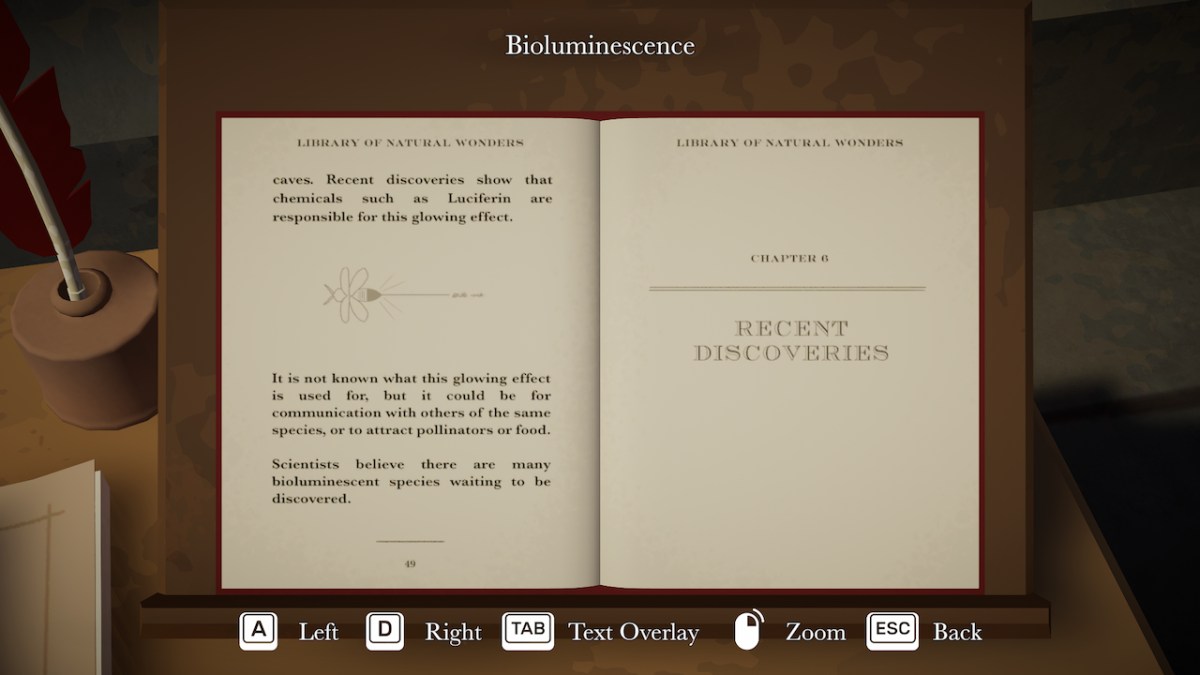
The Plant Chemicals note tells us that Fool’s Emerald has Luciferin, which makes this plant bioluminescent.
The problem is that if bioluminescence is what communicates to other Fool’s Emerald grow, then we need grown and bloomed Fool’s Emerald, but all we have is a seedling.
This means that we’ll need something else to produce this light.

The News Article mentions the story of someone walking past a cave and seeing a “blinking light pattern” that spelled out “Attention” in Morse Code. If this is the bioluminescent work of the Fool’s Emerald, then we can extrapolate two new things. That it grows in caves, and that it can be mistaken for a Telegraph communication.
So we’ll just need to grab a Telegraph and signal “Attention” in a dark cave to communicate to our Fool’s Emerald seedling.
Connecting the Grotto
Before we go off finding our Telegraph, we’ll need somewhere that resembles a cave to begin the blooming process. The Grotto, in the Formal Garden, looks perfect. However, there’s no way to get across.
The Letter About Lawn highlights that Jimmy had ran over a solid object with the lawnmower.
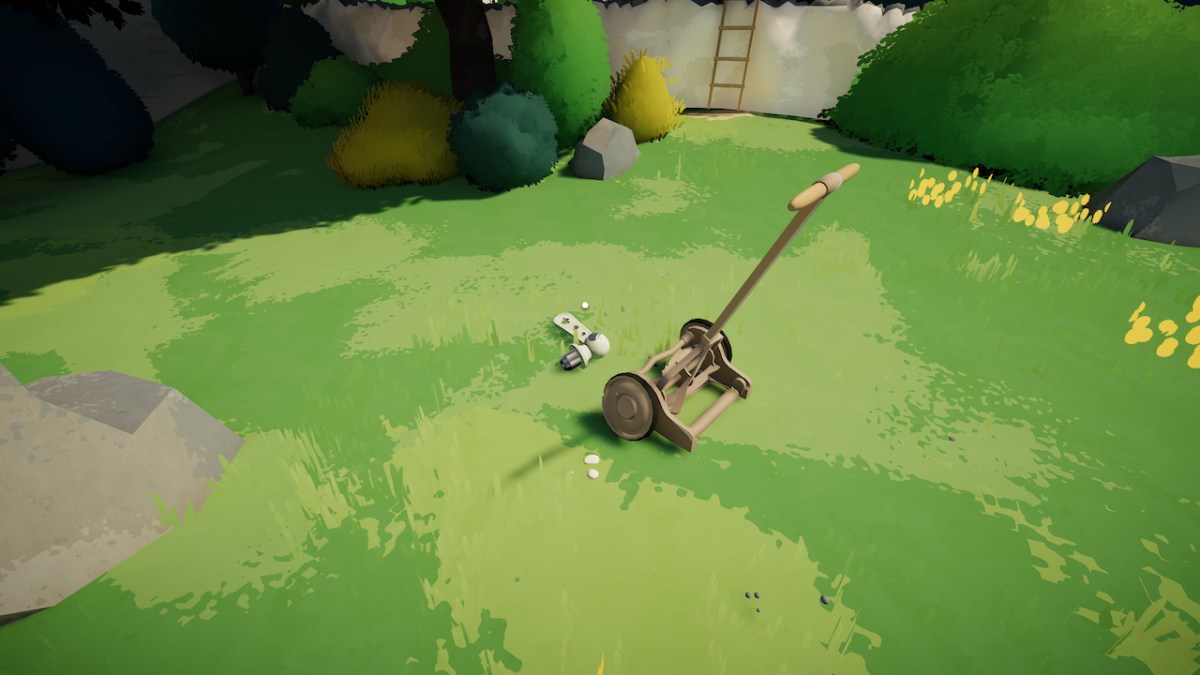
Upon finding the lawnmower, in the Pond Garden to the right of the walkway to the Boathouse, we’ll find a lawnmower with a handle in front of it. The symbol of a water drop connects this handle to the Grotto.
Bring it back to the pedestal in front of the Grotto and place it in. It will turn on the water features, and lilypads will populate the surface to allow a way across.

Whilst you’re here, you may as well grab the Fool’s Emerald seedling and place it on the dish on the table in the Grotto.
Let’s now trick our Fool’s Emerald into blooming.
Acquiring and using the Telegraph
The Note About Telegraph tells us the Telegraph is in the Boathouse. You’ll find it under the arch. You can open it, but I’d recommend you pick it up and bring it all the way back to the Grotto, first. Place it on the table.
With the Telegraph in the Grotto, all we need to do now is type out “Attention” in Morse Code, as that’s what the man in the News Article saw upon (presumably) encountering the Fool’s Emerald.
The Military Codes book shows us that the abbreviation for “Attention” is “KA.” We can use the Morse Code sheet to identify how to type out “KA” in Morse Code.
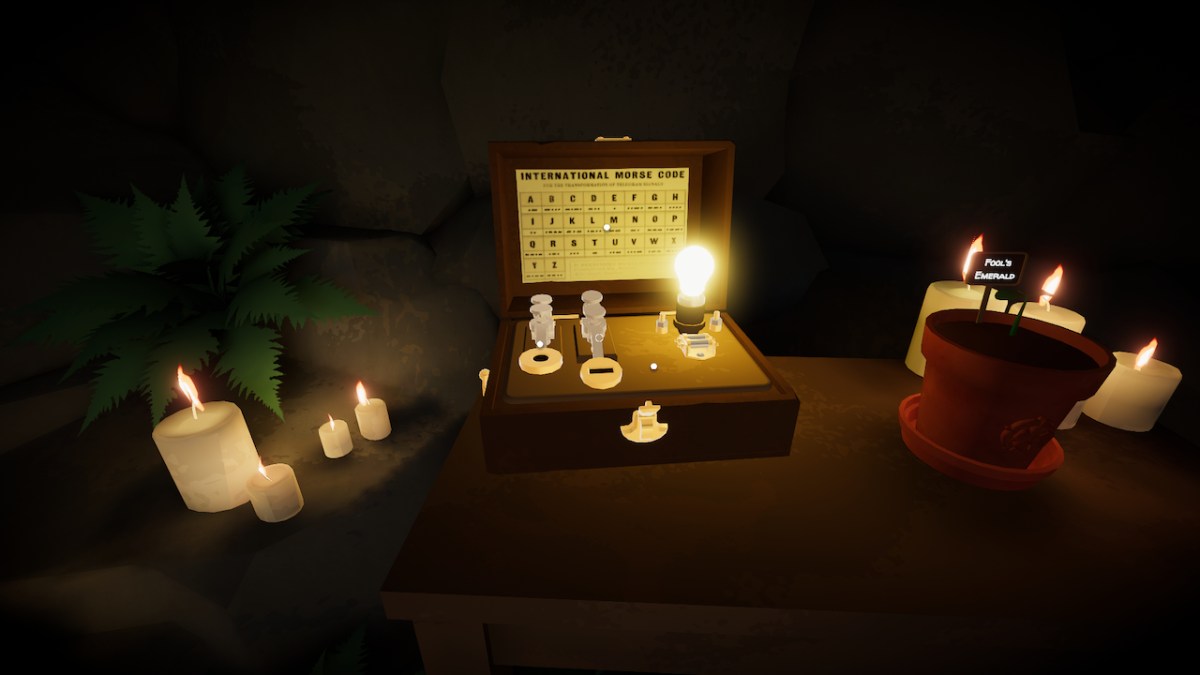
In case you’re unfamiliar, Morse Code translates each letter into dashes and dots. The dashes represent (in this case) long blinks of light and the dots represent short blinks of light. The left dial produces the short bursts and the right dial produces the long bursts.
So to type out KA, you’ll have to press the right dial, then the left dial, then the right dial, then the left dial, then finally the right dial. Dash, dot, dash, dot, dash.

This will bloom the Fool’s Emerald, and it will grow all through the Grotto.
Finishing Chapter Five
With the completion of all the plants in Chapter Five, you’ll be told to go to the Gatehouse.
Make the trip back again and savour it this time — for it’ll be your last trip in Botany Manor.
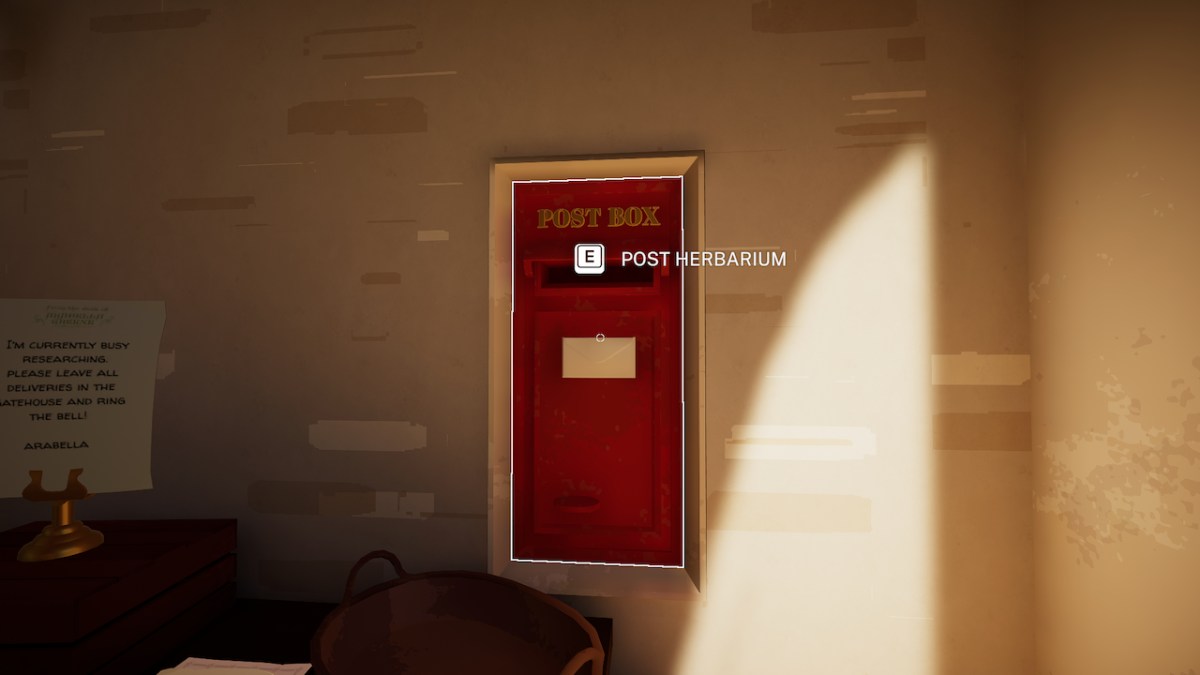
Now that the herbarium is complete, Arabella can finally send it off to get her work, and herself as a botanist, considered seriously. Interact with the postbox to send off the book.
I’ll allow you to enjoy the post-credit section that plays on your own.
A hearty congratulations for completing the game. I hope you enjoyed it — I know I did!


Published: Jul 26, 2024 11:18 am