The addition of Coruscant to the list of explorable planets in Star Wars Jedi: Survivor was a surprise to be sure, but a welcome one. It’s the longtime capital of the galactic establishment and a dystopian ecumenopolis with aliens of all types spread across multiple city levels. Cal’s adventure in Jedi: Survivor takes place just below the surface in the Undercity of Coruscant, and we’ve found all of the collectible locations and created maps for where to find everything.
All Coruscant collectible locations in Jedi: Survivor
The maps show where to find all of the Coruscant collectibles locations in each district. You’ll find all of the Priorite Shards, Databank Entries, chests, Force Essence Points, and Force Tears with this guide. Written descriptions add more context in how to reach the different collectibles, as well as what’s inside the chests.
Note that Priorite Shards, Databank Entries, and Chests are marked on the maps with in-game icons. Force Essence Points and Force Tears are circled.

All Rooftops collectibles
It doesn’t take long to realize you can’t unlock all of the collectibles around the different Coruscant locations in Jedi: Survivor. The first room you drop into features a locked door and requires the Slicing skill to open. As such, you must return to Coruscant to complete everything after you’ve progressed through a large chunk of the main story in Jedi: Survivor.
All Databanks Entries
The Databank Entries are both near the Meditation Point. The first is just a few feet away in the corner of the plaza near the security door. The second is up one level on a small landing. It’s the same path that follows the main story, making it difficult to miss.
All Priorite Shards
There is only a single Priorite Shard in the Rooftops area and it’s near the Meditation Point. There’s a bridge one floor above the north end of the plaza. The Priorite Shard is at the end of that bridge in the corner on a container.
All chests
Two chests fill out the Rooftops area. The first chest is in the first room you drop into during the main story. It’s difficult to miss. It contains the Patience lightsaber Emitter.
The second chest is at the end of a maintenance area which branches off from the plaza with the Meditation Point. You’ll need to Slice the door to open the section and then Force Push a hatch shut to block a flow of water. Jump across the sections to reach the chest. It contains the Patience lightsaber Switch.
All Force Tears
The first room you drop into during the main story also contains the Force Tear behind a security locked door. You’ll need the Force Lift ability to access it. It’s the Fractured Malice challenge.

All Renovation Site collectibles
All Databank Entries
The first Databank Entry is at the beginning area of the Renovation Site near the Meditation Point. Look to the left immediately upon entering the Renovation Site to spot a scannable terminal.
The next Databank Entry is in the next area inside of the building with the bar/kitchen. Go up the ramp and run along the lit billboard sign then enter through the doorway. Scan it at the area to the left.
Follow the route for the main quest up until the point where you swing on the rope and climb up to the upper level of the Renovation Site. Take an immediate left after climbing up and go down one level across the gapped staircase. There’s a terminal in the room below which holds the Databank Entry.
All Priorite Shards
The first Priorite Shard is back at the northwest corner of the Renovation Site, tucked away in a small alley by a large ramp. It’s to the left immediately after the last wall-run obstacle.
There’s a Priorite Shard tucked away on a lower level in the Southeast corner of the Renovation Site. Go down to the large plaza area where all the Stormtroopers patrol and then up the nearby stairs. Take a left and cross the expanse via the poles. The Priorite Shard is on a crate there.
The last Priorite Shard is under the staircase just before you squeeze through the maintenance corridor at the endpoint of the Renovation Site during the main story.
All chests
There’s a chest hidden near the back of the Renovation on an upper level at the northeast end of the location. Go to the section where there are multiple traversable billboards and run across the first to climb up to the next level. Turn around and then wall-run across the two higher-up billboards to reach a landing. The chest is down a short hallway and contains the Patience lightsaber grip.
The second chest requires the BD-1 Slicing ability open a locked door at the northwest end of the Renovation Site. It contains the Coruscant Paint BD-1 coating.

All Industrial Stacks collectibles
This is where the Imperial Senator’s ship crashes and Cal’s team boards it. This is a quick section to complete.
All Databank Entries
There are two Databank Entries inside of the ship down in the Senator’s office. One of the entries is on the wall behind his desk. The other is at the far side of the room.
All Undercity Meats collectibles
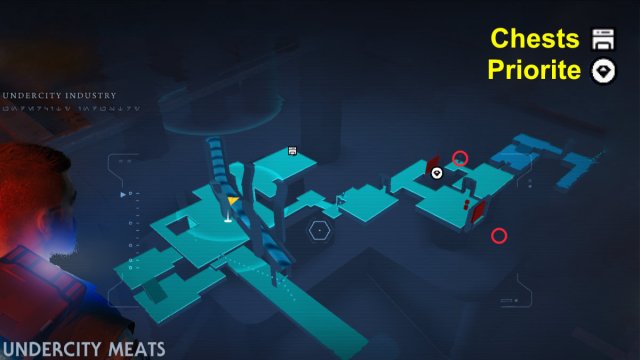
Undercity Meats is relatively sparse, but you’ll have to return to this area on Coruscant to get all the collectibles after you’ve unlocked more abilities during the main story in Jedi: Survivor. You’ll need Merrin’s Charm to Air Dash through a ray shield as well as BD-1’s Electro Dart to charge a power conduit and open a door.
All Priorite Shards
There’s a lift behind a ray shield at the back of the Undercity Meats, just before the encounter with the Purge Trooper. The Priorite Shard is actually under the lift, so you’ll need to trigger it to go up, then immediately get off of it to reveal and access the Priorite Shard.
All chests
There’s only one chest in Undercity Meats and it’s easy to get the first time you pass through the location during the campaign. This is one of the Stim upgrade chests, which makes it worthwhile.
Find the chest in the main open room of Undercity Meats. This is after you escape the conveyor belt section and climb up a vertical section. You’ll know you’re in the right place from all the red lighting and the open space. Approach the scalable wall and double jump up the wall to climb up to the landing with the chest at the end of the hall.
The one catch to accessing this chest is the Imperial Security Droid boss guarding it. These enemies are tough to beat earlier on in the game, but again, the upgrade is worth the trouble.
All Force Essence Points
There are also two Force Essence Points. The first is easy to get during the first playthrough. Take a left into a side hall in the cold meat storage room and you’ll immediately find it.
The second Force Essence Point is behind the locked door in the room where the Purge Trooper spawns. Use BD-1’s Electro Dart ability to activate the power conduit and open the door. This unlocks an Easter egg of sorts, because a Jotaz creature from Jedi: Fallen Order emerges to fight. Defeat the Jotaz and claim the Force Essence Point.

All Freight Handling Depot collectibles
There are three collectibles in the Freight Handling Depot. You can get the chest and the Databank Entry on the first playthrough, but the Force Essence Point requires Air Dash and Merrin’s Charm to access behind the ray shield.
All Databanks Entries
You’ll easily spot the Databank Entry in the hallway on the way out of this area if you don’t already smell the irresistible aroma of the Turbo Dogs.
All chests
There is only a single chest at the Freight Handling Depot. Take the zipline up as if proceeding to the next area, out of the Freight Handling Depot. Turn around immediately upon ziplining up and then wall-run down the corridor to the ledge where the chest is. It contains the Coruscant Paint weapons coatings.
All Force Essence Points
A single Force Essence Point is at this location. Grapple onto one of the cargo containers passing through the location and use it to Air Dash through the green ray shield where the conveyor belt passes. Travel down the hallway once through it and you’ll find the Force Point by a window on the right.
All Hanger 2046-C collectibles
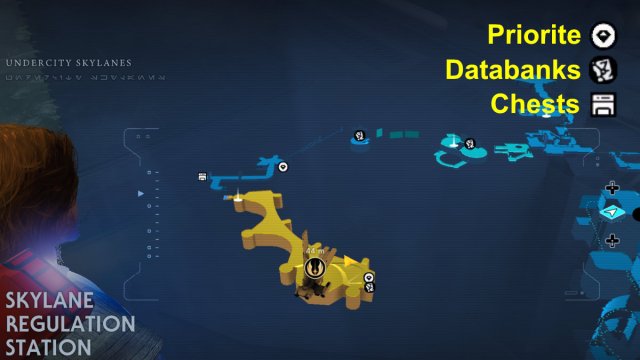
We combined the Skylane Regulation Station and Hanger 2046-C into one map for convenience. Note that you’ll need the BD-1 Electro Dart ability to open the door where the chest is.
All Databanks Entries
There are two Databank Entries you can get in the first playthrough. The first is the Gonk droid at the Skylane Regulation Station near where you fight the Inquisitor. Start at the Meditation Point there and go down the nearby staircase into the hall. The droid is there on the left.
The second Databank Entry is at the floating control station in the middle of the location. Interact with the terminal to obtain the Databank Entry.
Once you complete the main storyline, you can return to Coruscant to listen in on the last Databank Entry. It’s near the Mantis landing pad, not far from the Scavenger droid with the Priorite Shard.
All Priorite Shards
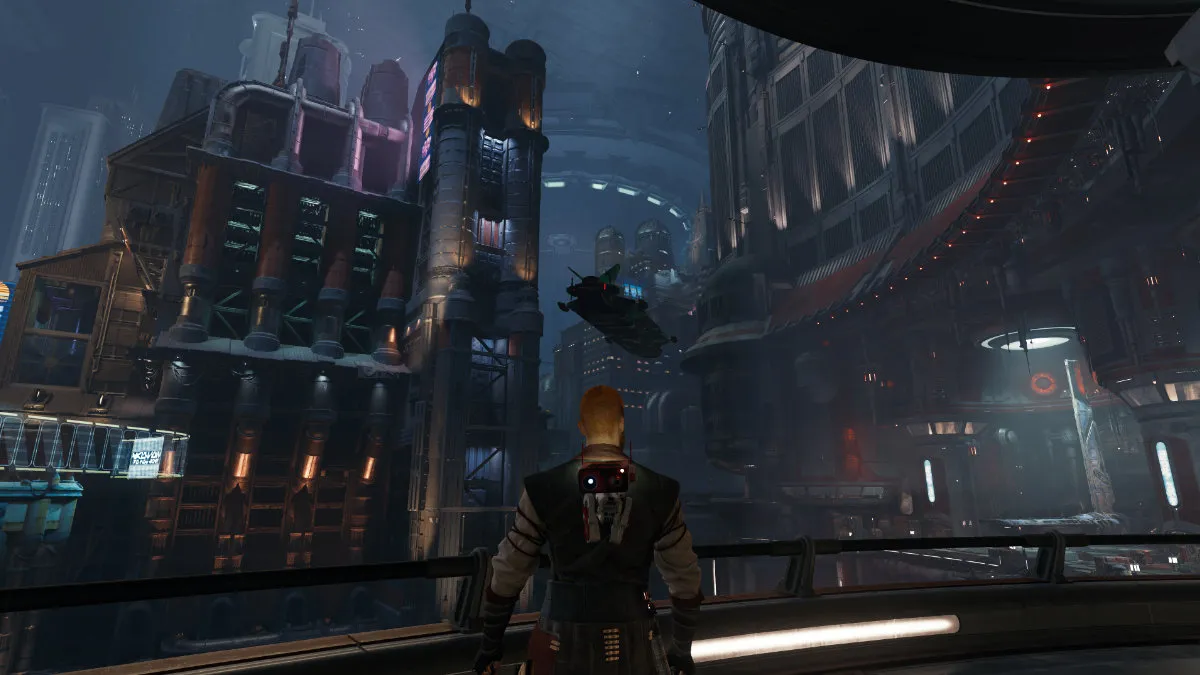
It’s possible to get each Priorite Shard in the first playthrough and each is easy to acquire. The first Priorite Shard is at the Balcony when you cross over to the hanger section characterized by the red hallways and Republic architecture. Walk to the corner of the balcony facing the rest of the Hanger 2046-C and you’ll find the Priorite Shard there. Refer to the feature image of this guide and the map for additional context.
The last Priorite Shard is near the landing pad for the Mantis. Proceed past it and you’ll spot a Scavenger droid holding it. Chase and destroy the droid to acquire the Priorite Shard.
All chests
The chest is in fact a terminal in this case, which allows you to hack the heavyweight DT Imperial Sentry Droids. The terminal location is in a side hallway through the red hallways with Republic architecture that interlink the landing pad to the ziplines across the Skylane space in the area. You’ll note the power conduit above the door. Use BD-1’s Electro Dart to power and unlock the door. Your next task is then to destroy D-L1T, the “Legendary” Imperial Sentry Droid.
Now you know where to find all of the Coruscant collectible locations in Star Wars: Jedi Survivor as well as how to get everything. We also have guides on all Mountain Ascent collectibles locations on Koboh, all Arid Flats collectibles locations on Jedha, and all 18 Bounty Puck locations to name a few.









Published: Jul 6, 2023 9:32 PM UTC